
Using an Airbyte Server (advanced)
This page is for users who have decided that the Airbyte server is the right deployment option for their production instance.
Setting up an Airbyte Server
With a full Airbyte server you will get an infrastructure that manages the scheduled runs of these connections as well as an Airbyte UI to manage your Airbyte connections.
- We recommend you spin up an EC2 instance of the Airbyte app and a corresponding RDS. Follow along with the linked Airbyte docs to set up your server using abctl and a values.yaml file.
- If you anticipate scaling issues hosting your Airbyte server on EC2 and expertise in managing Kubernetes, you can instead deploy Airbyte on Kubernetes.
Securely Storing Secrets
By default, Airbyte Server stores secrets, such as API keys and other types of credentials, as unencrypted strings in the Airbyte database. Airbyte offers alternate options for storing secrets in a more secure manner. We recommend using Hashicorp Vault to securely store secrets. To configure your Airbyte Server to use Vault, perform the following steps:
-
Create a new Key/Value Secrets Engine in your Vault instance. Both Engine versions 1 and 2 should work.
-
If you're running Airbyte on EC2, add the following environment variables to the bootloader, server, and worker Docker services:
SECRET_PERSISTENCE=VAULT VAULT_ADDRESS=<VAULT URL> VAULT_PREFIX=<Secrets Engine Name>/ VAULT_AUTH_TOKEN="<VAULT TOKEN>" -
If you're running Airbyte on Kubernetes, add the following entries to your Helm values.yaml file or a custom Helm values file specified with
-f, --valuesoptions during deployment.airbyte-bootloader: extraEnv: - name: SECRET_PERSISTENCE value: VAULT - name: VAULT_ADDRESS value: <VAULT URL> - name: VAULT_PREFIX value: <Secrets Engine Name>/ - name: VAULT_AUTH_TOKEN value: "<VAULT TOKEN>" server: extraEnv: - name: SECRET_PERSISTENCE value: VAULT - name: VAULT_ADDRESS value: <VAULT URL> - name: VAULT_PREFIX value: <Secrets Engine Name>/ - name: VAULT_AUTH_TOKEN value: "<VAULT TOKEN>" worker: extraEnv: - name: SECRET_PERSISTENCE value: VAULT - name: VAULT_ADDRESS value: <VAULT URL> - name: VAULT_PREFIX value: <Secrets Engine Name>/ - name: VAULT_AUTH_TOKEN value: "<VAULT TOKEN>"
You can also store secrets using GCP Secret Manager or AWS Secret Manager if you're already integrated into one of those cloud platforms. See the Airbyte documentation for environment variables required for each option.
Setting up Airbyte with an External Postgres DB on AWS EC2 Instance
A working airbyte set-up with a Postgres RDS DB in AWS requires you to run abctl with a specific values file, which could look like the following:
# Global params that are overwritten with umbrella chart

global:
  database:
    type: "external" # "internal"
    # # -- Secret name where database credentials are stored
    # secretName: "" # e.g. "airbyte-config-secrets"
    # -- The database host

    host: "<db-host>"
    # -- The database port
    port: "<port, e.g. 5432>"
    # -- The database name
    database: "postgres"
    # -- The database user
    user: "postgres"
    # -- The database password
    password: "Password"

  storage:
    # -- The storage backend type. Supports s3, gcs, azure, minio (default)
    type: S3 # default storage used
    # -- Secret name where storage provider credentials are stored
    #storageSecretName: "airbyte-config-secrets"
    # S3
    bucket: ## S3 bucket names that you've created. We recommend storing the following all in one bucket.
     log: <bucket name>
     state: <bucket-name>
     workloadOutput: <bucket-name>
    s3:
     region: "us-east-2" ## e.g. us-east-1
     authenticationType: instanceProfile ## Use "credentials" or "instanceProfile"

postgresql:
  enabled: false
minio:
  enabled: false
temporal:
  extraEnv:
    - name: POSTGRES_TLS_ENABLED
      value: "false"
    - name: SQL_TLS_ENABLED
      value: "false"
To run abctl with the values file use a command like the following
abctl local install --values=path/to/values.yaml [--chart-version=<e.g. 1.0.0>]You will also likely need to set the EC2 metadata value HttpPutResponseHopLimit to 3 in order to allow fetching credentials properly. You can use a command like the following:
aws ec2 modify-instance-metadata-options --instance-id <instance_id> --http-put-response-hop-limit 3 Using your Airbyte Server
Instead of running your Airbyte connections through the command line you’ll need to recreate them in your new Airbyte server. Fortunately, all the parameters will stay the same.
Create a Faros Destination
This only needs to be done once and will be used by all sources.
- Add a new destination definition
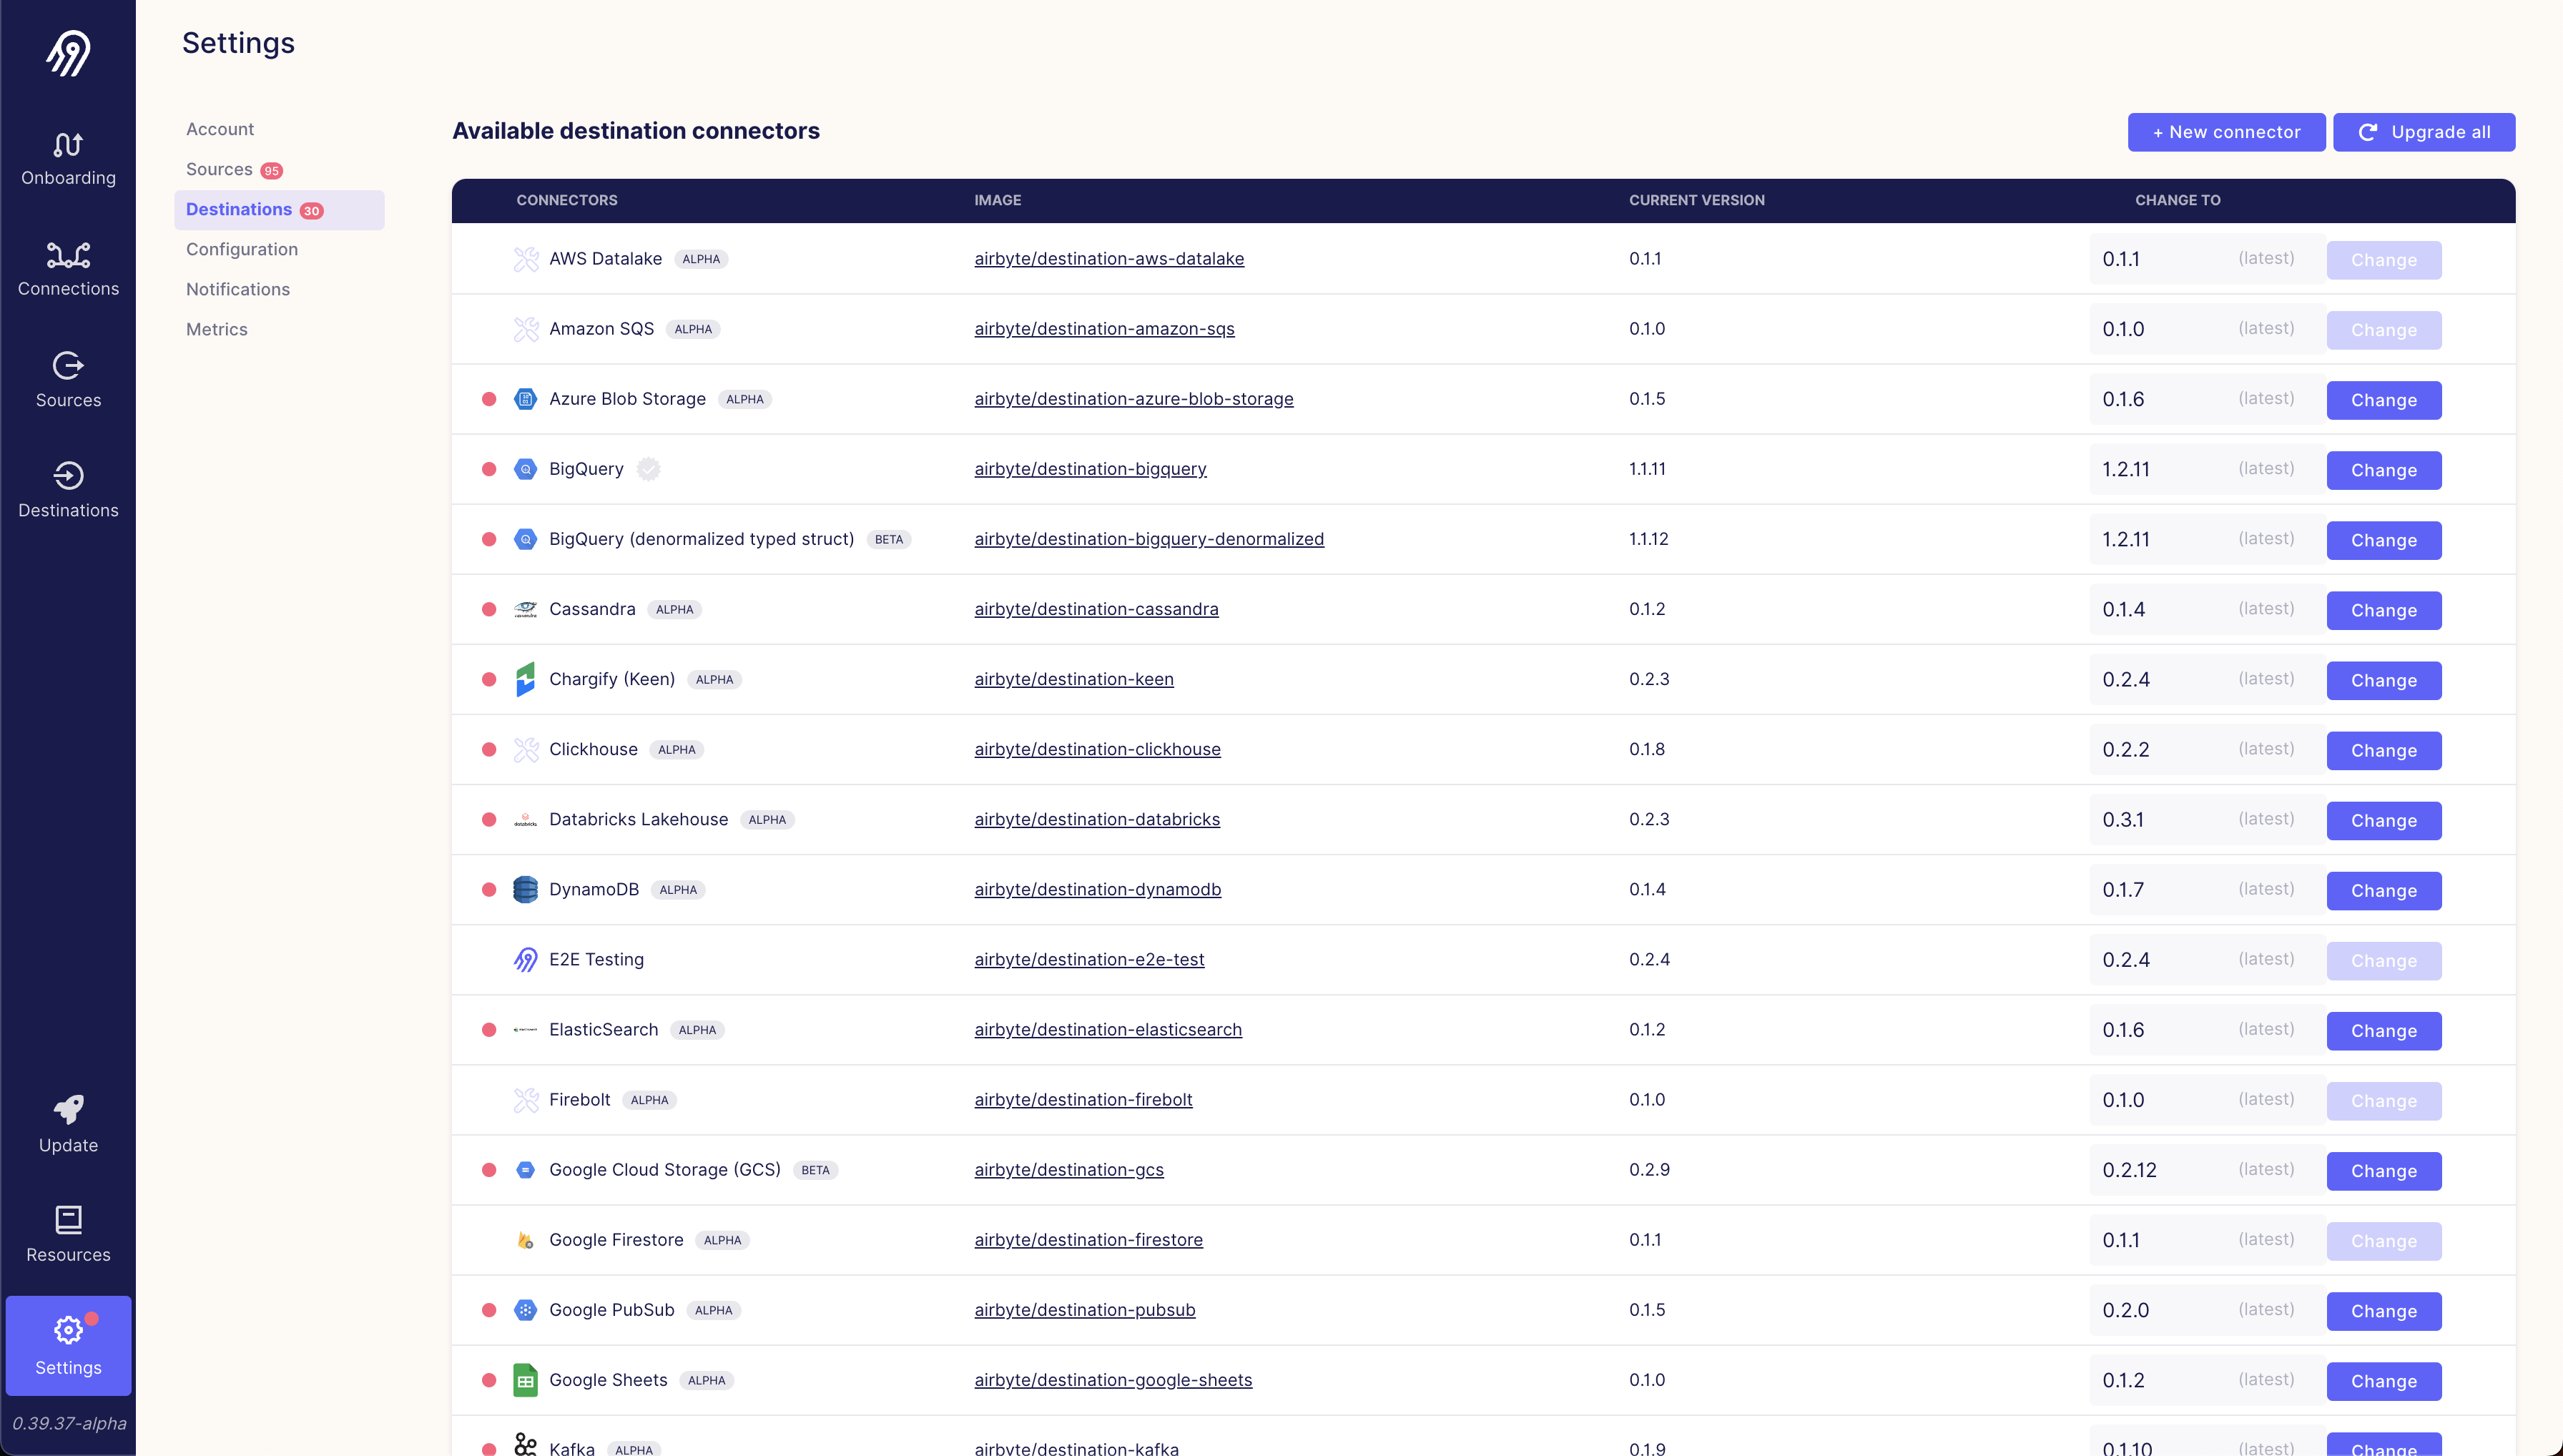
- Add a Faros destination definition

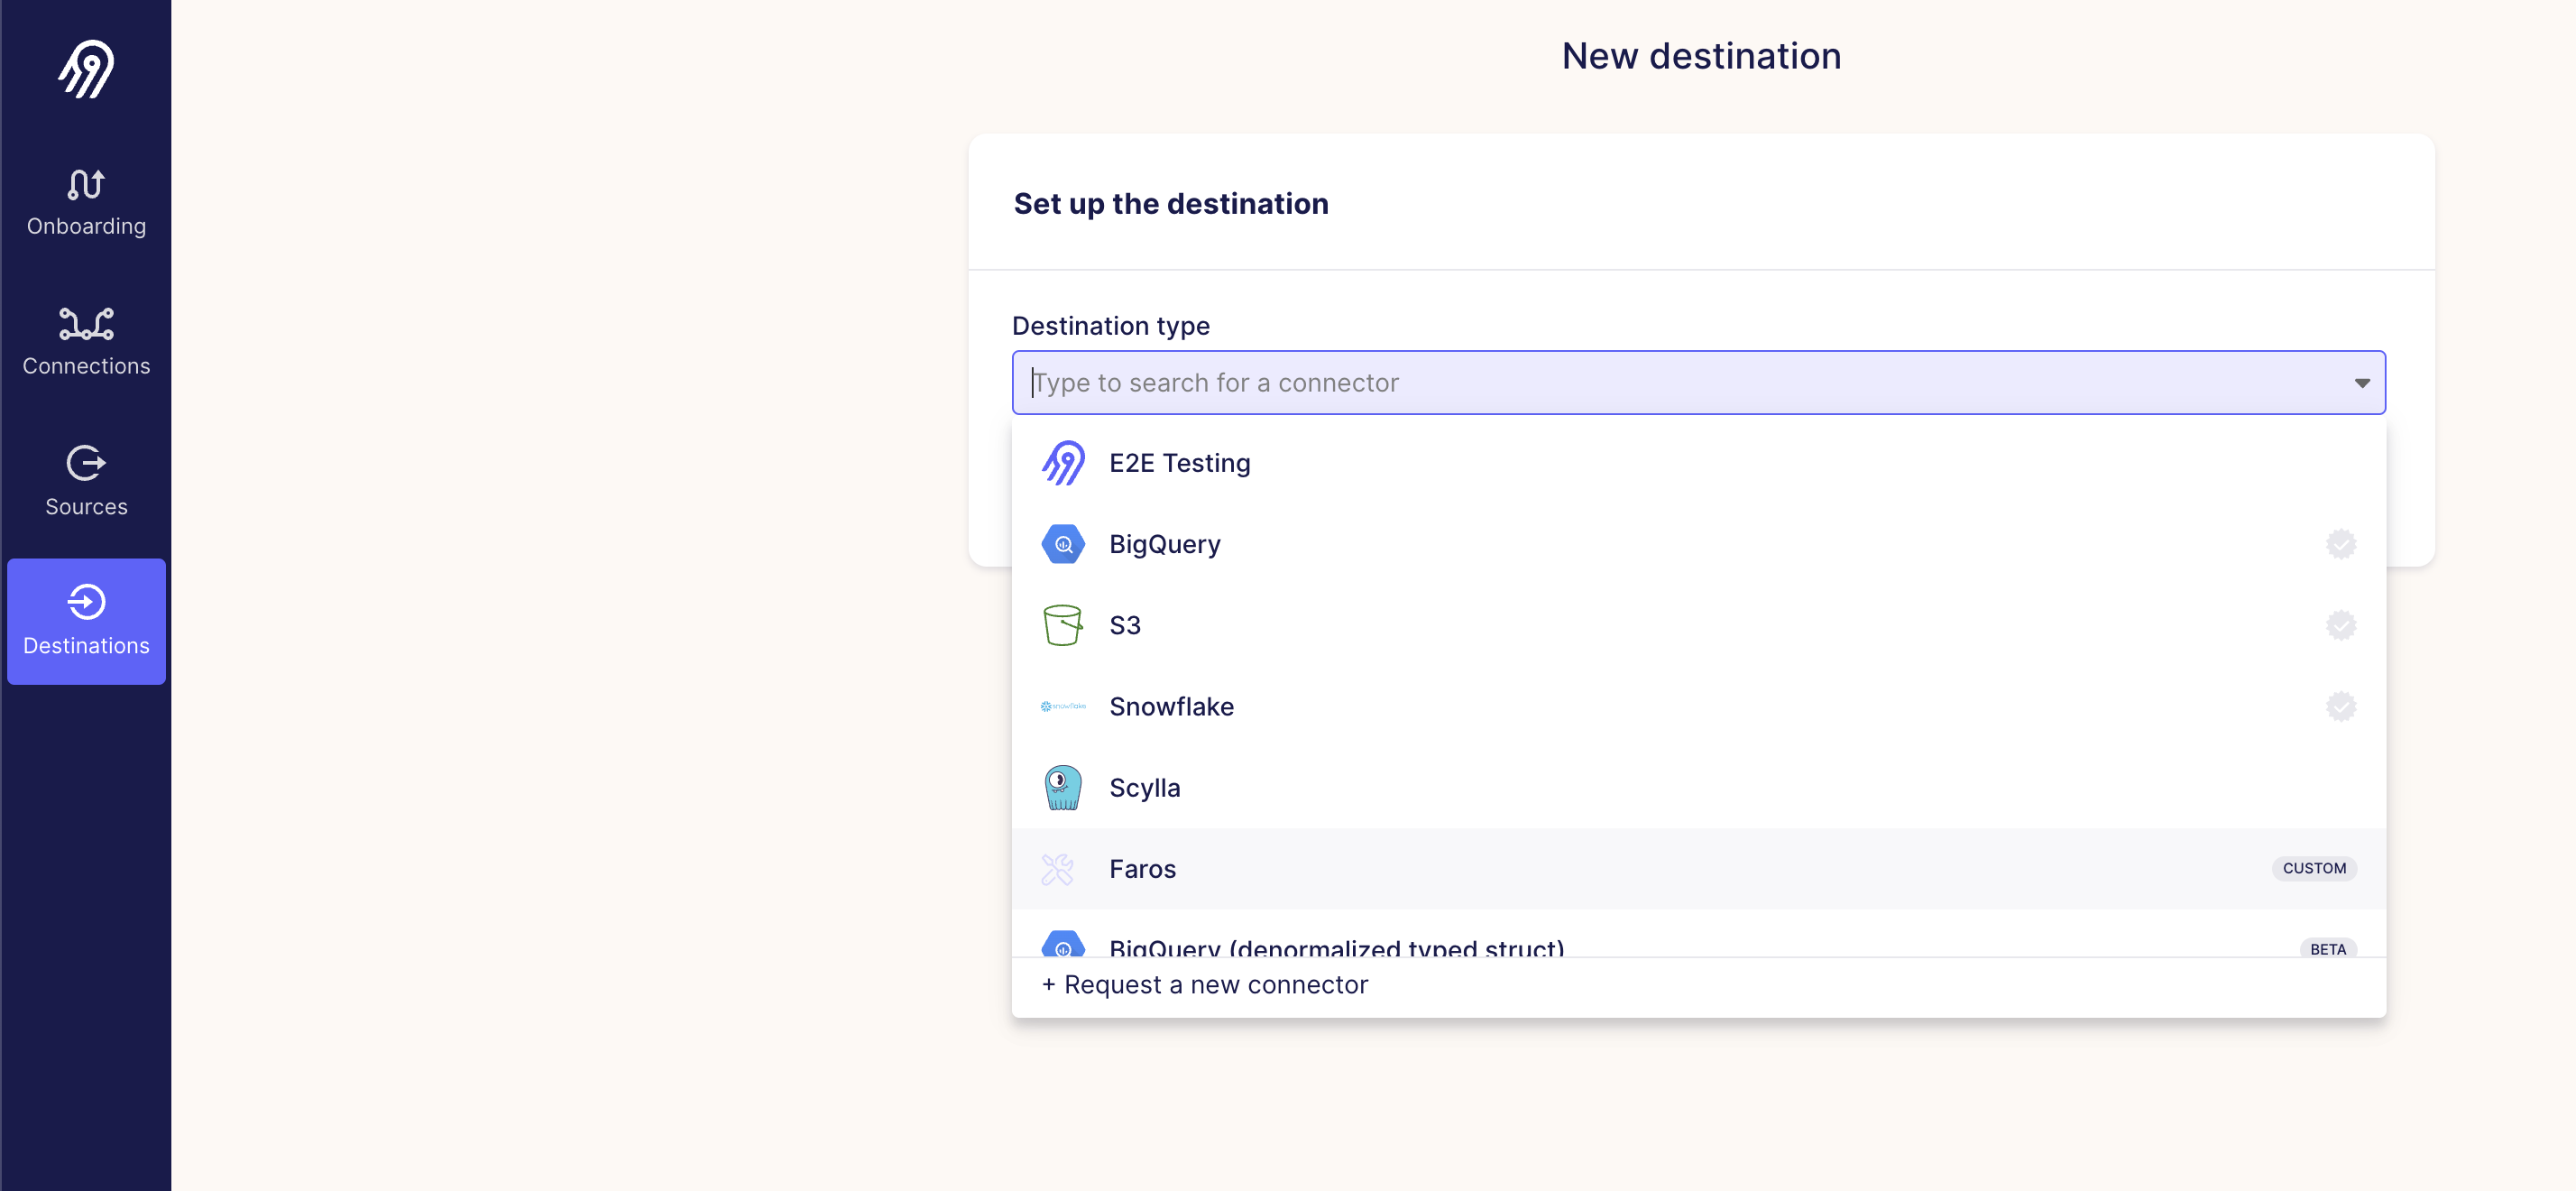
- Choose Faros Destination
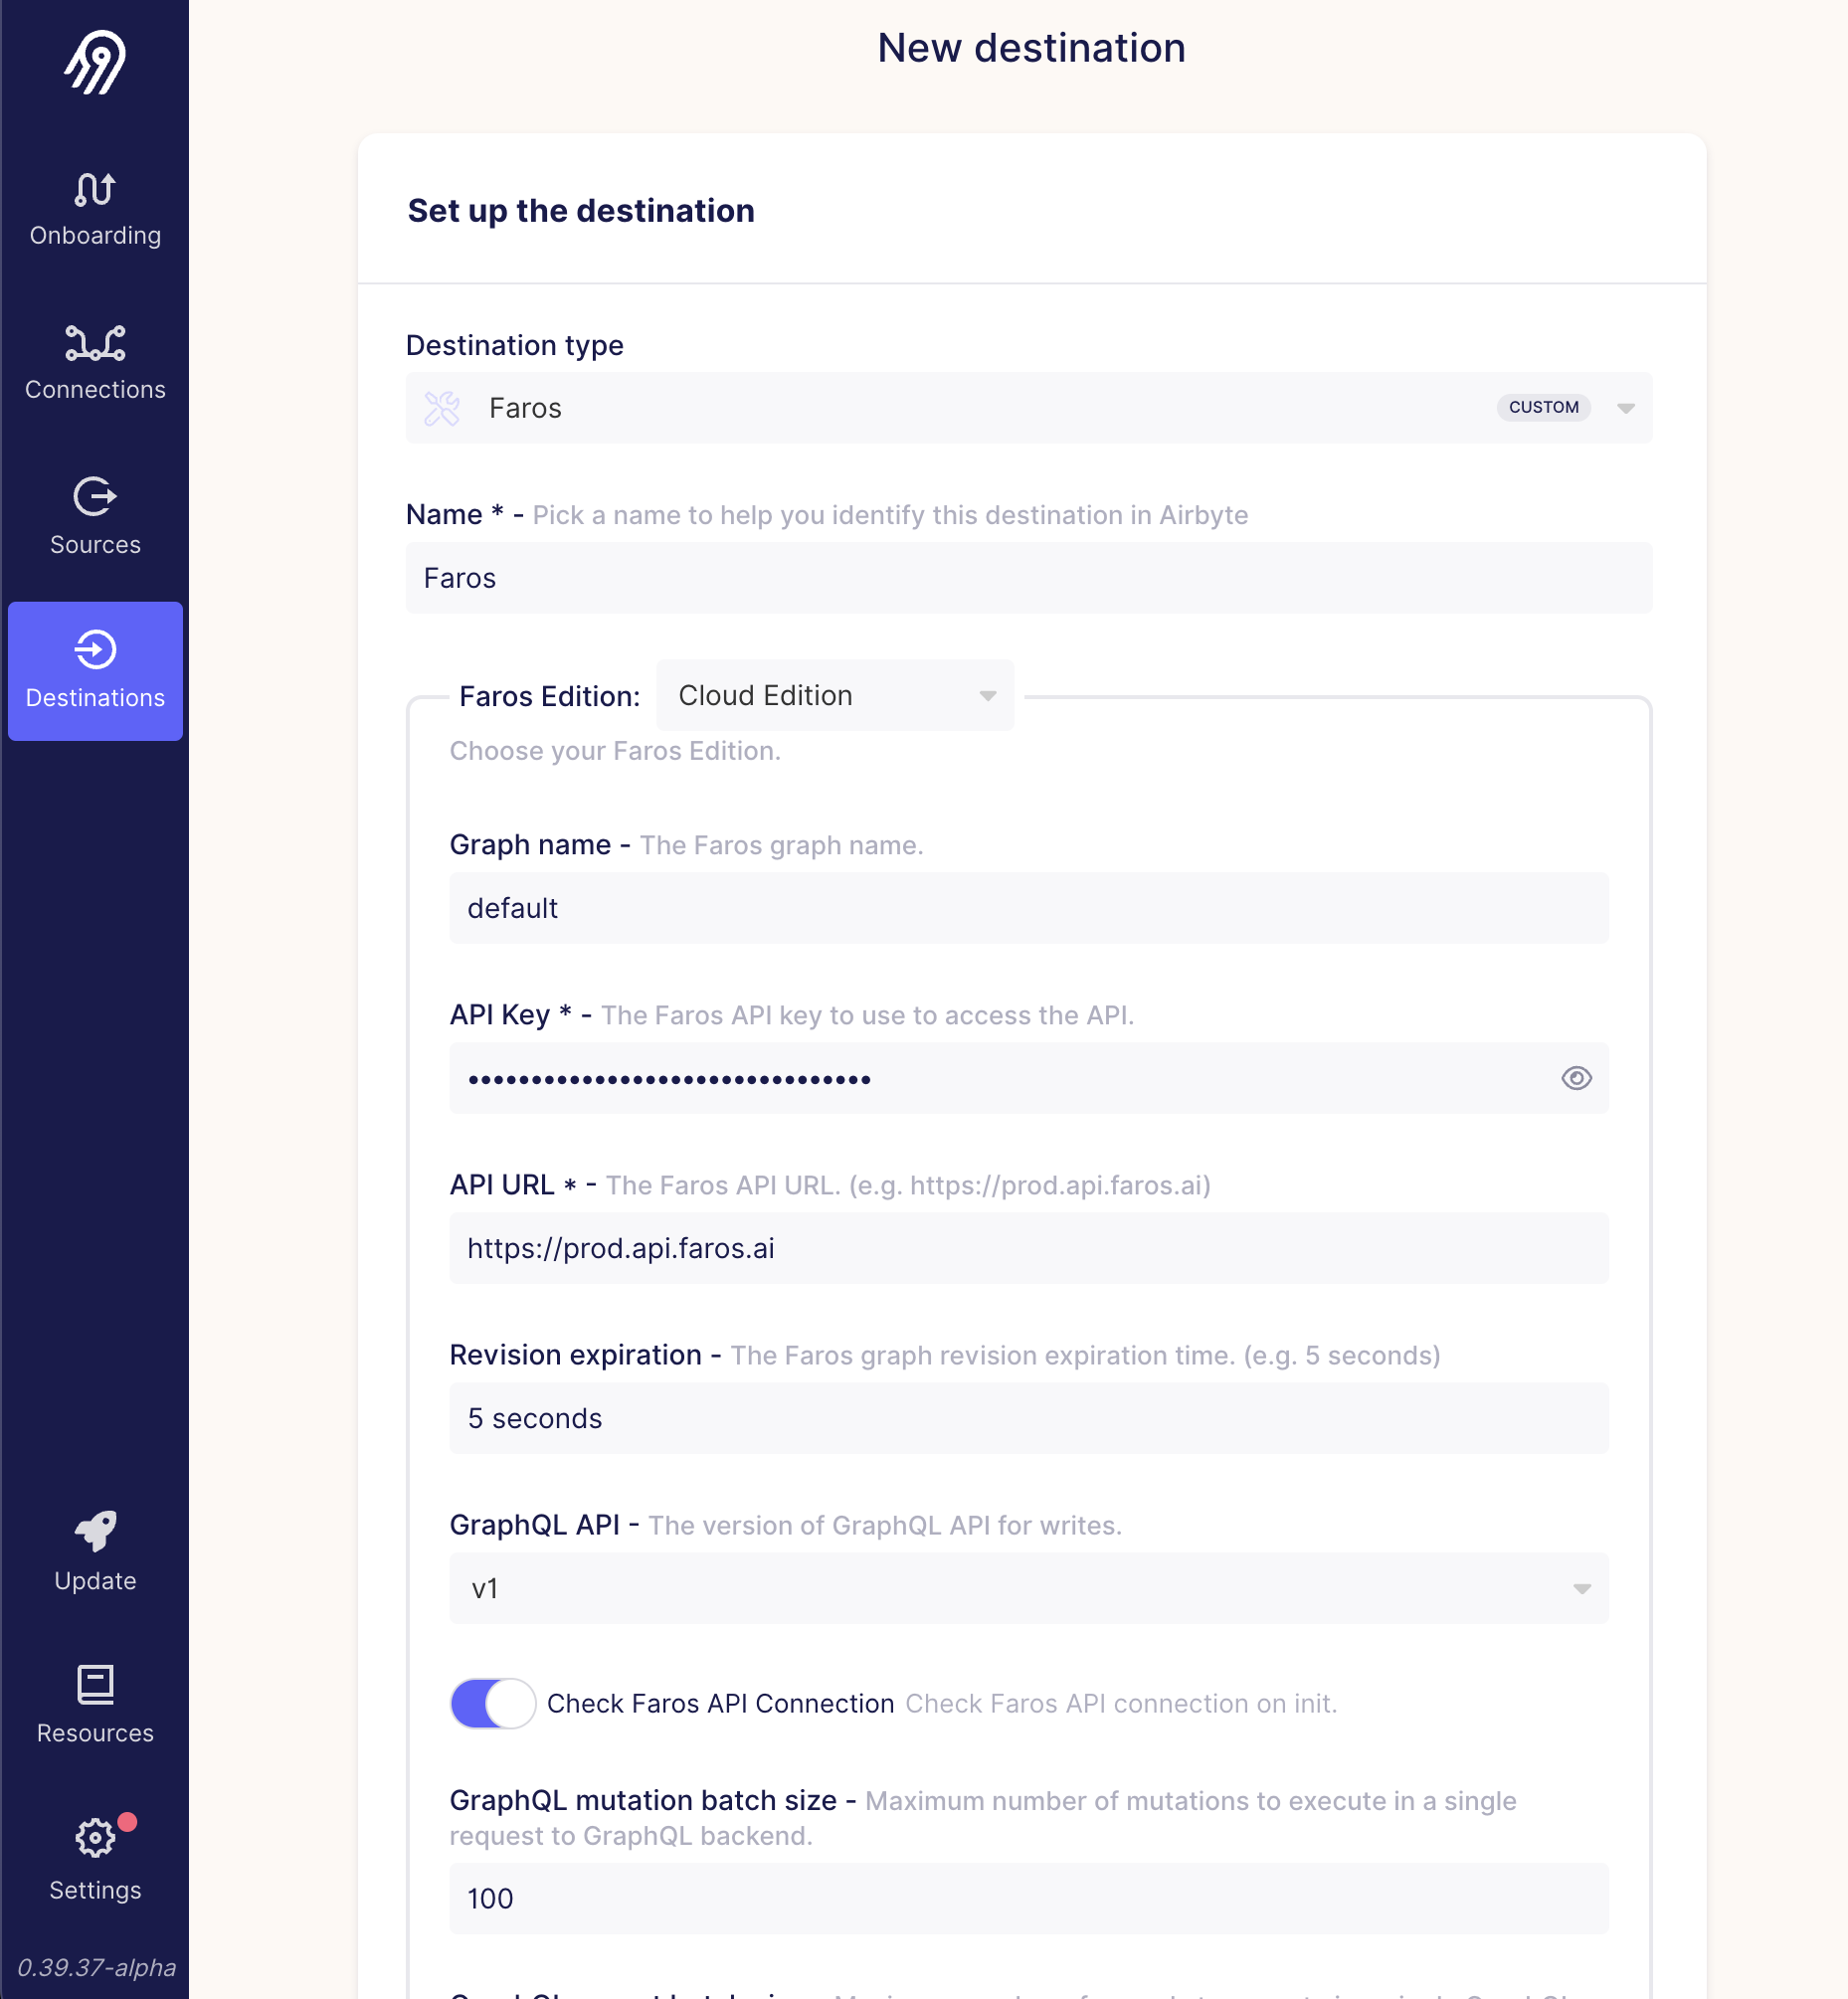
- Configure the Faros destination (Note: select "v2" for GraphQL API version)
Add your sources to the UI
The example below reproduces the GitHub CLI command in the Airbyte server UI.
-
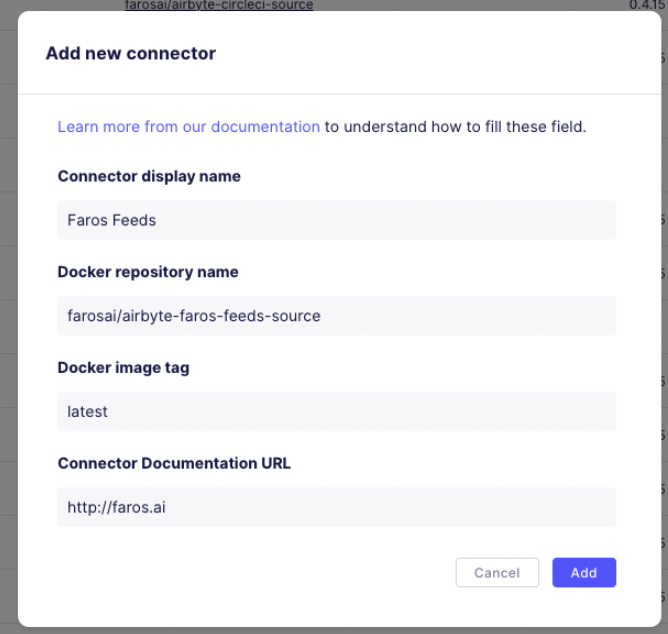
Add the connector to your sources
Settings>Sources>New connector-
Connector display name: Faros Feeds
Docker repository name: farosai/airbyte-faros-feeds-source
Docker image tag: latest
      Note: this pulls the latest version at the time you create the connector. It does not update to the latest version each time the source runs.
Connector Documentation URL: <https://docs.faros.ai>
-
-
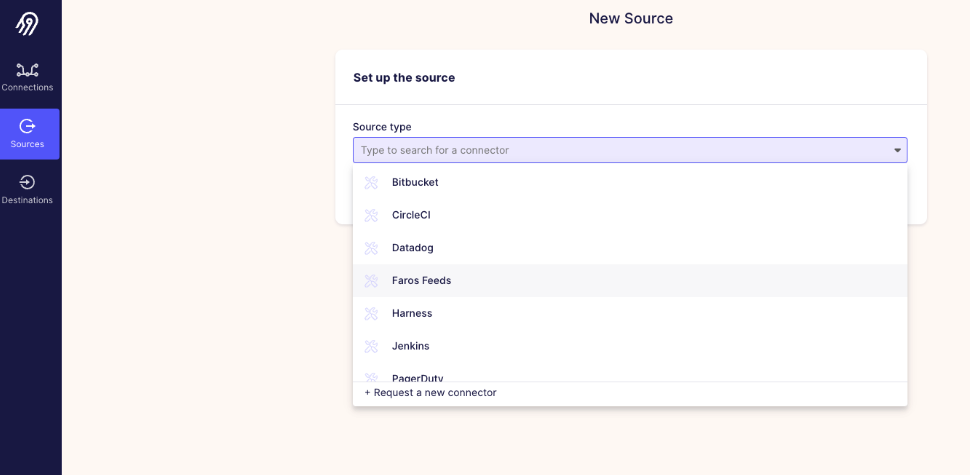
Create a new source to pull from GitHub Enterprise using the connector you created above
Sources>New source-
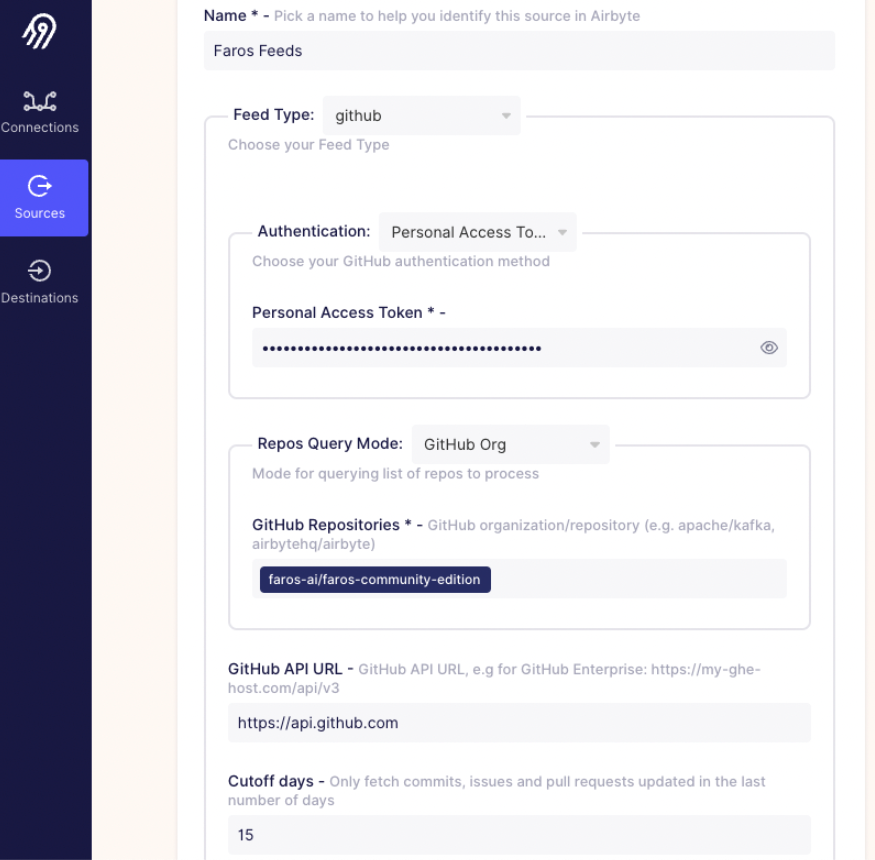
Source type: Faros Feeds (or whatever you called it in step 1a)
Choose 'github' from the Feed type dropdown. This will show the GitHub specific configuration fields.
Authentication: Choose your authentication method and complete accordingly.
Repos Query Mode: Select GitHub Org and enter a list of repositories to pull.
GitHub API URL: Enter the GitHub Enterprise API URL (defaults to GitHub API URL)
Cutoff days: fetch entities updated in the last number of days (defaults to 90 days)
Feed command line arguments: Leave blank. This is how we can pass extra feed arguments which aren’t present in the UI.
Enable debug logs if desired.
-
-
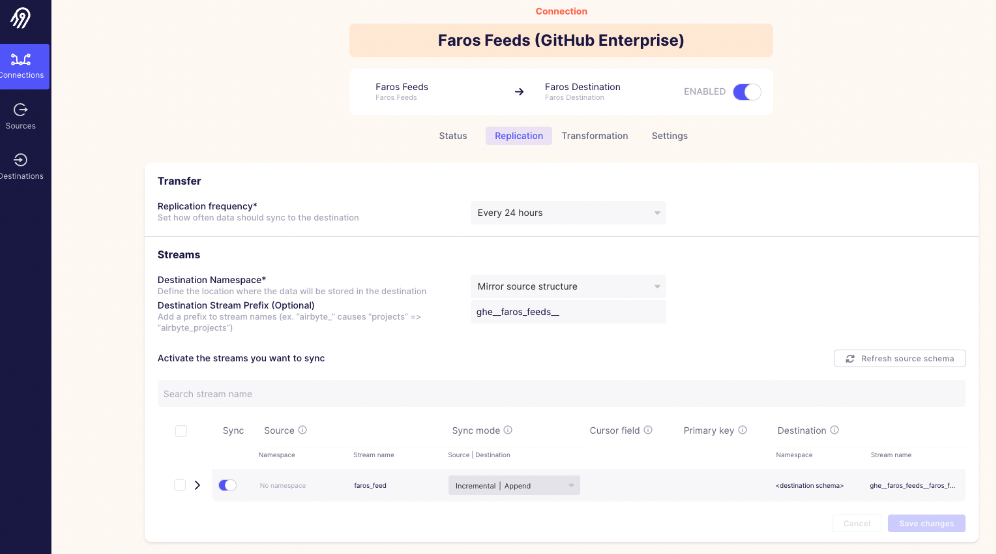
Create a connection between the source and the Faros destination
- Destination Stream Prefix: Enter a prefix matching
<origin>__faros_feeds__(e.g.,ghe__faros_feeds__). The first part will be used as the origin for your records. The second part (faros_feeds) is used by the destination connector to convert records emitted by the source into the Faros models. - There's a single stream:
faros_feed. Activate it and select the sync mode.
- Destination Stream Prefix: Enter a prefix matching
Updated 5 months ago