Connecting to Jira Cloud
Creating a Jira Cloud Source in Faros AI
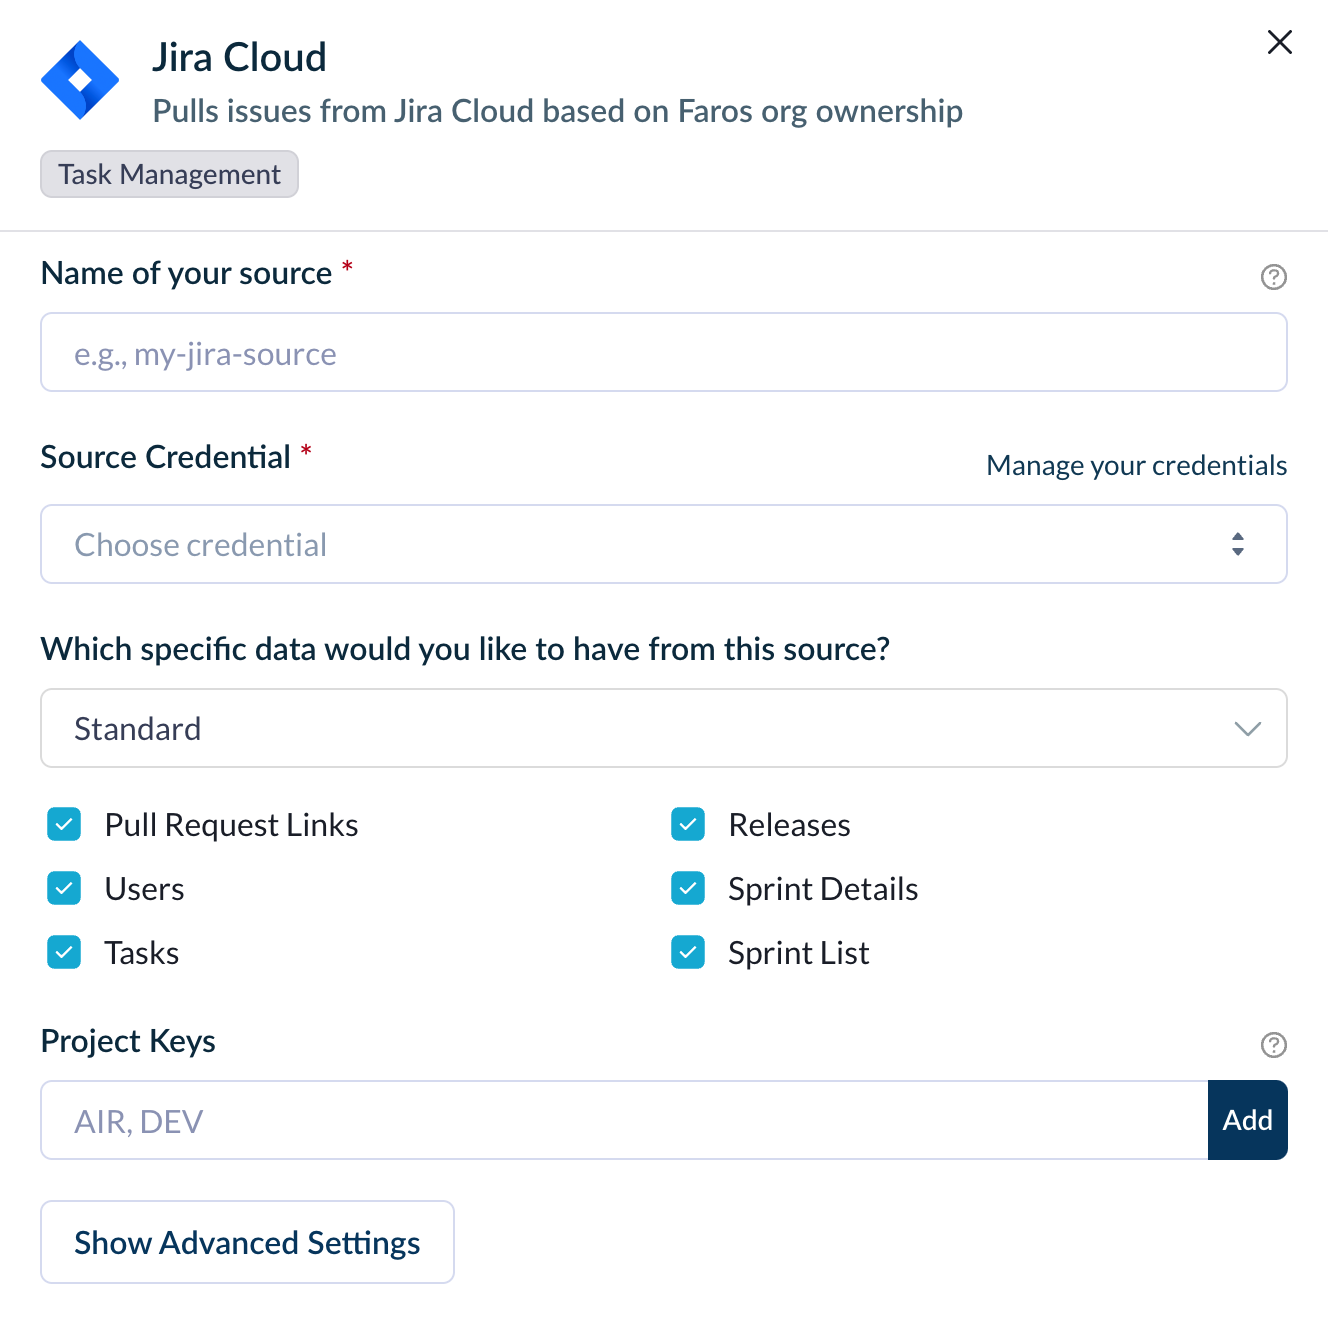
Creating a Jira Cloud Source
To connect to Jira Cloud in Faros AI,
-
Create a new source by navigating to Admin Settings > Data Control > Sources
-
Click +New
-
Select Jira Cloud
-
Enter a unique name for your source
-
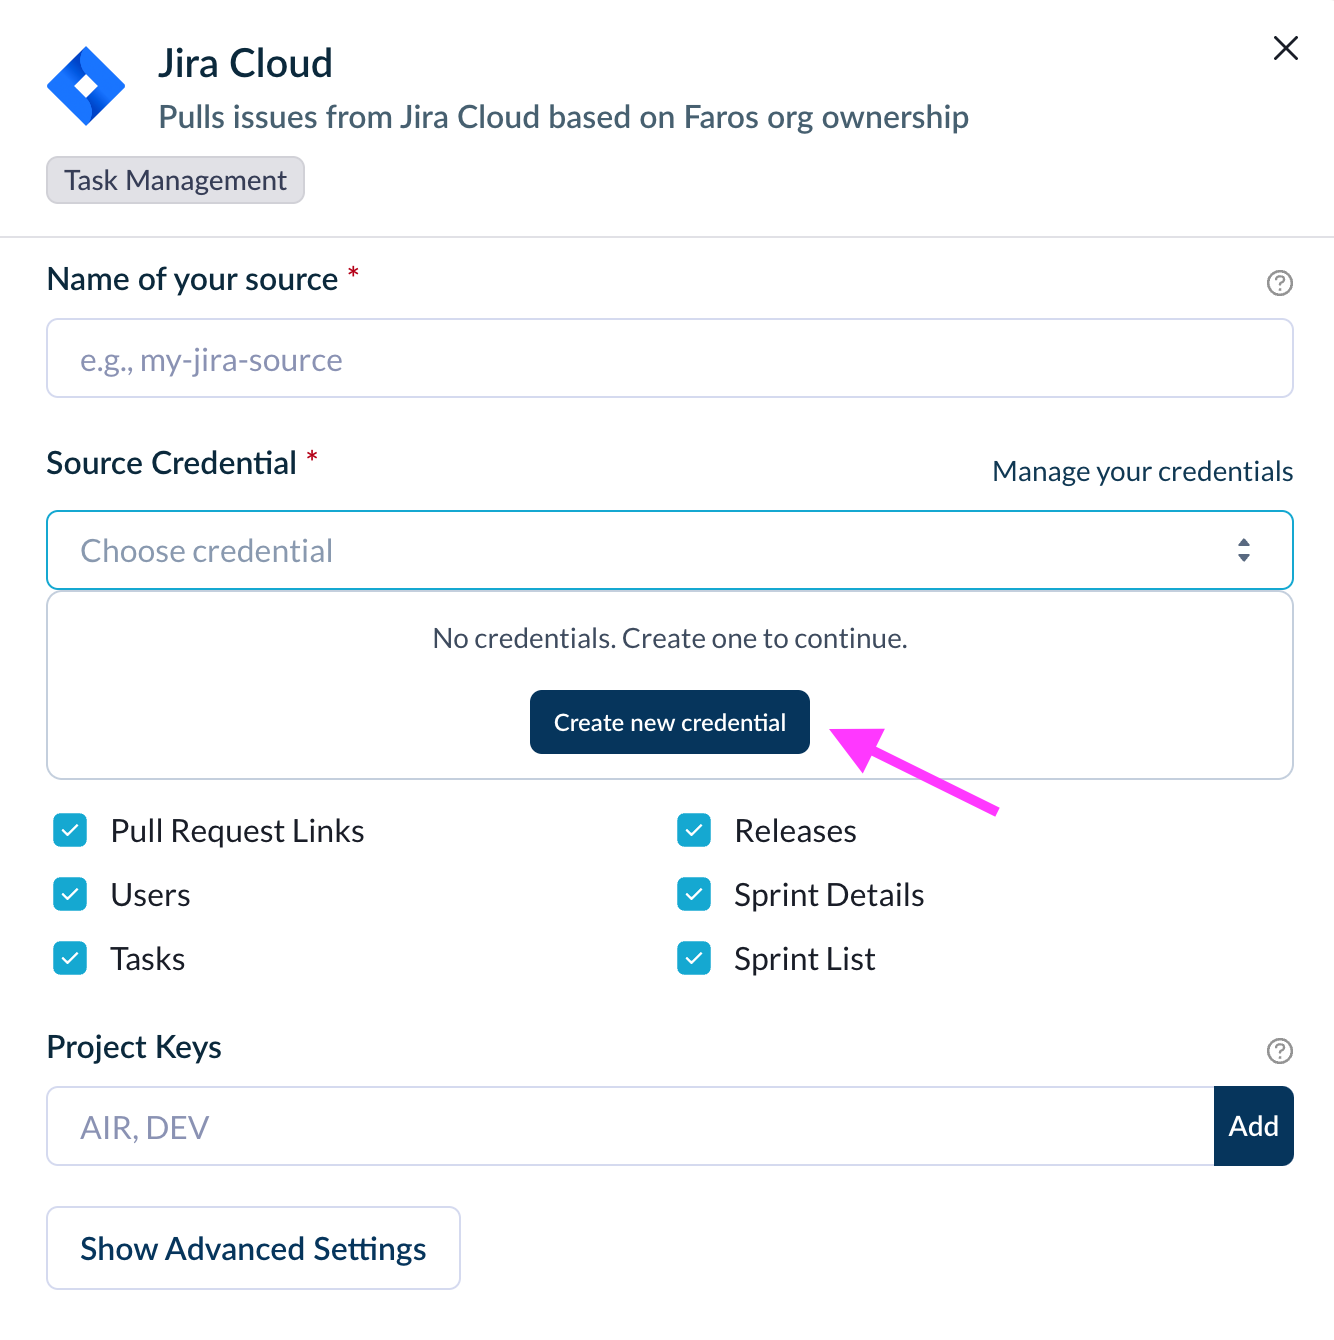
Select or create your Jira credentials. To create a new credential, click Create new credential in the Source Credential section. Follow the instructions below or see additional details here.
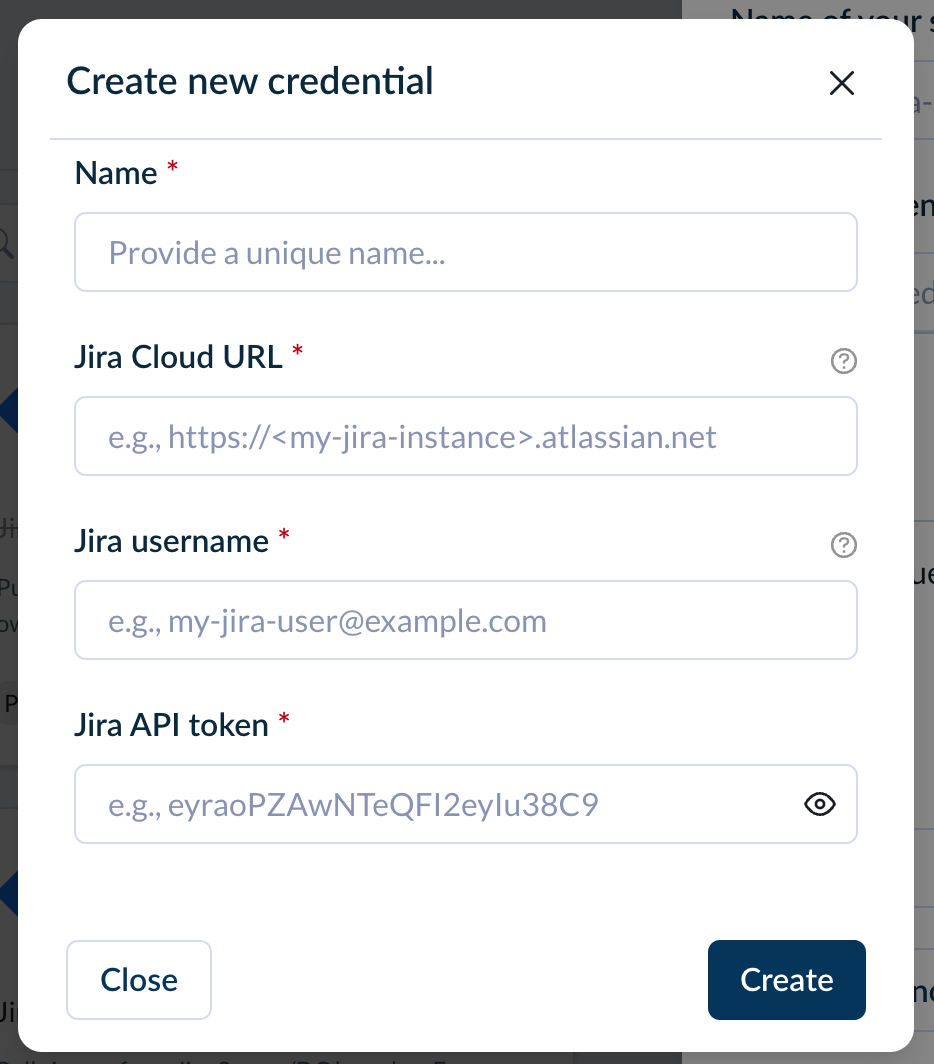
You will populate the following fields:
Field Name
Details
Required User Permissions
Example
Name
A unique name for the credential
N/A
JiraCloud
Jira Cloud URL
The URL you use to access your Jira Cloud instance
N/A
https://<my-jira-instance>.atlassian.net
Jira Username
The Atlassion account email account for the Jira user that will be used to connect Faros AI to Jira Cloud.
The Jira integration user must have the following permissions:
- Application access to Jira
- 'Browse Users' global permission
- 'Browse Project' and 'View Development Tools' permissions for each project
Jira API token
The API token will allow Faros AI to connect to Jira Cloud
N/A
see instructions on how to create an API token here
-
If you created new credentials, you can verify your to Jira Cloud credentials using the following cURL commands
- Verify users permissions ('Browse Users' global permission)
curl -D- \ -u [email protected]:user_api_token \ -X GET \ -H "Content-Type: application/json" \ https://<my-jira-instance>.atlassian.net/rest/api/2/users/search - Verify project permissions ('Browse Project' permission)
If you would like to verify for specific projects you can add the query param keys to the URL, e.g. keys=PROJ1&keys=PROJ2. If the permissions are configured correctly you should get a list of users/projects with each command. If no results are returned you may not have the correct permissions for the projects# Test cURL to verify projects permissions ('Browse Project' permission) curl -D- \ -u [email protected]:user_api_token \ -X GET \ -H "Content-Type: application/json" \ https://<my-jira-instance>.atlassian.net/rest/api/2/project/search?action=browse
- Verify users permissions ('Browse Users' global permission)
-
Which specific data would you like to have from this source?
- We recommend selecting Standard to ensure all dashboards will populate. However, for large implementations of Jira, sometimes tradeoffs must be made to reduce the impact of a large data pull on Jira. If you have questions, please contact Faros AI support.
-
Project Keys
- Enter the Jira project keys for the data you’d like imported into Faros AI. Note that these are case sensitive.
- Important: Enter each project key individually and then click ‘add’ before entering a new one. Do not enter a comma-delimited list.
- If you do not enter anything here, all projects will be included.
- If you do enter project keys here, this list will take precedence over the ‘excluded project keys’ list in advanced settings.
Configuring Jira Boards
Under Advanced Settings, there are two available methods to control which Jira boards are included in your Faros Data:
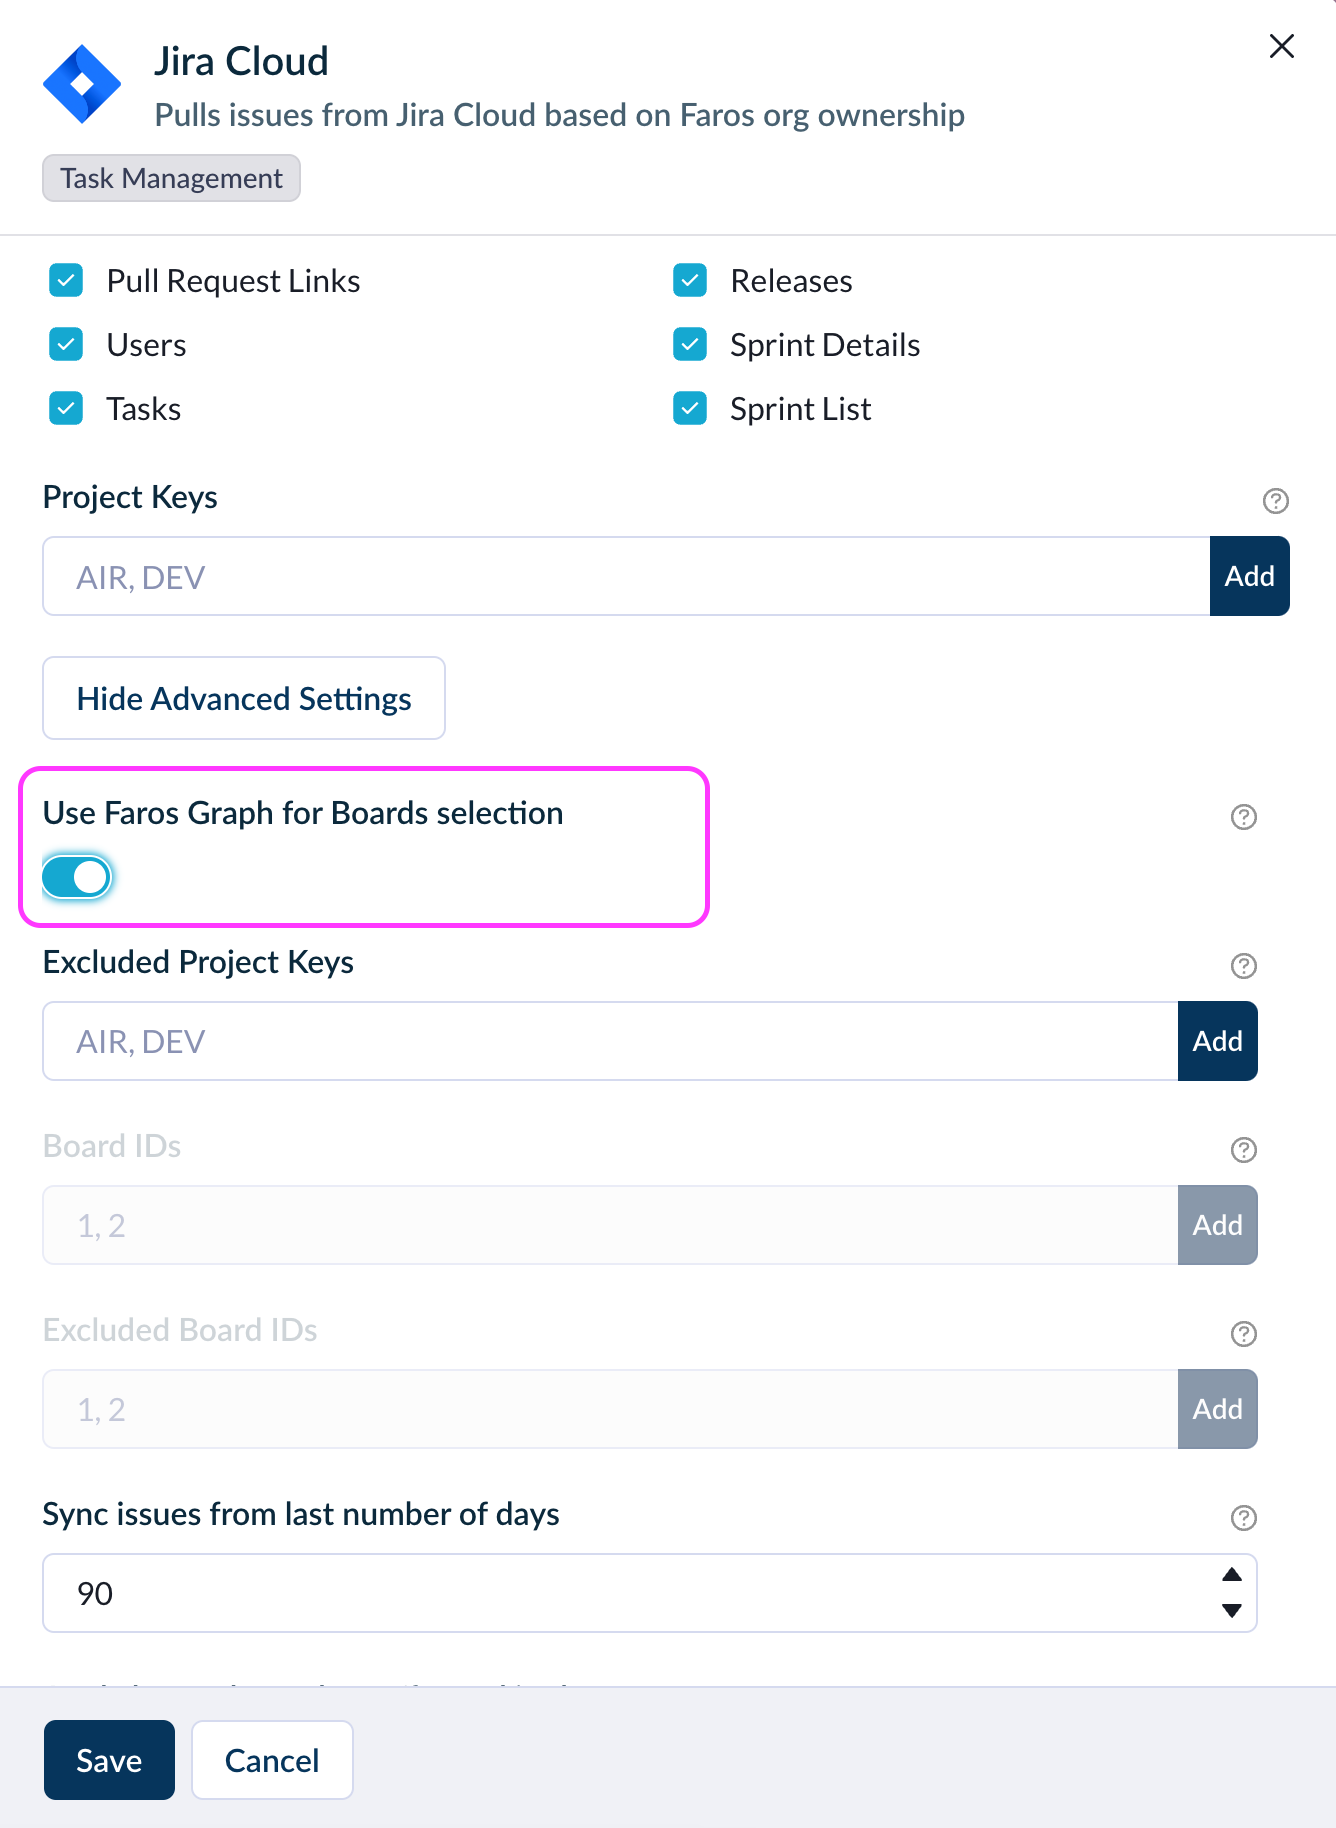
Use Faros Graph for Boards Selection
Which method should you use?
Use Faros Graph for Boards Selection: On
The Faros Graph provides a clean UI for searching and filtering boards, so you can manually find and select the boards you care about. This board data is also available in the Faros API, so you can set a transform or process to modify what gets pulled based on other data stored in Faros.
Use Faros Graph for Boards Selection: Off
If you already know exactly boards to include or exclude, you can define those directly in the source, and the data will be ingested into both databases with no additional work on your part.
Using Faros Graph for Boards Selection
To use Faros Graph for Boards Selection, follow the instructions below:
- Under Advanced Settings for your Jira Cloud source, toggle Use Faros Graph for Boards selection to On.
- Navigate to Admin Settings > Organization Setup > Boards
- On initial pull, all boards within the included projects will default to being included. If you’d like to exclude a board, mark it as ‘Excluded’ and then click the checkmark icon.
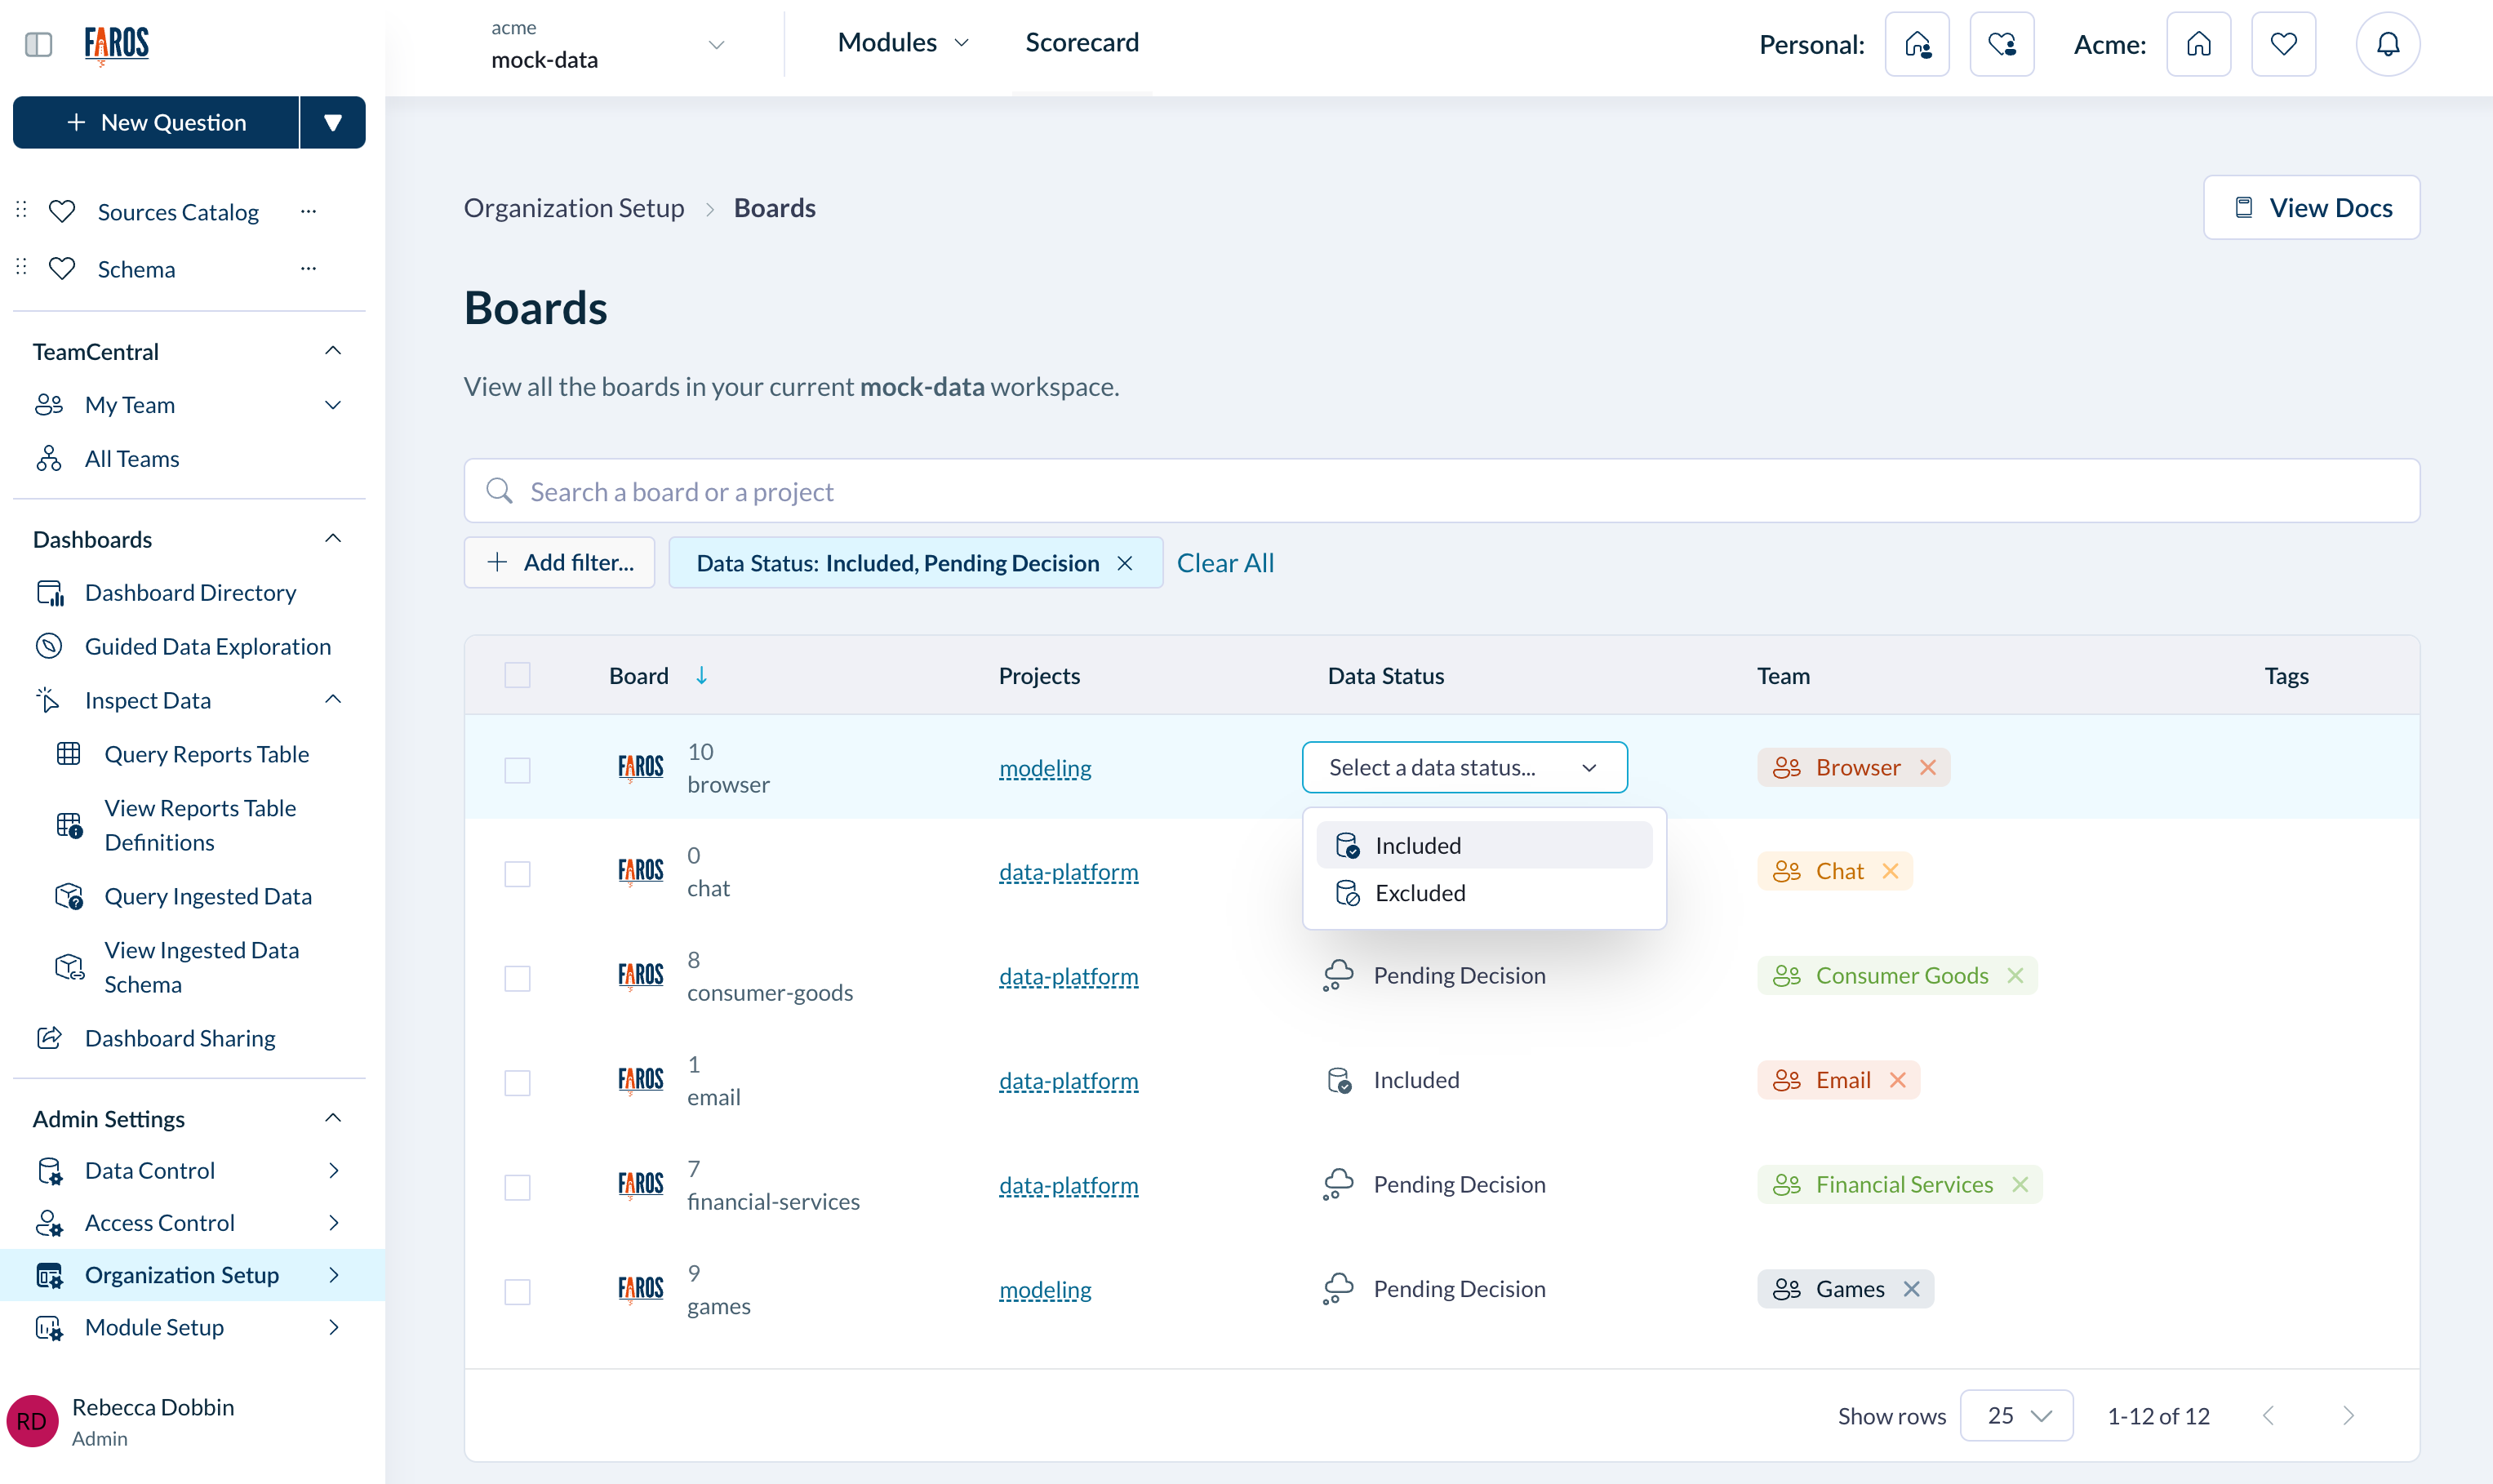
Include or Exclude Boards
Using Source Settings for Boards Selection
If you NOT are using Faros Graph for Boards selection, then the source settings determine what data gets pulled into the GraphQL database. The source uses the Board IDs to determine which boards' tasks will be ingested into Faros’ raw database..
By default, these tasks will also be available in the reports database. If you wish for these tasks to only be available in the raw database, then go to the Boards page and mark them as excluded. (see section above for details).
To use source settings for boards selection:
- Toggle Use Faros Graph for Boards selection to Off under Advanced Settings for your Jira Cloud source.
- Use the Board IDs and Excluded Board IDs fields under Advanced settings to configure which boards will be included in your Faros data.
- Important: Enter each board ID individually and then click ‘add’ before entering a new one. Do not enter a comma-delimited list.
- If Board IDs are listed that are not in the included project keys, they will not be imported into Faros AI
- If Board IDs are listed in the Board IDs field that contradict what is listed in the Excluded Board IDs field, the Board IDs field will take precedence.
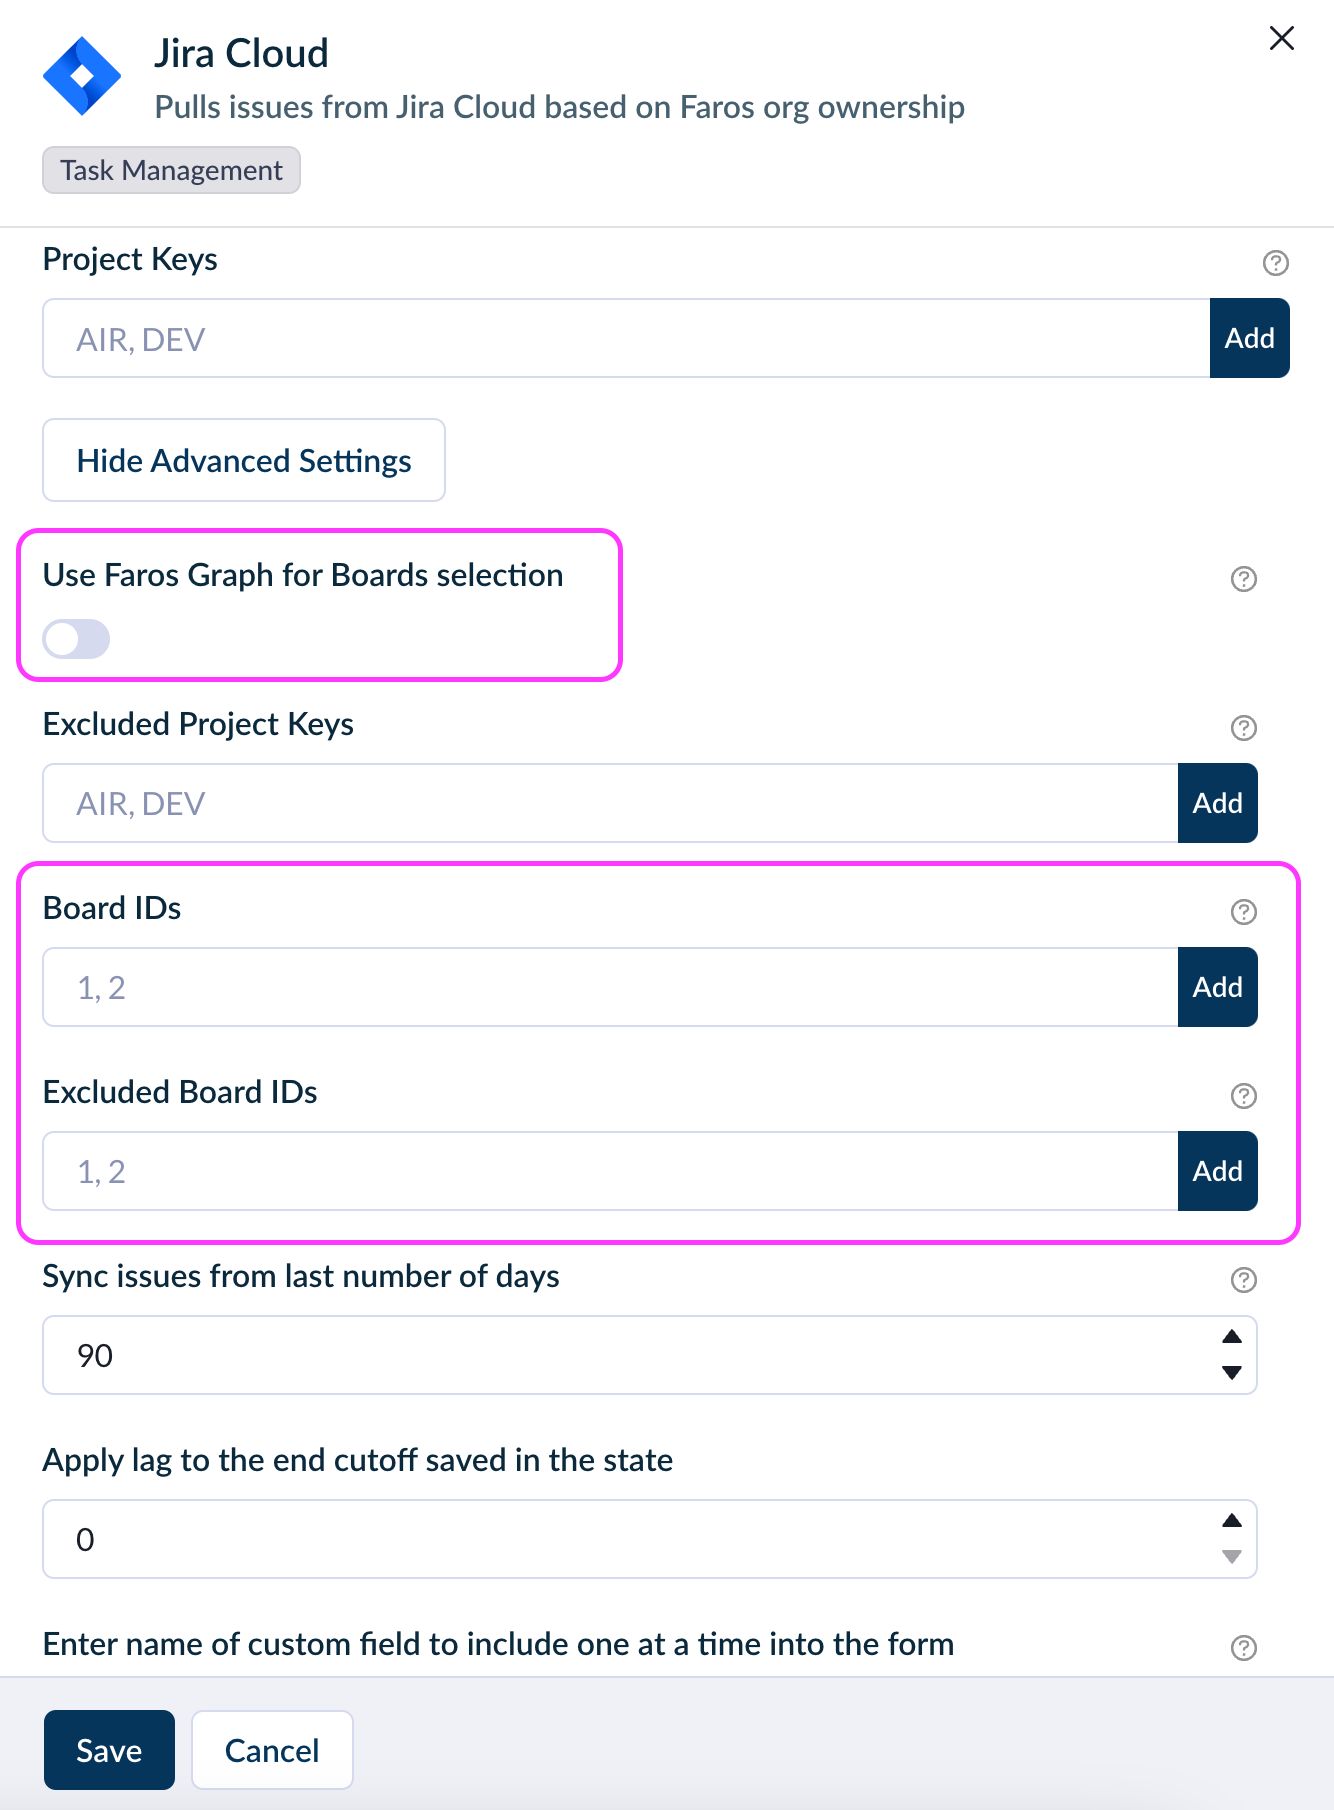
Configure Boards Selection on the Jira Source
Custom Fields
If the Enter name of custom field to include one at a time into the form field (under Advanced Settings) is left blank, no custom fields will be imported. You can find additional details on Jira custom fields here and here.
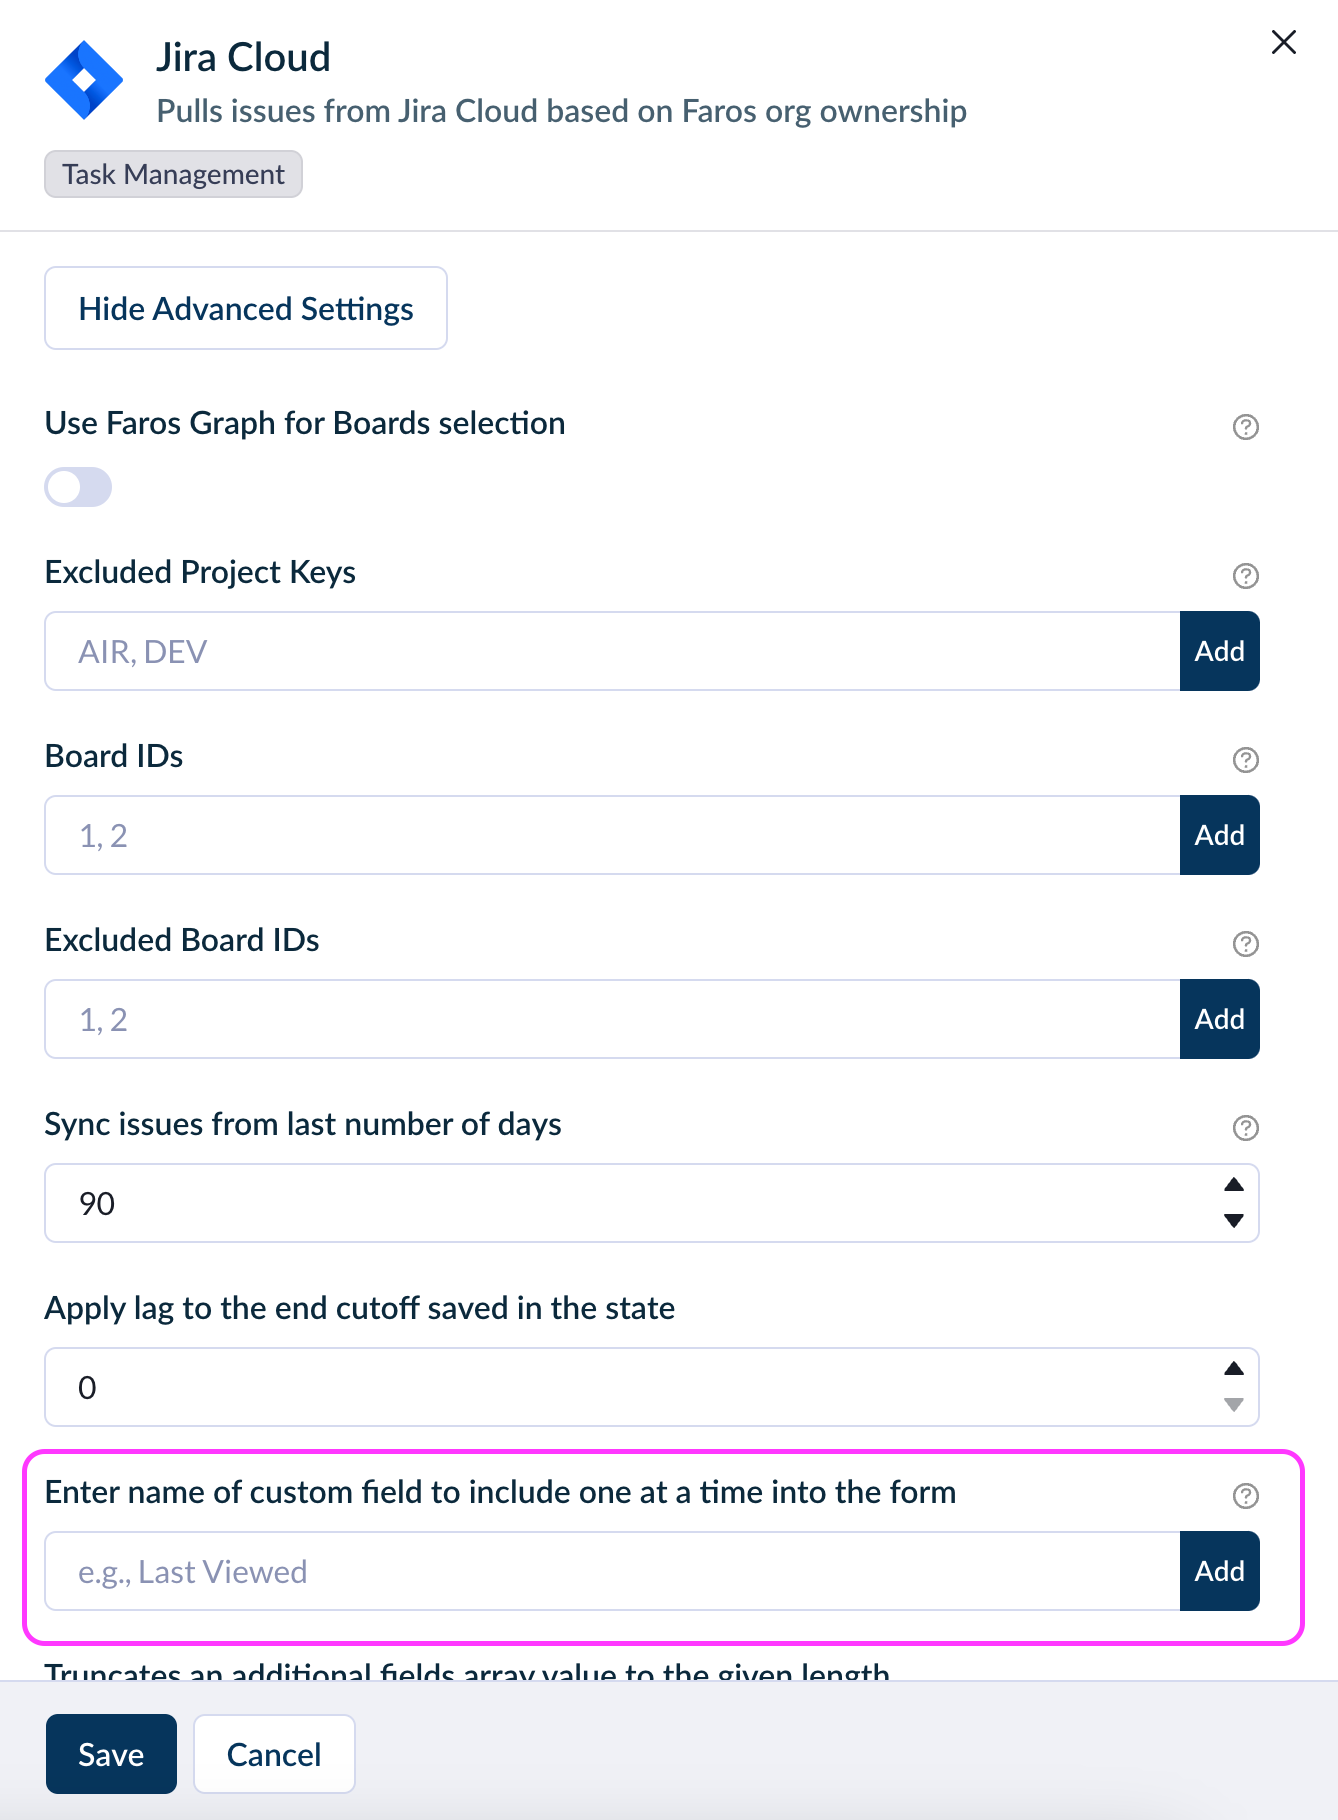
Jira Custom Fields
Using Jira in Hybrid or On-Prem Mode
Please see additional instructions here if you are connecting to Jira with Faros AI in Hybrid or On-Prem mode.
Updated about 2 months ago
