
Custom Fields in Jira
How to ingest and use Custom Task Fields from Jira within Faros
Background
In Jira, tasks have both standard fields that are available by default through Jira, and custom fields that you define and use within your company. This article refers to the custom fields that you would like to ingest into Faros and use.
Setting up Custom Jira Field Ingestion
Navigate to "Sources"

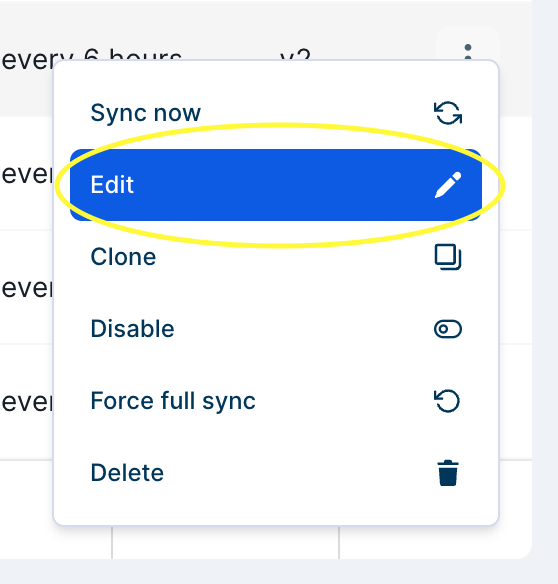
We're assuming your Jira Connector is already set up. In this case, the Jira Connector is at the bottom of the list, and is called "gv2-faros-jira". We will click on the three dots on the right

Click Edit to change the settings
Under Advanced Settings, toggle “Should include additional fields from issues”
Enter the names of the additional fields to pull in from Jira. They must match the name of the custom field exactly how it displays in the UI in Jira.
Once you've added your custom fields, they will appear in the list above the input field.
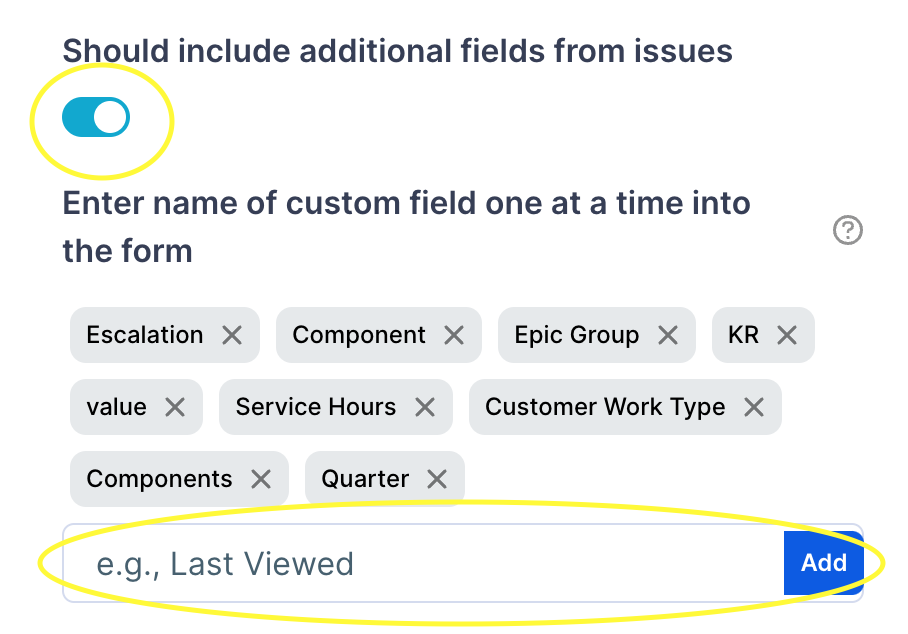
Please add custom fields one at time - click the Add button between entering each custom field.
Click Update Source at the bottom

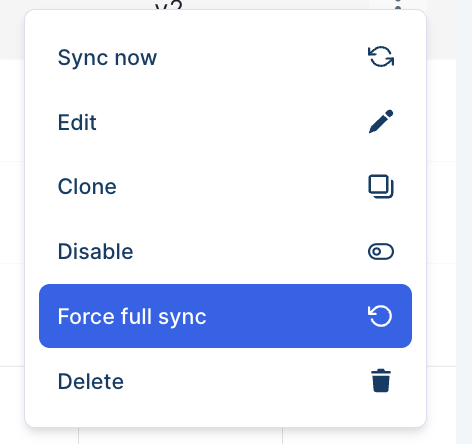
If you'd like to ingest these new fields retroactively, as opposed to from this point forward, click Force full sync.
Note this sync takes longer than the alternative (listed next).
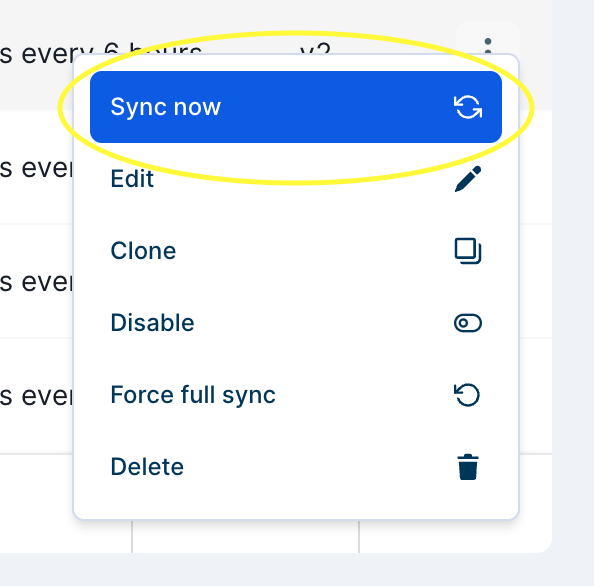
If you'd simply like to start ingesting these custom fields going forward, click Sync now
At this point, once the source has finished running, the newly added custom fields are saved to our underlying data store.
If you want to view the data in the Faros Reports Tables as soon as possible, you can refresh the reports tables (i.e. dashboard sync) by navigating to your "Graphs" page and click the Sync Now icon for the relevant graph:

Once this is done, your new Custom Field should start populating in the Faros Reports "Entity Additional Field" table.
Checking custom columns using GraphiQL
If you want to check which custom columns were pulled for a specific task without waiting for a dashboard sync to finish, you can use the GraphiQL interface. This must be done after the Source has finished a run with the custom column added.
This check works best with a specific task in mind. Suppose you have a Task with an ID in Jira as "FAI-123", and a custom column(s) you hope to be pulling from the source. You can use the following query in GraphiQL to look at which custom columns were pulled:
query test {
  tms_Task(where: {uid: {_eq: "FAI-123"}}) {
    uid
    additionalFields
  }
}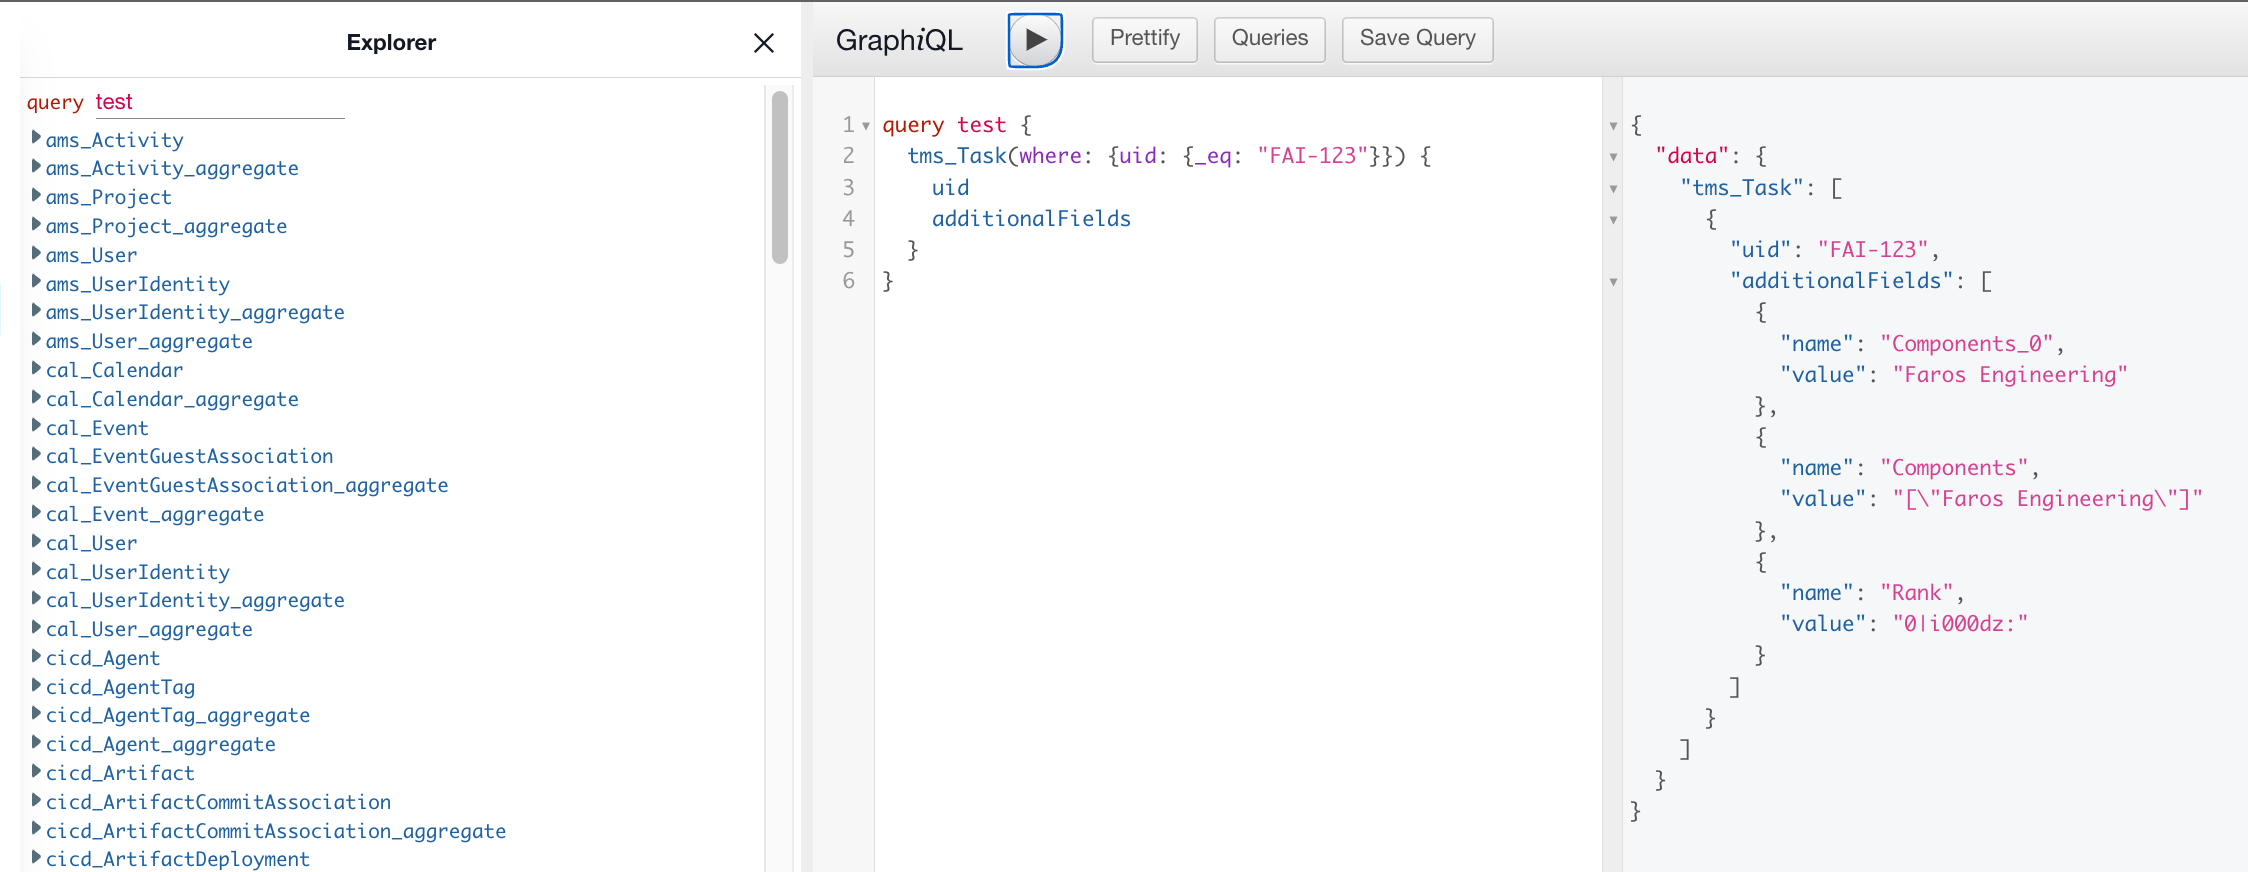
in this case the columns pulled were "Components" and "Rank". Since the "Components" Value is a list, it is stored as a list in the original value, and then each item in the list is given its own custom field name, starting at index 0.
Viewing the data in the Faros Reports Tables
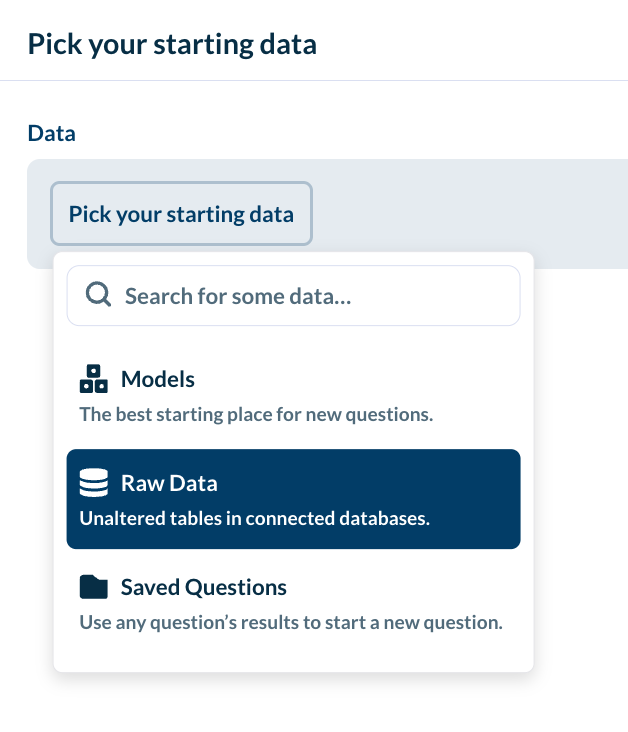
Once the new custom fields are added to the Source, the source finished a run, and a dashboard sync finishes, you should be able to view these custom fields in the Entity Additional Field table. You can search for them by first creating a New Question, and clicking on "Raw Data":
then choose Entity Additional Field:

then "Filter" by Entity Additional Field - Field Name equals to your new field name, in our case "Quarter":
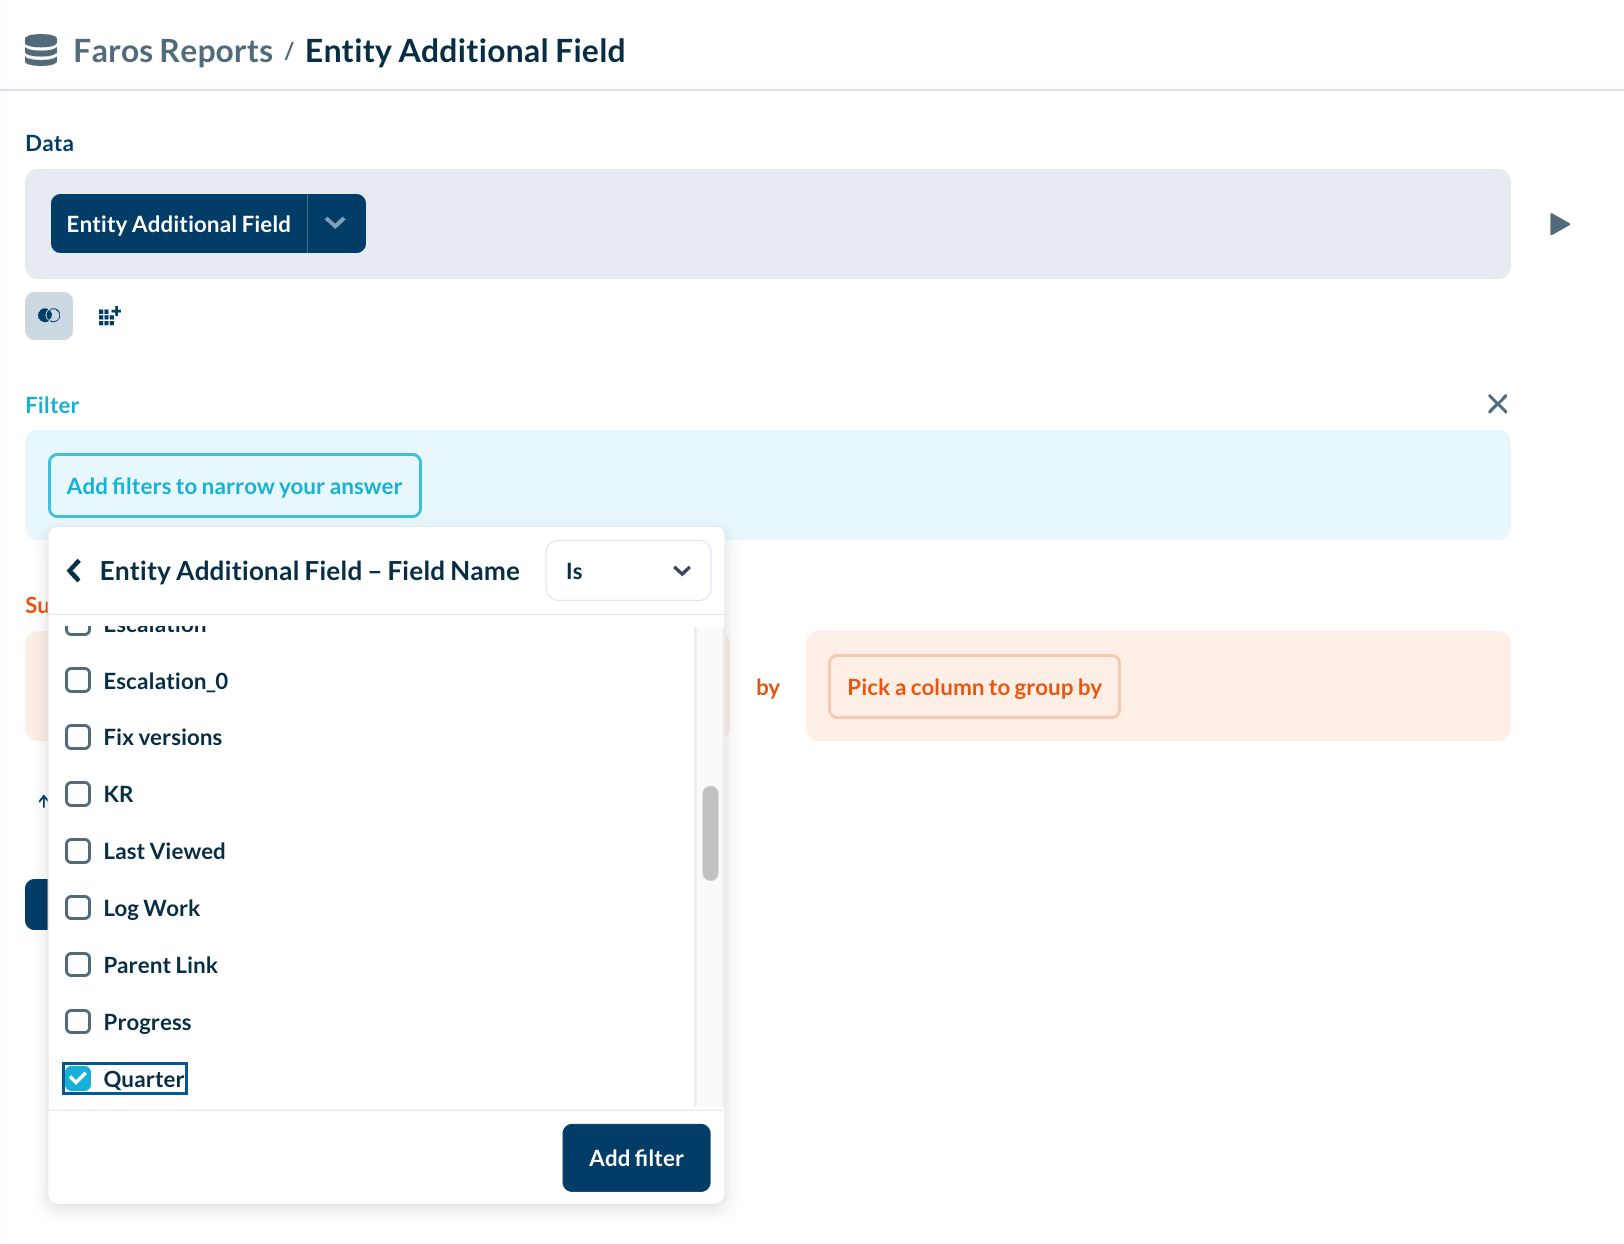
Then click on "Add filter" and press the "Preview" button on the right to see some of the Custom Fields that were pulled:
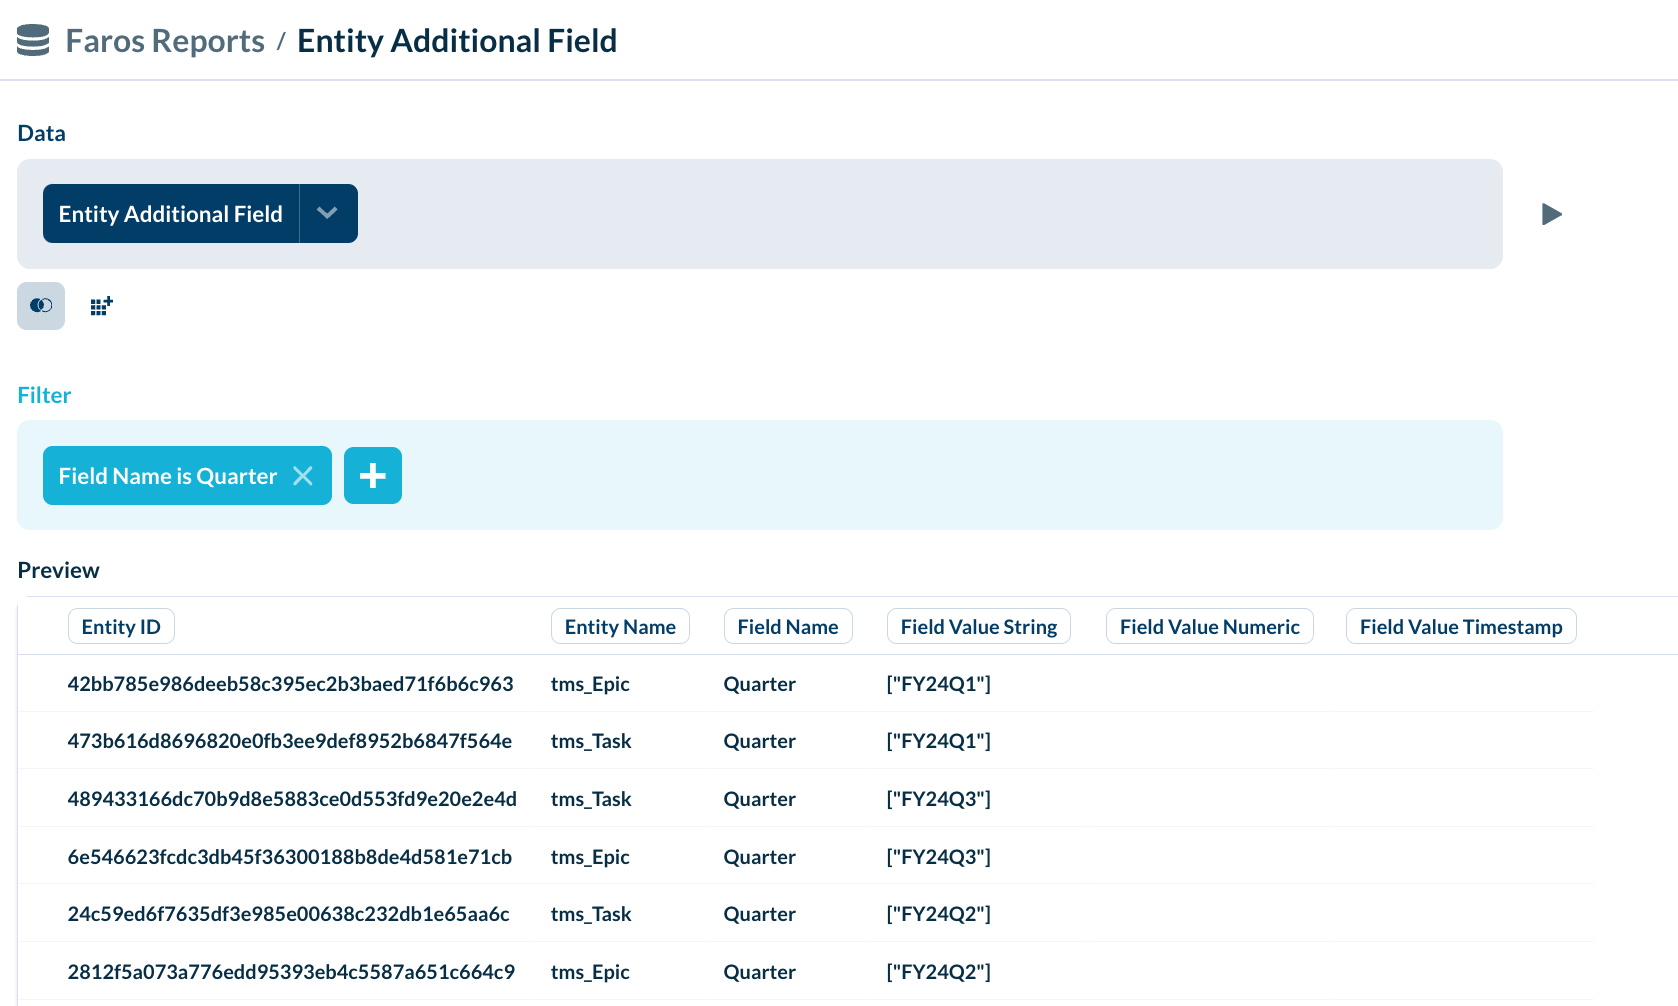
Note that the value for the custom field is in "Field Value String". The other columns, "Field Value Numeric" and "Field Value Timestamp" will populate if the field value fits into their data-types.
To connect a Task to its Custom Field, we need to join the Task Table with the Entity Additional Field Table, where the Task ID from the Task table is joined on the Entity ID from the Entity Additional Field Table. We also want the Filter to check that the Entity Additional Field's "Field Name" is the same as the new Custom Field name we added, in this case "Quarter":
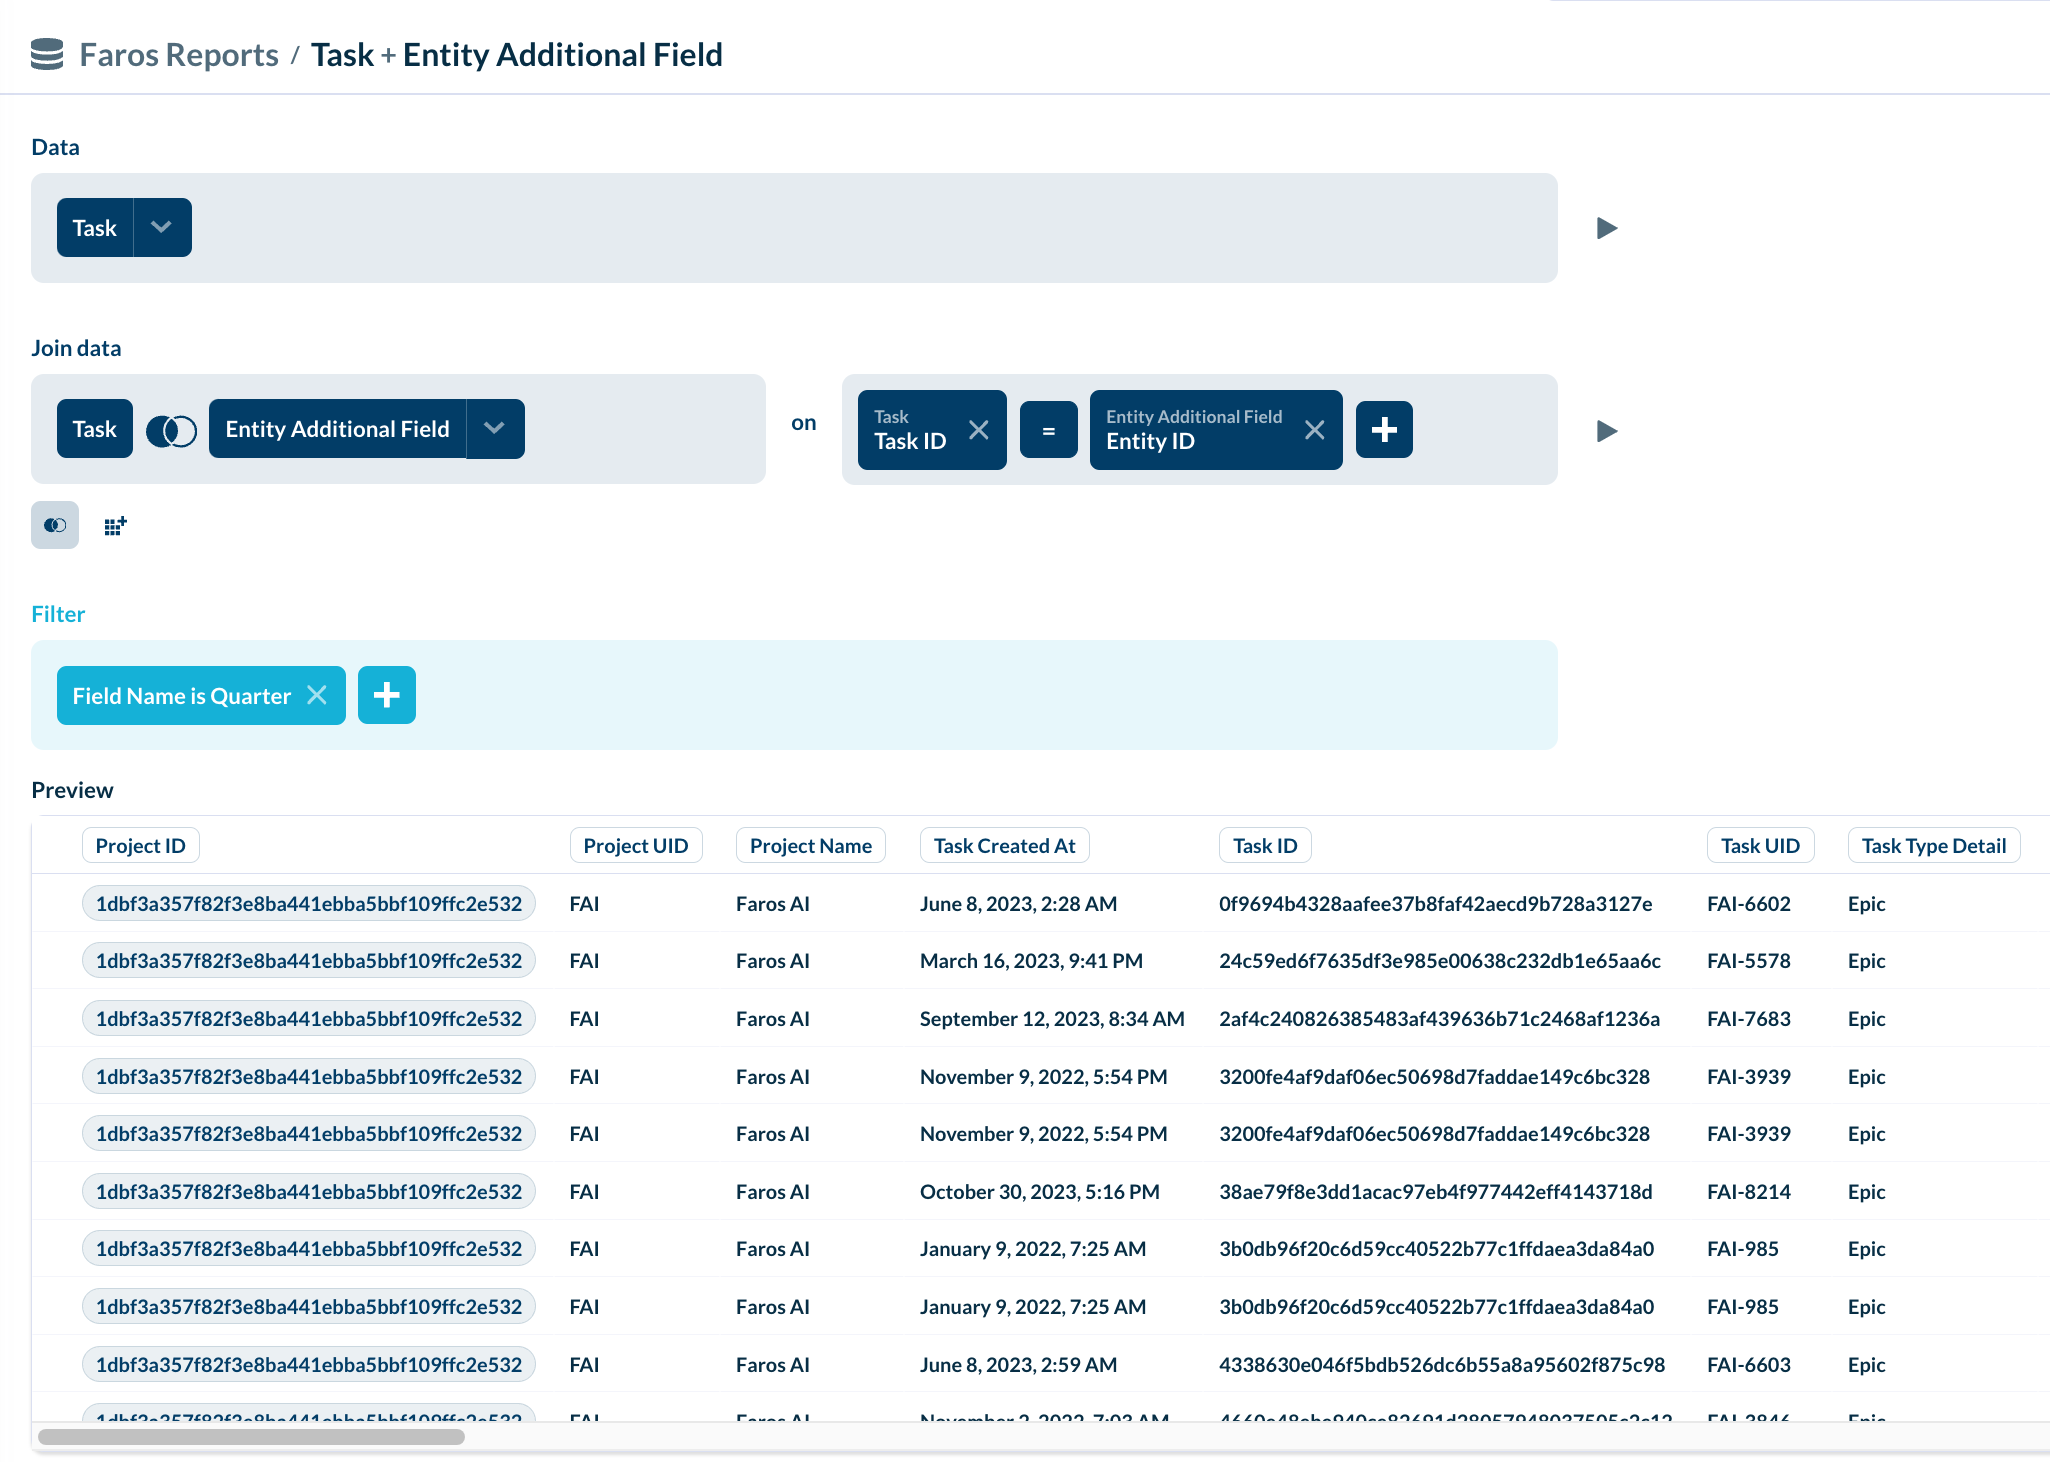
Now we have our Tasks and our Custom Column joined together in each row.
Joining 2 or more Custom Fields to a Task
Suppose you want to view several custom fields per task. In this case, you can set up a "join" in the following way.
First let's list the names of the custom fields we want to join on. Suppose they are:
["Quarter", "Service Hours", "Rank"]In this case, we create 3 custom columns, one per each of the custom field names we want to join on.
We'll start with a new question with the "Task" table as its base, and we click on "Custom column":
Then we create three custom columns, each of which look like this:
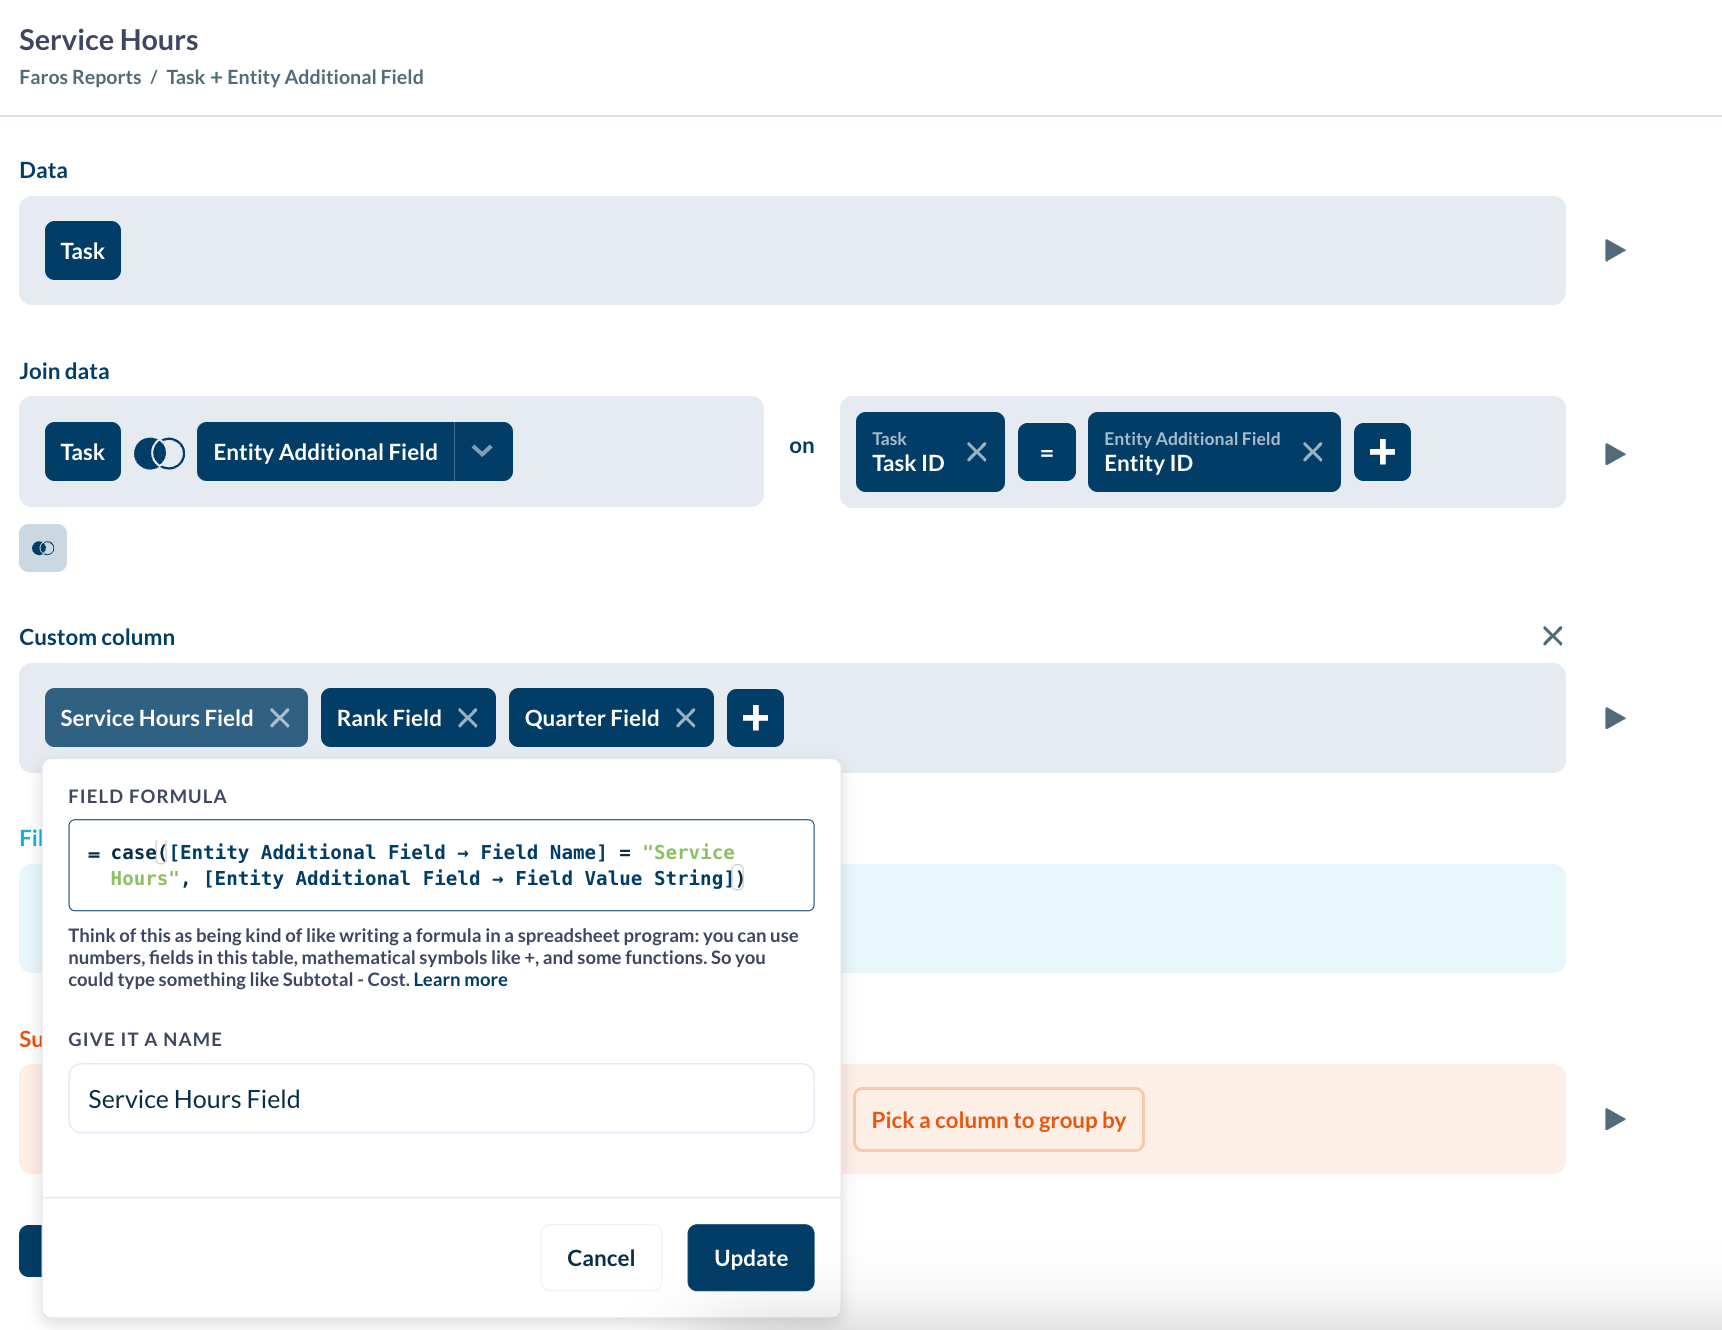
Click on Done to save it. Note that each of the custom columns contains the field formula
case([Entity Additional Field → Field Name] = "field-name", [Entity Additional Field → Field Value String])where field-name is replaced by "Quarter", "Service Hours", and "Rank".
Then in the "Summarize" Section, create corresponding columns which are formatted as shown in the following picture:

All the Custom Expressions will look like
Max([custom-field-name])Where custom-field-name is replaced by the name of the Custom column created above.
If we click on "Preview" on the right, we get a table which looks something like the following:
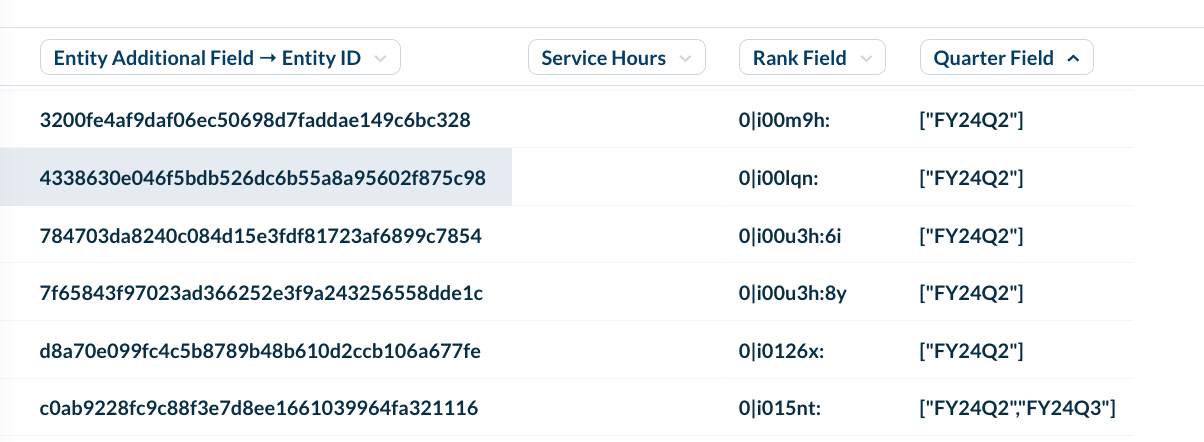
You can add more columns to this table by adding more items to the "by" section, e.g.:

Updated 5 months ago