
Transforming Data
How to write data transformations, a.k.a. "transforms", in Faros.
What is a "Transform"?
A transform is a mechanism to map objects from one part of the data model to another. In the following tutorial, we will use a transform to convert a "task" object into an "incident" object. When you run a transform it writes the new object data without modifying the original object data. For information on modifying an object in place, e.g. a "task" object into a "task" object, please reach out to the Faros team.
When would you want to do this?
For example, if you store "incidents" in your system as "tasks" within a TMS, you may want to convert those tasks that represent incidents into proper "incident" objects in the faros system. Having this data as an "incident" type will allow you to leverage the built-in tooling that uses incident objects, rather than task objects.
Also, please note that there are certain transforms built in Sources with a UI that make this process much simpler:
- "task" into an "incident"
- "task" into an "initiative"
- "release" into a "deployment"
A Note on Scheduling Jobs:
Transforms usually run on a schedule, just like any source - for example, by default they will perform the data transformations every 6 hours. You can also run them just once if you don't need the data regularly modified. In this case you will run the Source and disable it once it completes.
How do they work?
Transforms essentially perform the following 3 actions:
- Query the database
- Modify the data
- Write to the database
We use GraphQL to query the database, and we use the declarative JSON query language JSONata to modify the data. The data which your JSONata transformation outputs is used by the transform to write to the database. Once you have both your query and the corresponding JSONata finalized, you can save them and reference them using a "Transform" source under the "Sources" page, and the transform handles the rest of the process. All you need to worry about is writing a GraphQL Query and the corresponding JSONata within the "GraphiQL" page.
Getting Started
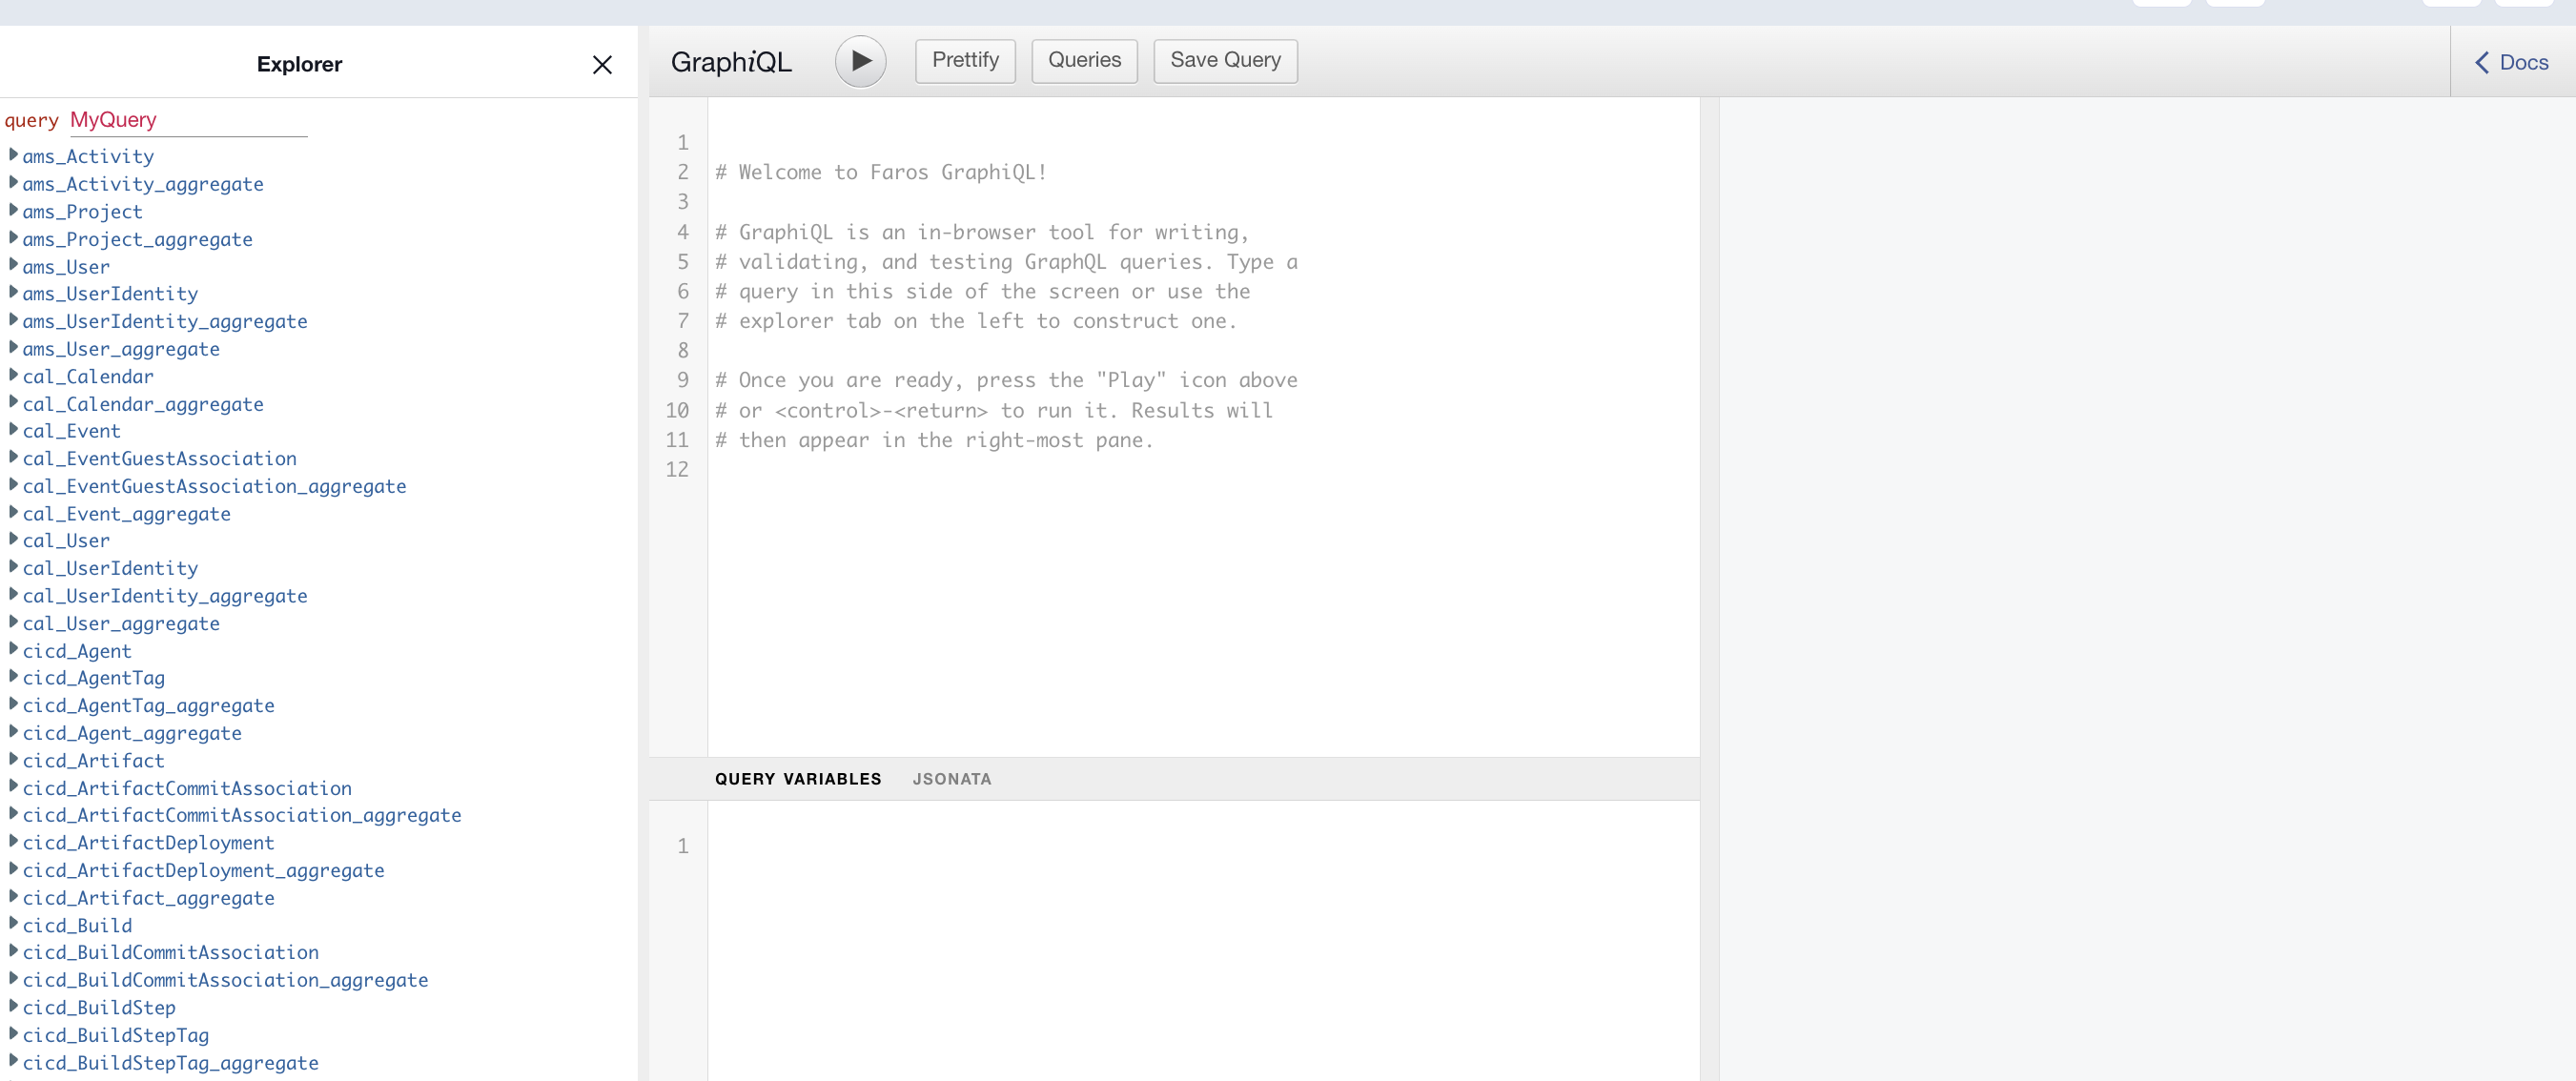
Navigate to your GraphiQL interface, which looks like this:
Writing the query
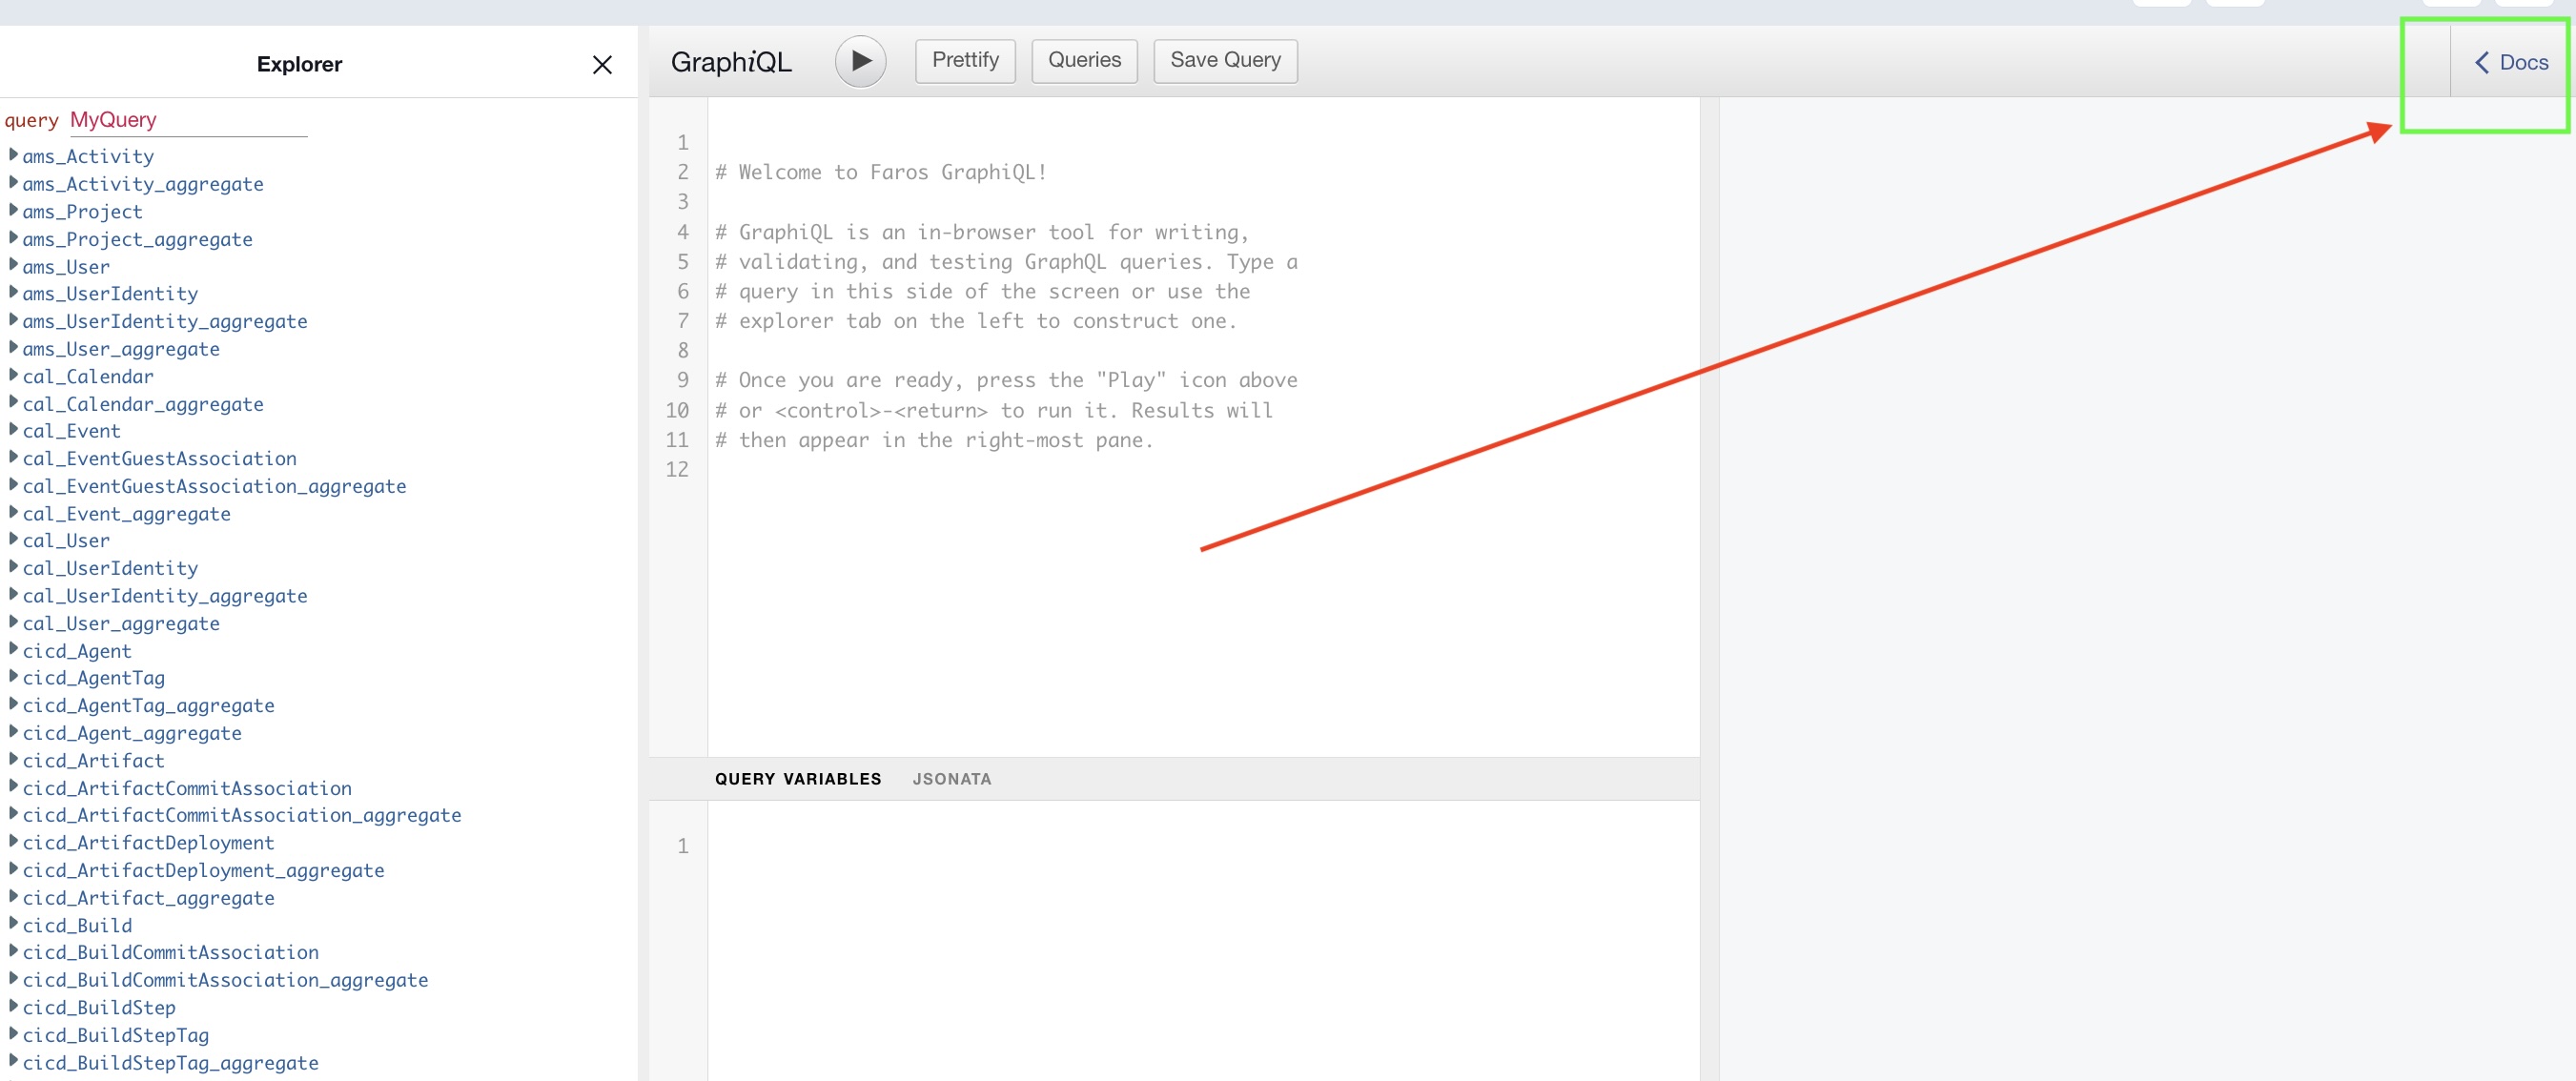
We will first need to write the GraphQL query. Suppose we want to perform a transformation on the tms_Task object. We would need to write a query which calls the fields we intend to use within the tms_Task. If we want to have ims_Incident objects created, we'll also need to make sure we write out to the proper fields in the incident object. In order to see what the available fields are for an object, use the "Docs" button at the top right corner and search for the object of interest. In this case we are searching for the ims_Incident object.
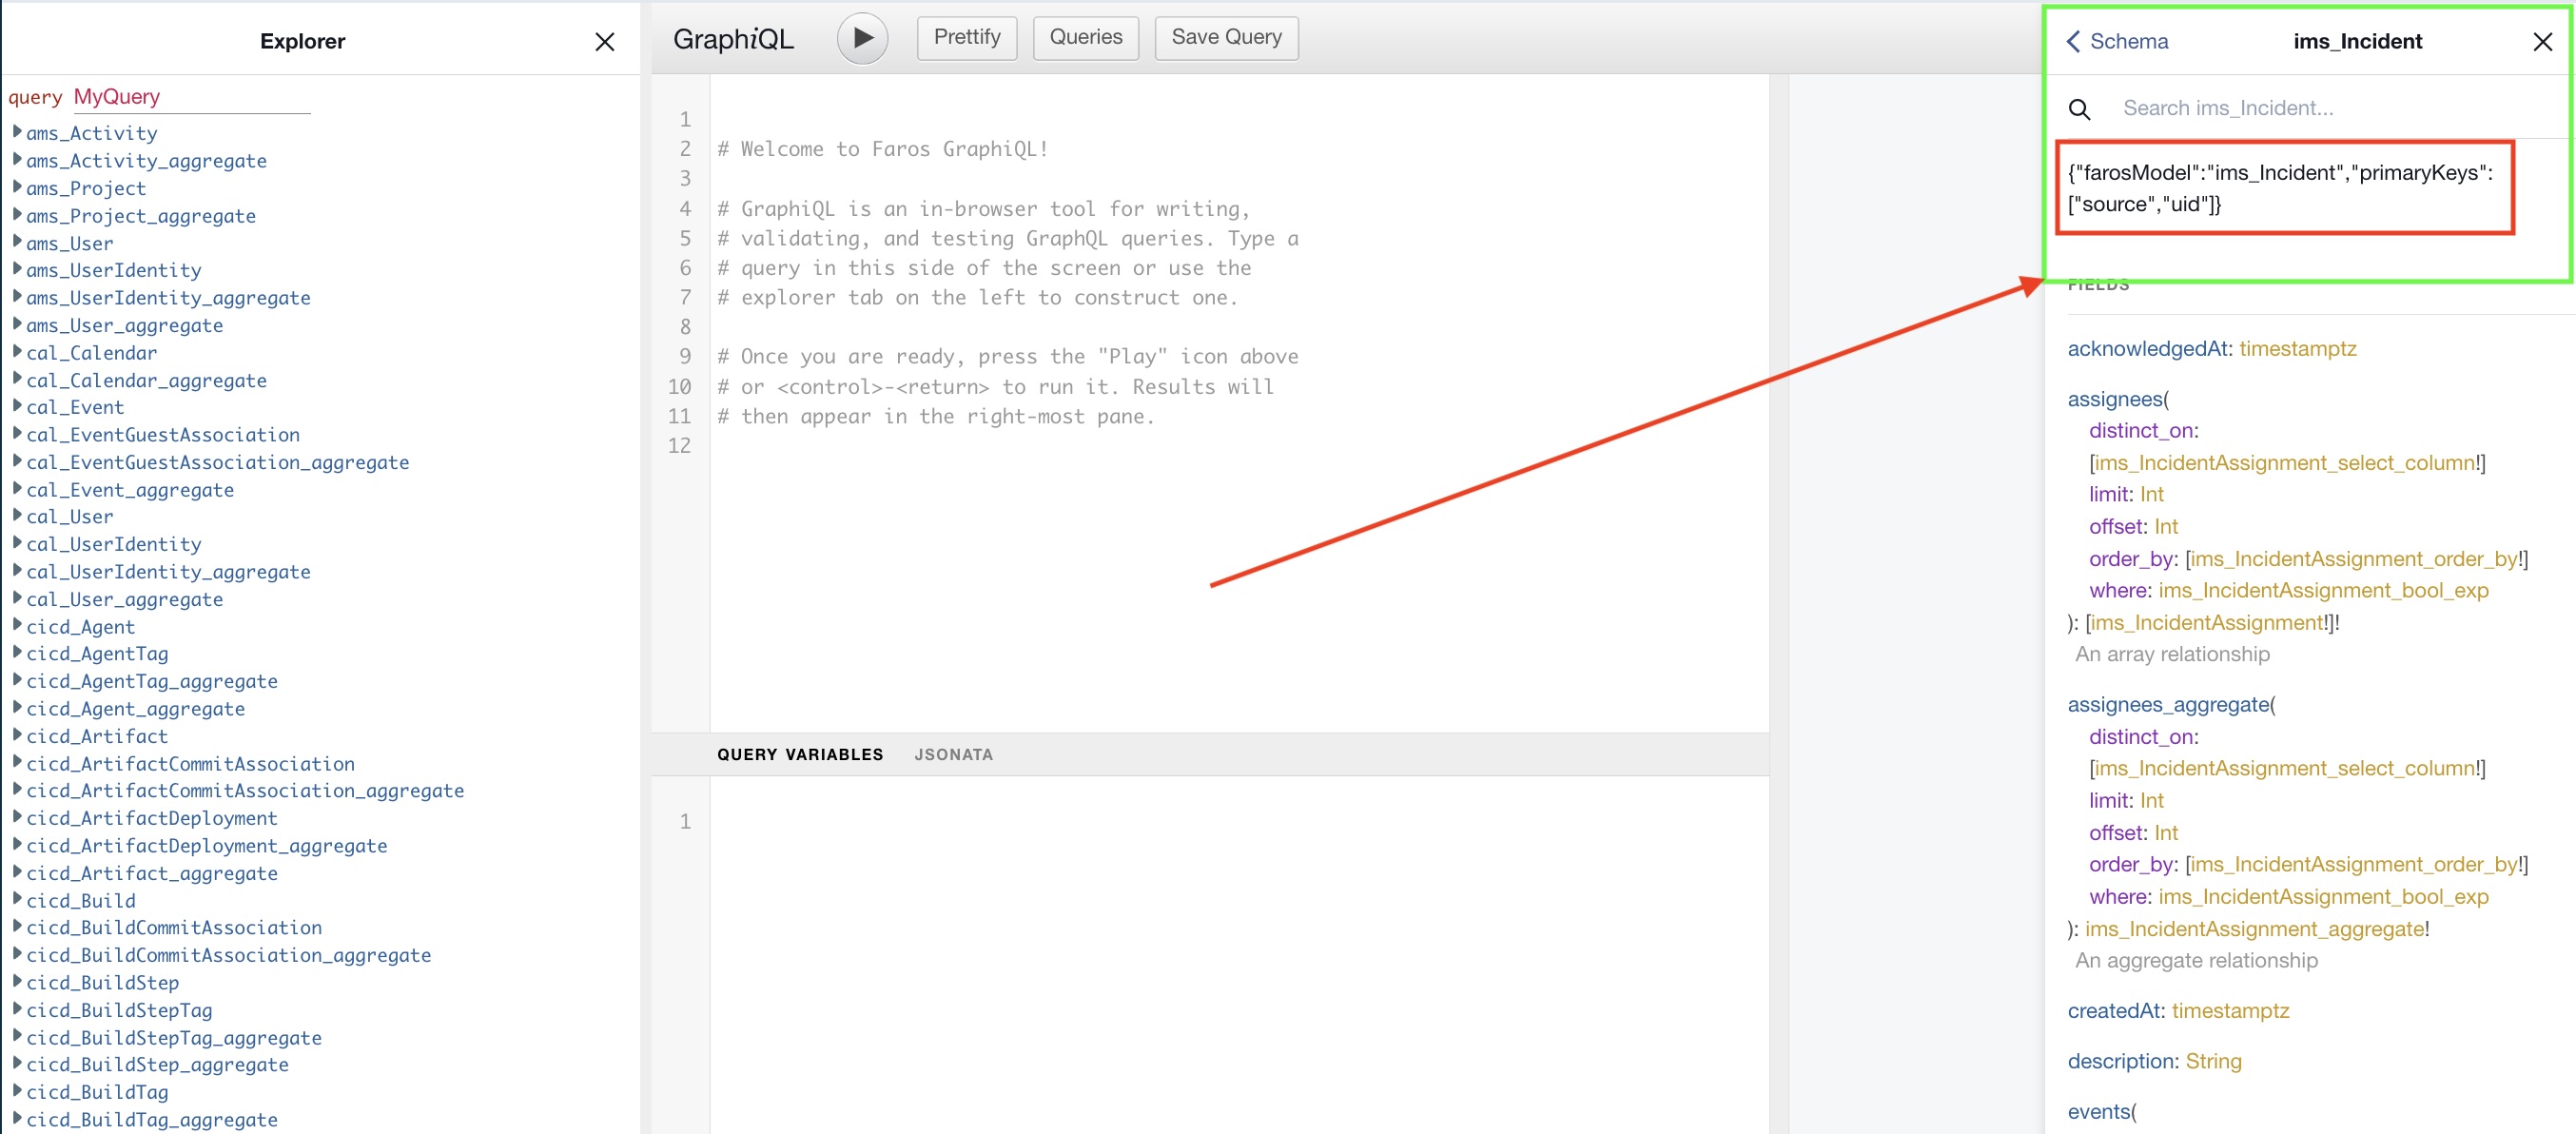
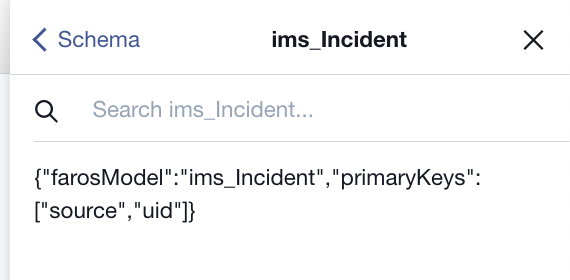
It is important to pay attention to the primaryKeys , which in this case are "source" and "uid". When we write out to an object (which we will see the format for further down in this doc), we will need to make sure these fields are present and filled out with the proper type (e.g. string/integer/object, etc). To check what the type is for these fields, you can scroll within the "FIELDS" section of the Docs, and look at the corresponding type.
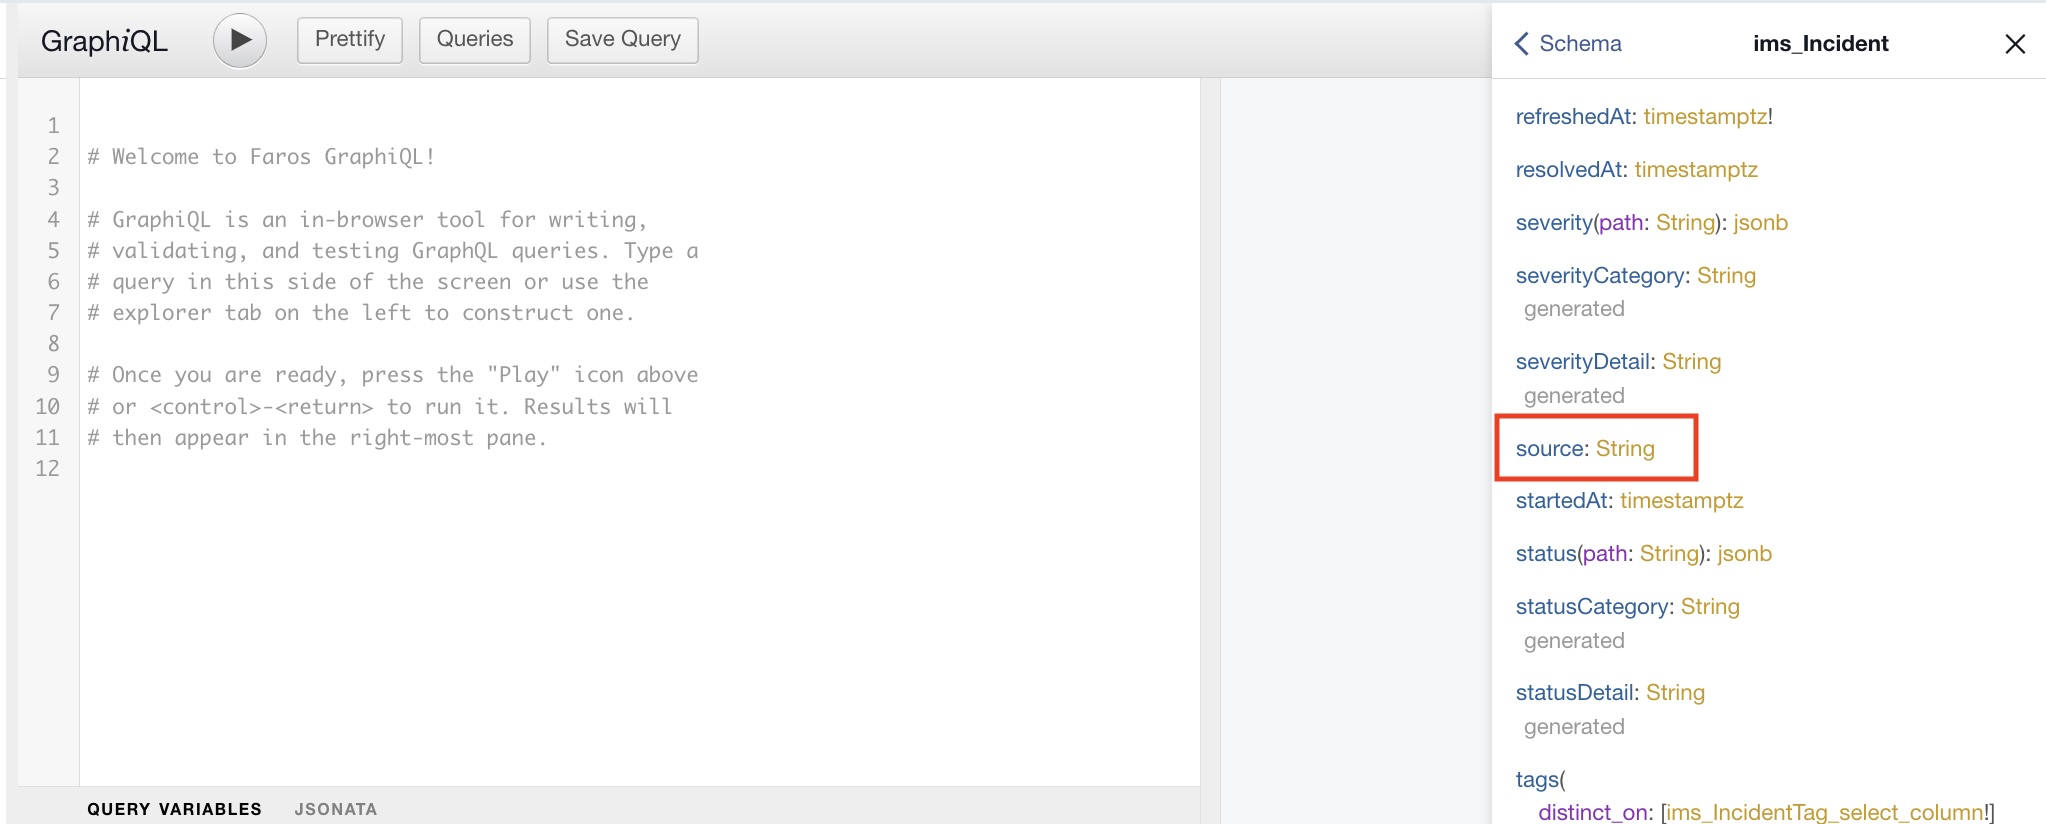
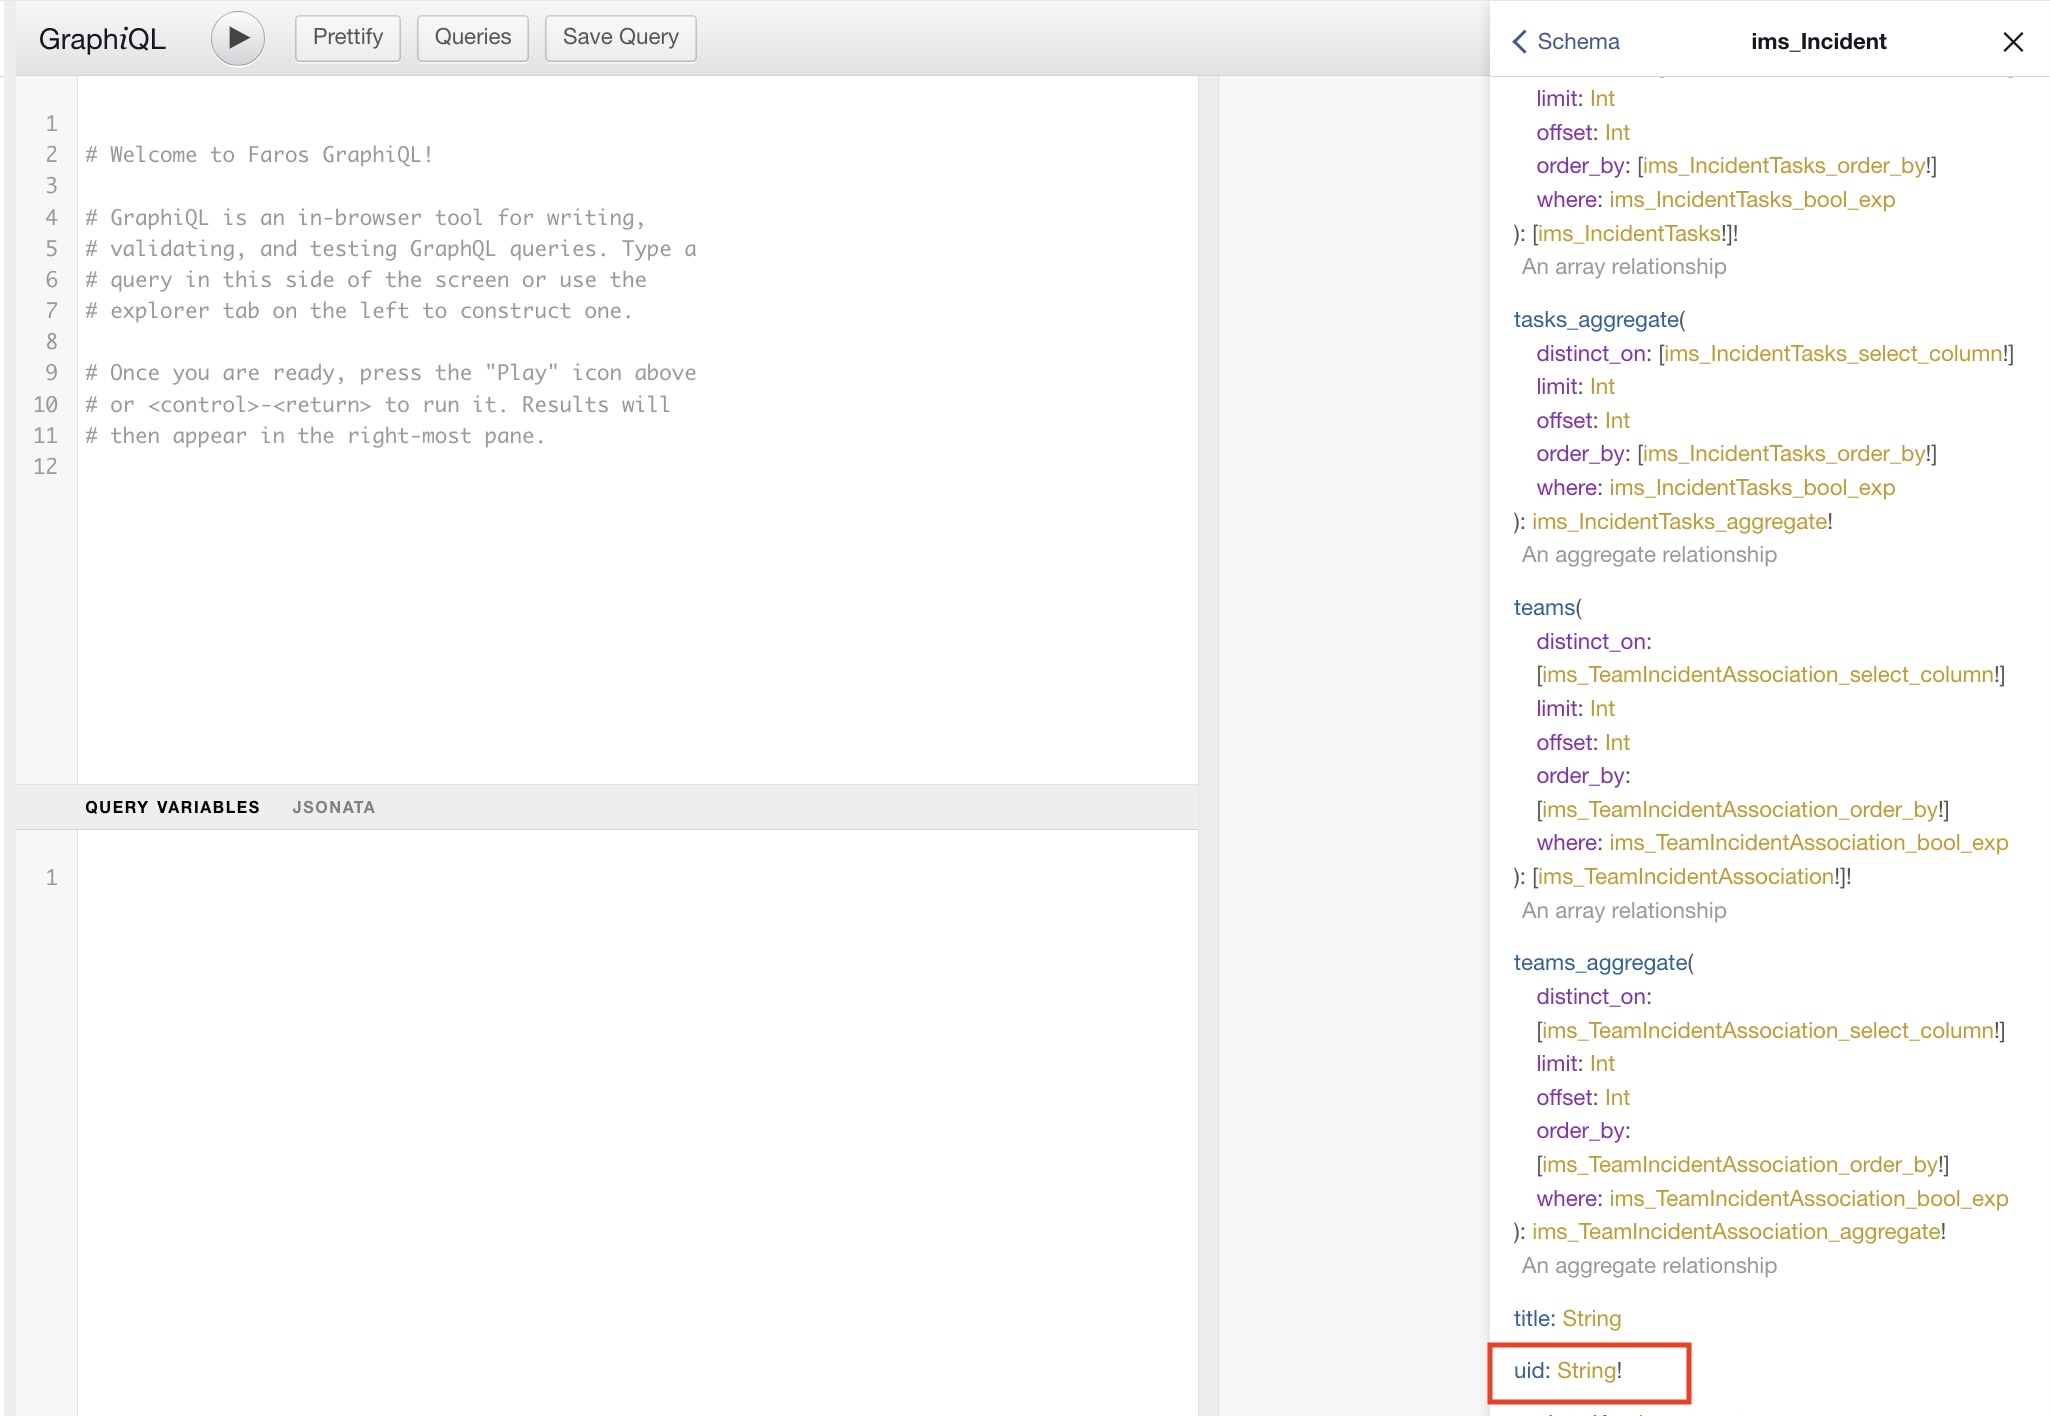
We've seen that both source and uid are strings, so we know to create those as strings.
A Note on UIDs:
Whenever you see 'uid' in the Faros schema, it refers to the "unique identifier" from the external system. The unique ID within the Faros database is the "id" field. When you write a transform, you don't need to worry about this. For example, you might have a unique ID "TASK-456" for a task within your JIRA, and this would be saved as the "uid" field within a tms_Task object in the Faros database.
A Note on primaryKeys:
The unique ID for an object is constructed from the primary keys. That means it is important to ensure that together, the primary keys are unique, because any two "different" objects with the same primary keys will write over each other - the last written object will be the one stored in the database. If you were to write fixed primary keys, the transform won't behave as expected.
Let's tie this information back in to writing the query. However we write the query, we'll want to be able to provide the fields "source" and "uid" (as strings) for the destination object ims_Incident. As written in the note above, we will make sure that the primary keys will be different for each object (note that if we use primary keys from an original object then we have a guarantee that those keys are unique). Let's check the primary keys for the input object:
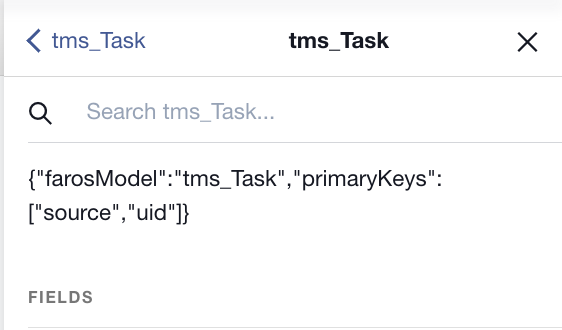
We can now see that the primary keys for the input object, tms_Task are also "source" and "uid", so we can confidently use those to create our "source" and "uid" for the output ims_Incident object.
In order to build the query, we can navigate to tms_Task within the Explorer:
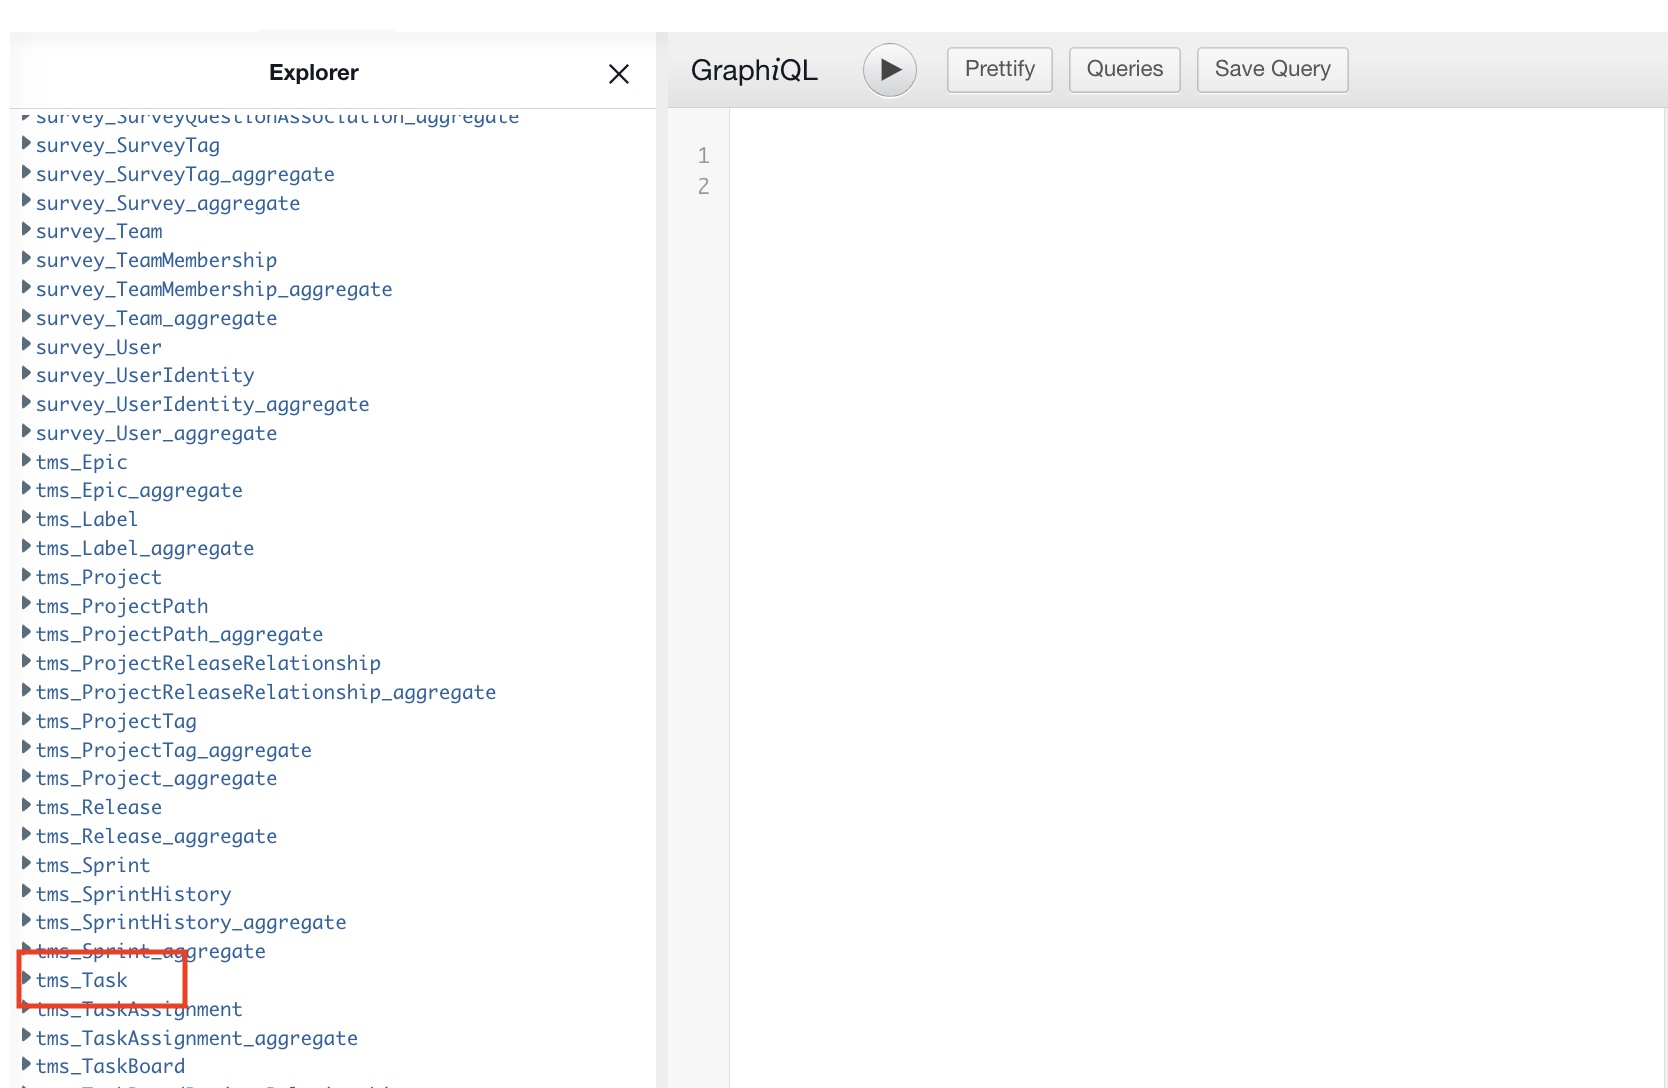
Then click down to expand and choose the fields you want to query:
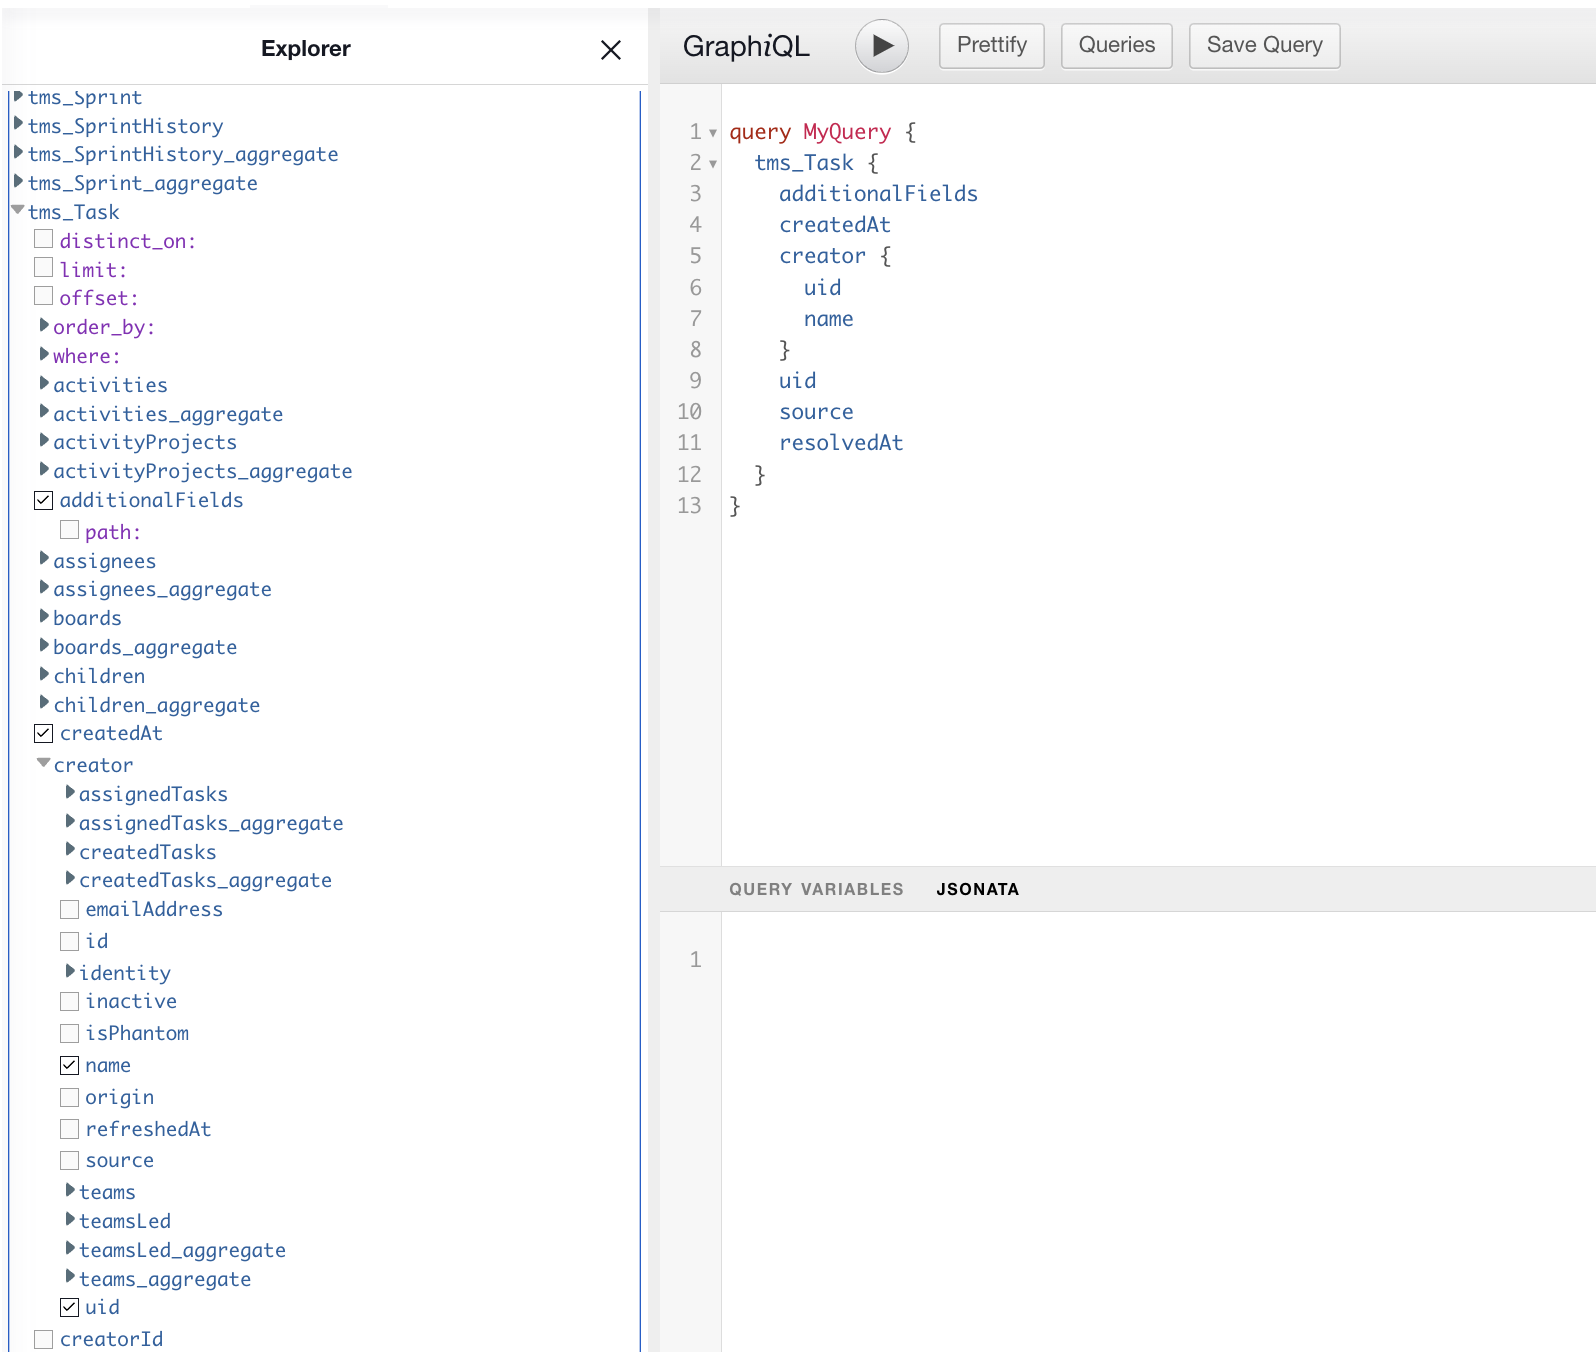
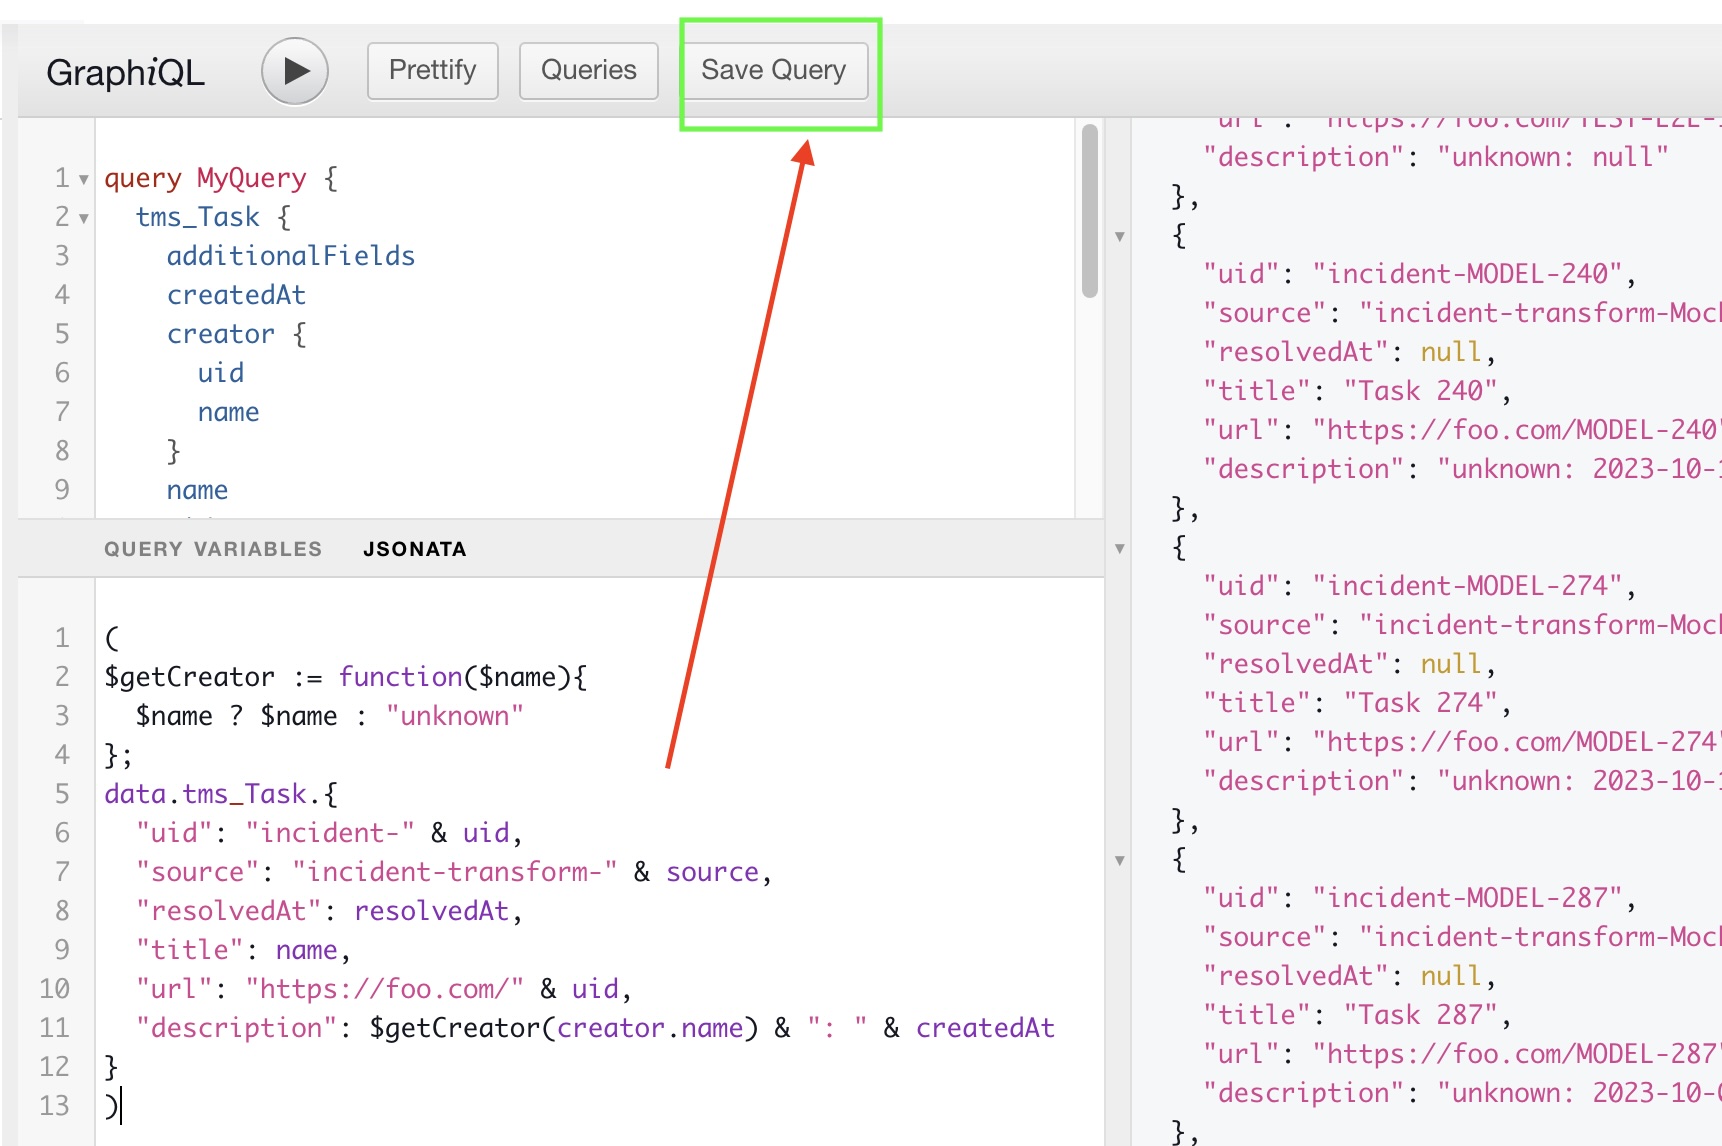
Here is a sample query which gives us many fields from tms_Task, including "uid" and "source" from the original task (we don't necessarily need to map the same fields to those fields). We hit on "play" to get the response:
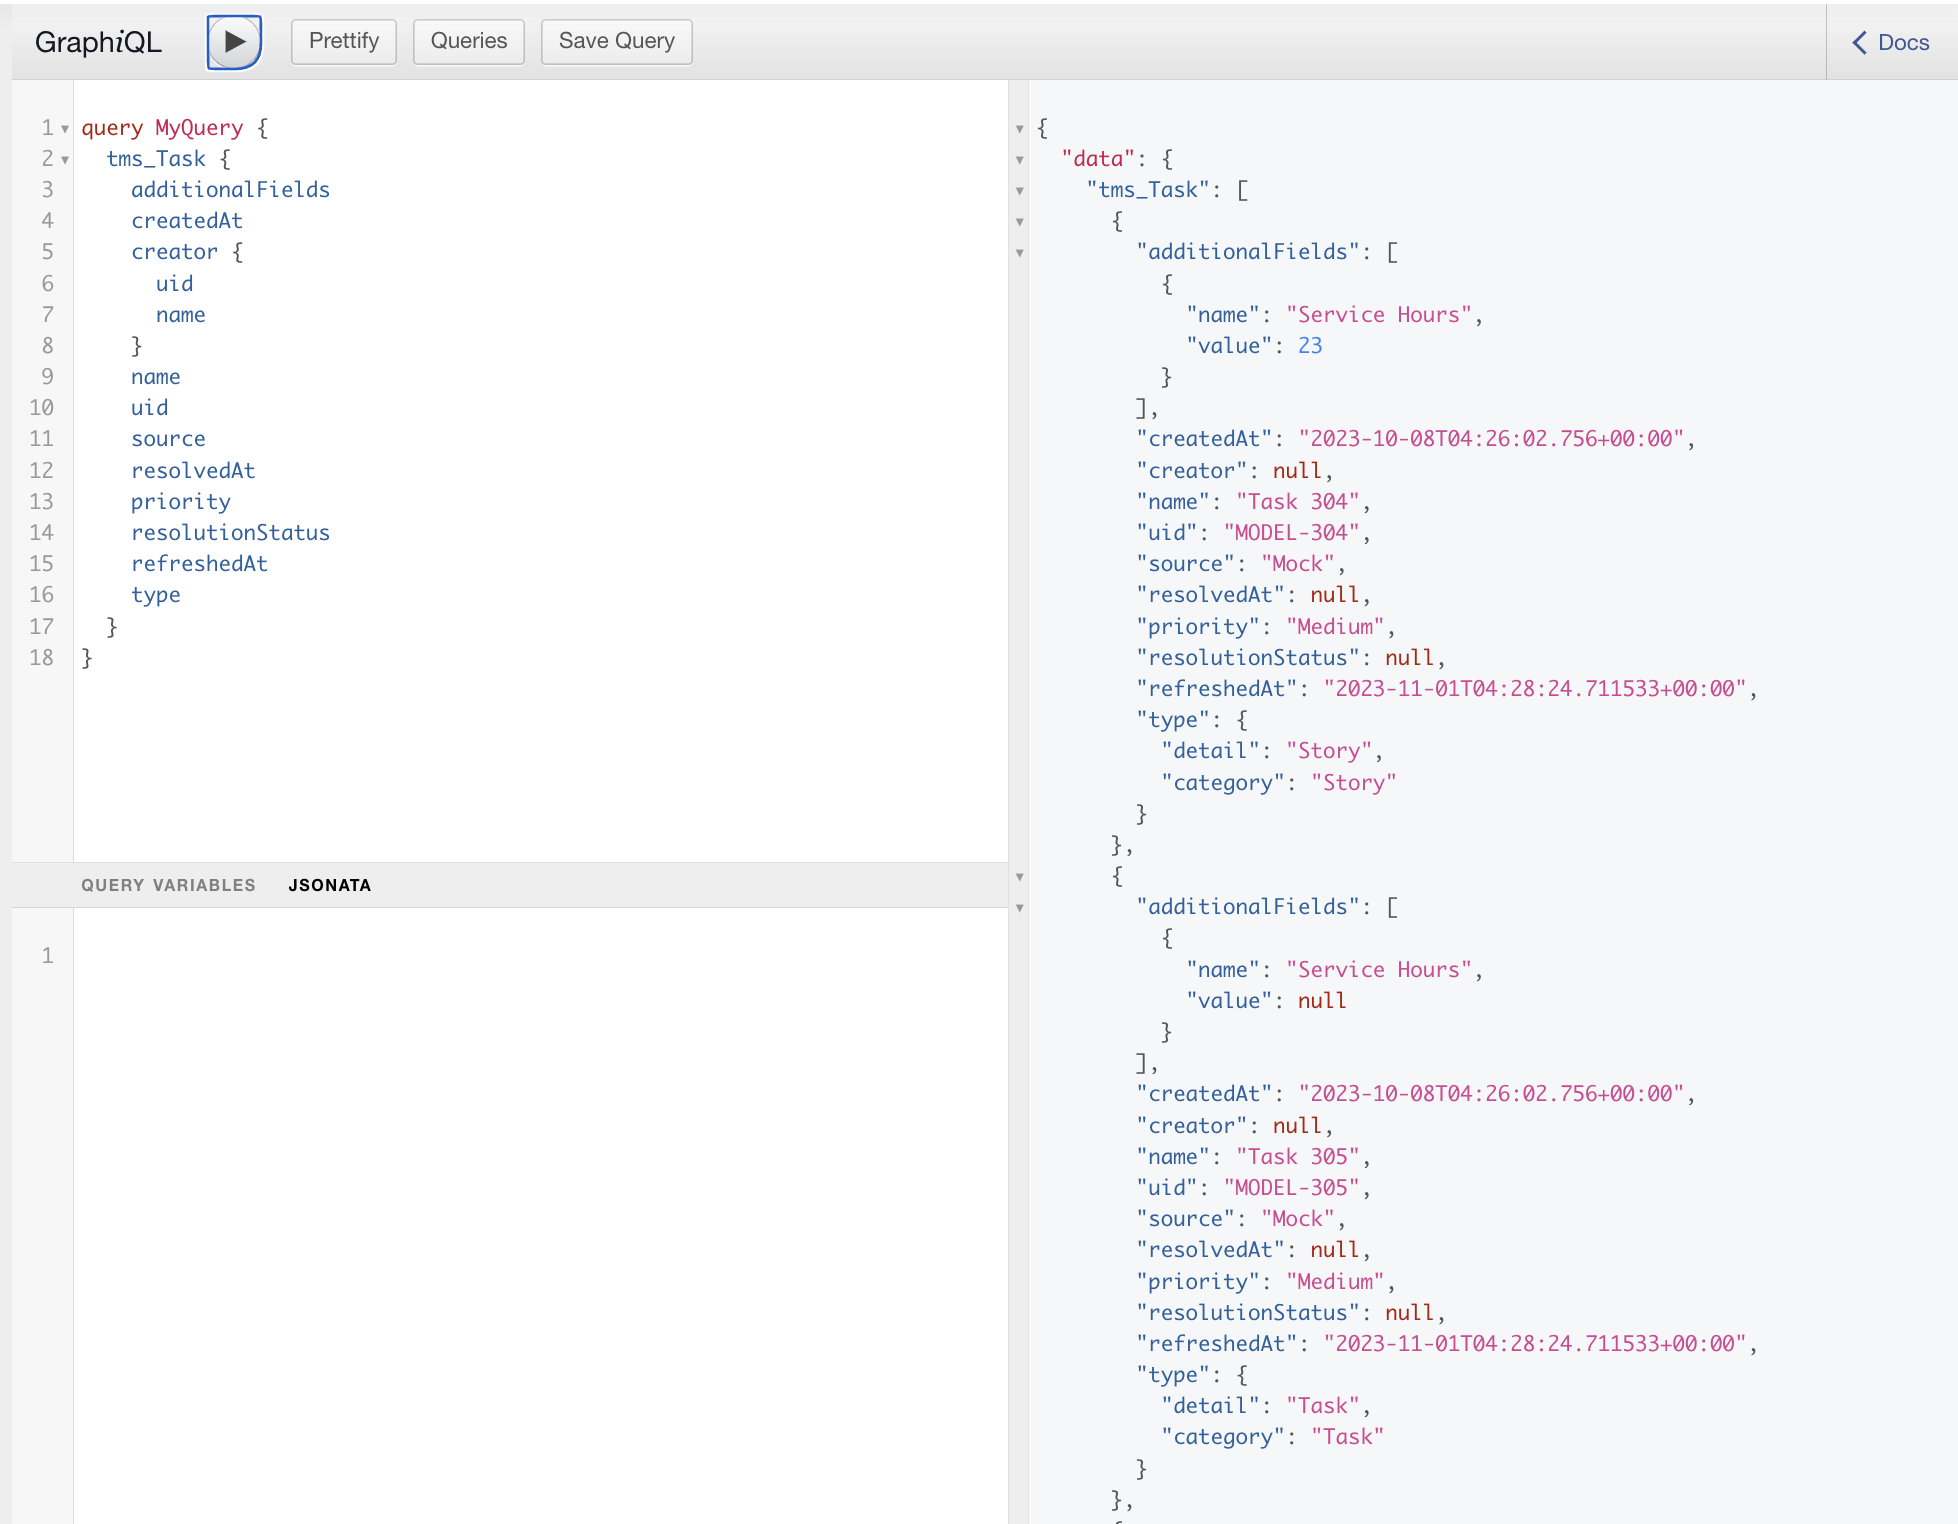
Here is the GraphQL query in a copyable format:
query MyQuery {
  tms_Task {
    additionalFields
    createdAt
    creator {
      uid
      name
    }
    name
    uid
    source
    resolvedAt
    priority
    resolutionStatus
    refreshedAt
    type
  }
}
Now that we have data on the right, we can use JSONata to reshape it to fit our needs.
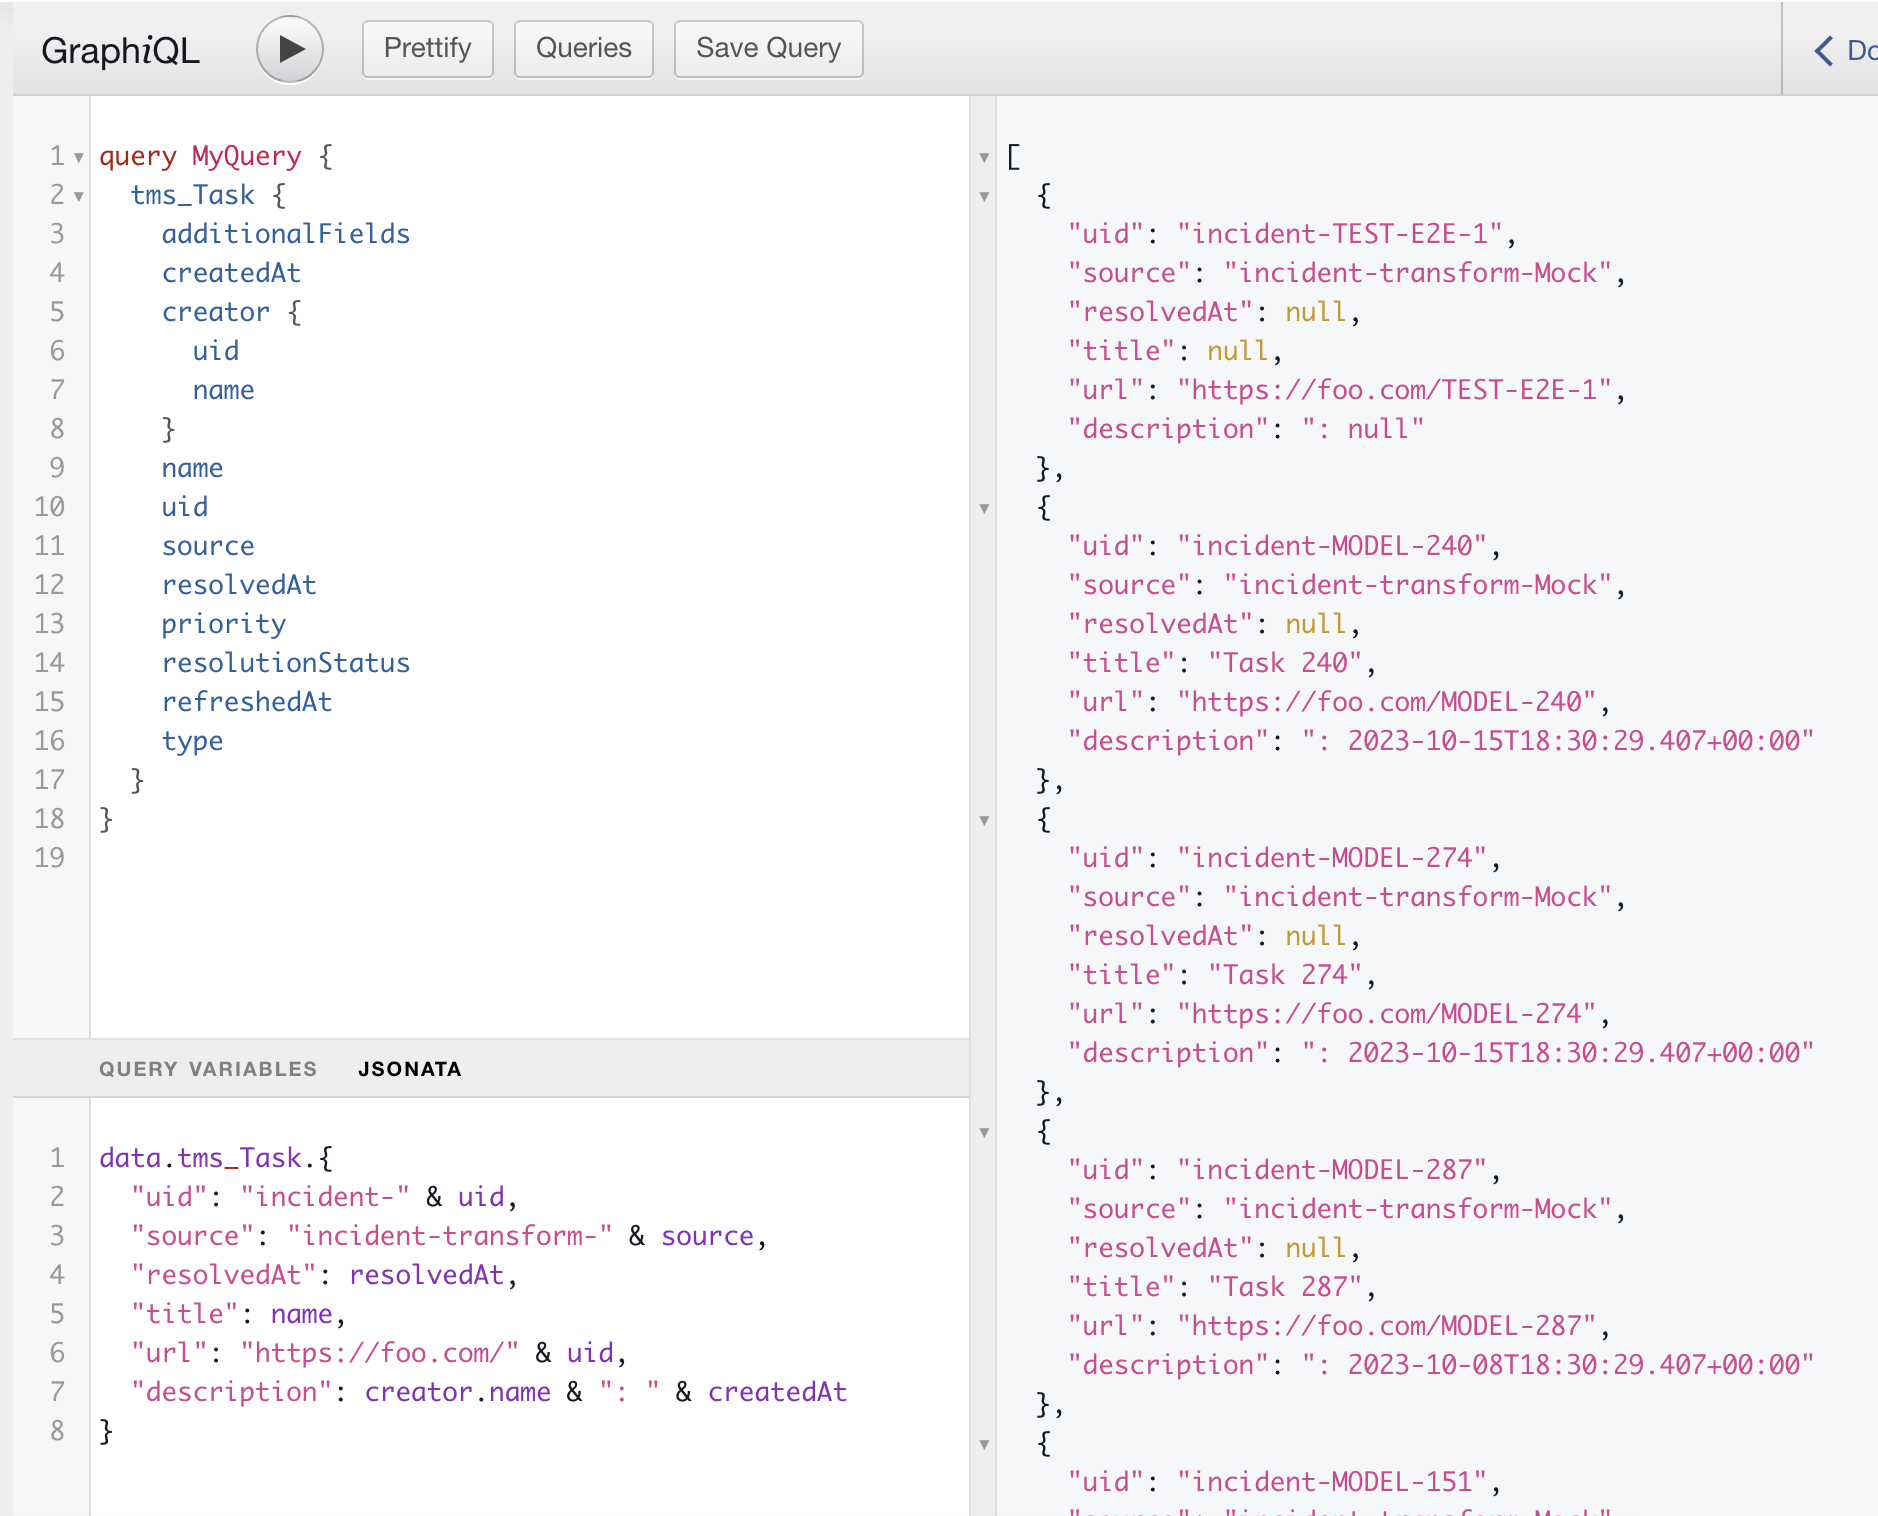
JSONata for copying:
data.tms_Task.{
	"uid": "incident-" & uid,
  "source": "incident-transform-" & source,
	"resolvedAt": resolvedAt,
  "title": name,
	"url": "https://foo.com/" & uid,
  "description": creator.name & ": " & createdAt
}
The JSONata we wrote is listed under "JSONata" in the bottom left. On the right we see how the JSONata transformed the results of our query into an output. Try playing with the string values in the JSONata, e.g. take "incident" and replace it with "ink-dent" and notice how the data in the right changes as you make those changes.
Adding more functionality to the JSONata
If we take a closer look at the "description" field for the output, we notice that the "creator.name" value is often missing. So now we'll add a function "$getCreator" to check if the "creator.name" value is empty, and if it is, we replace it with the string "unknown".
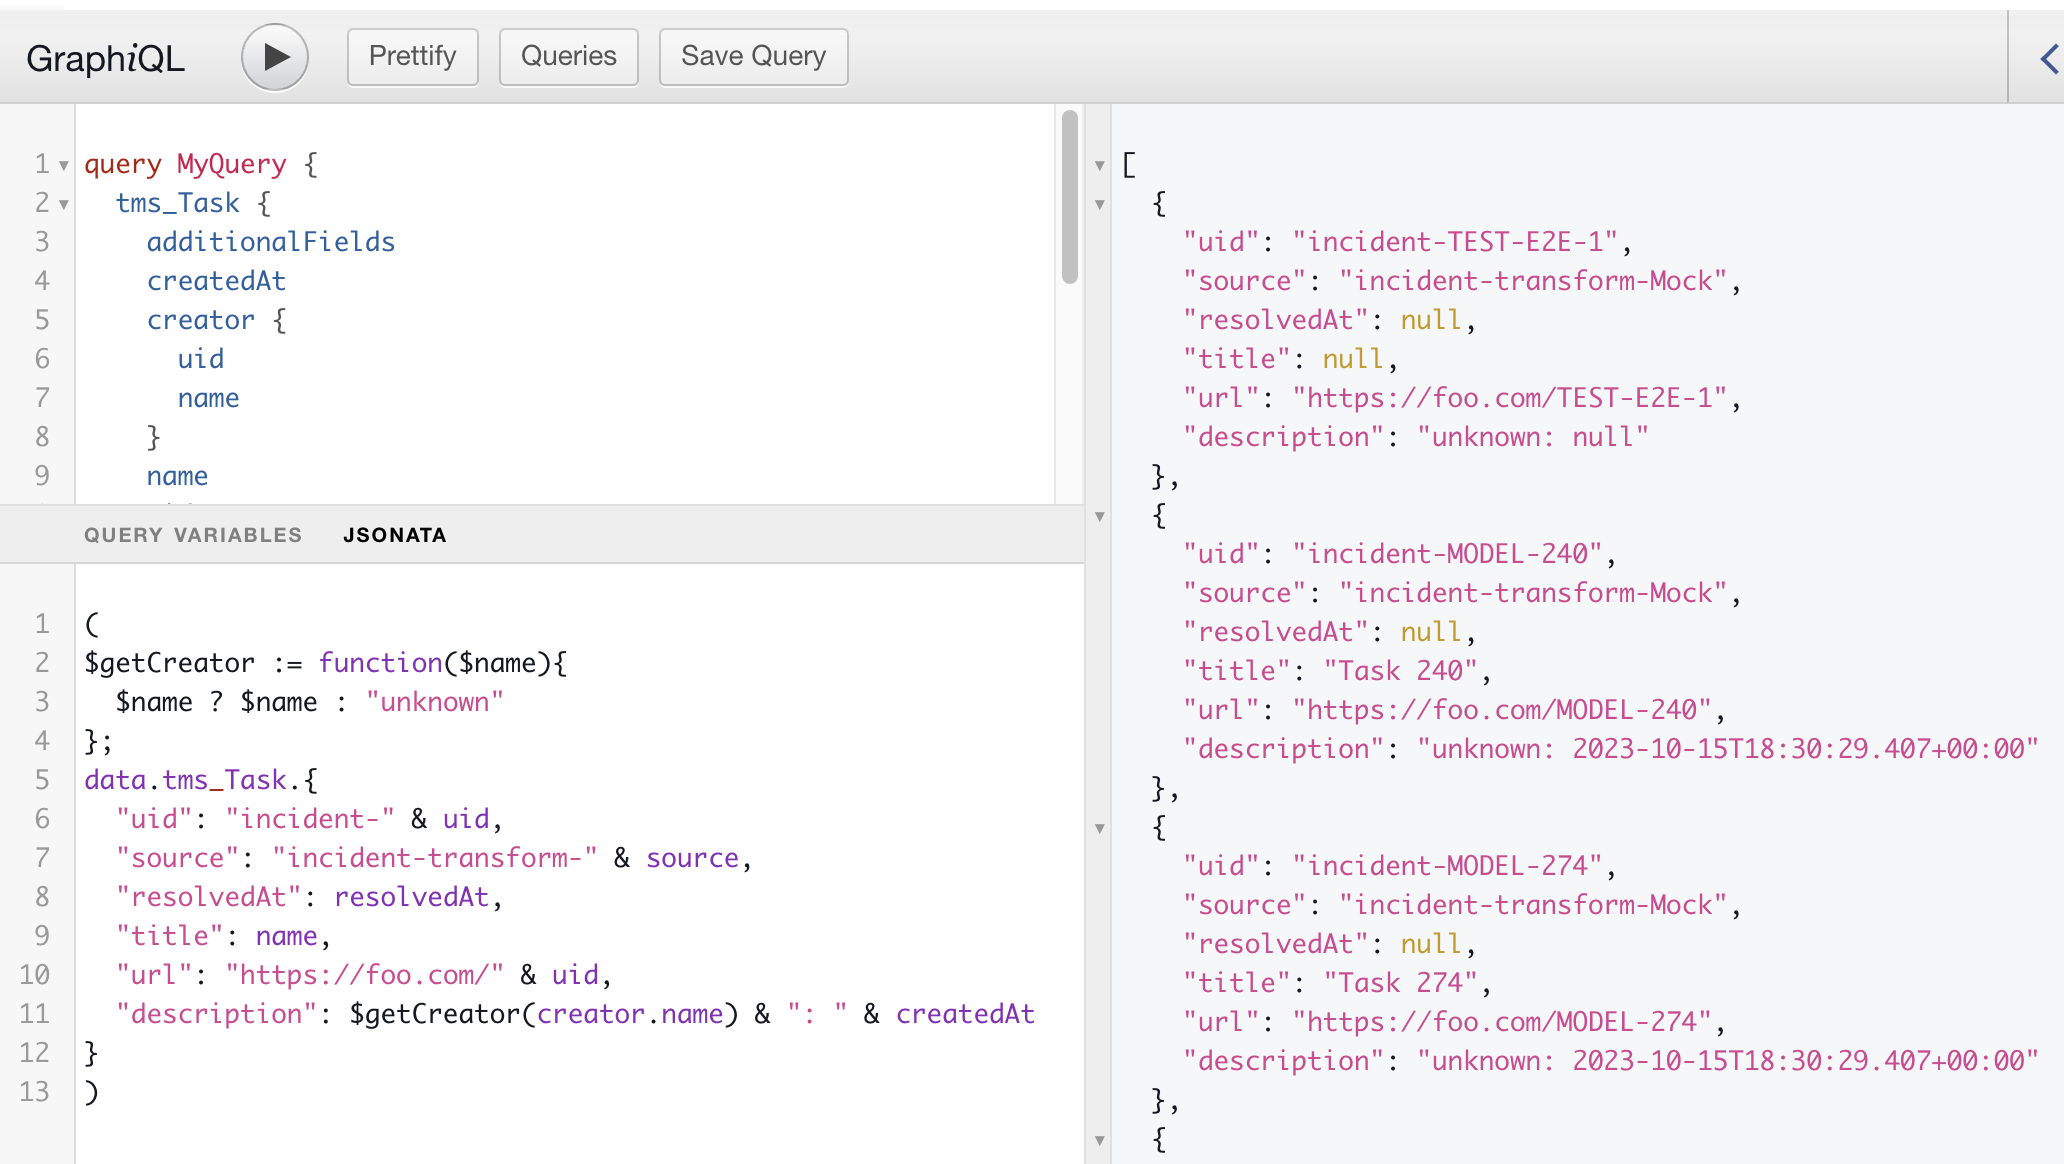
Updated JSONata for copying:
(
$getCreator := function($name){
	$name ? $name : "unknown"
};
data.tms_Task.{
	"uid": "incident-" & uid,
  "source": "incident-transform-" & source,
	"resolvedAt": resolvedAt,
  "title": name,
	"url": "https://foo.com/" & uid,
  "description": $getCreator(creator.name) & ": " & createdAt
}
)
As long as the JSONata is valid, the data on the right should update as you write the new JSONata
Now our JSONata contains the function and calls the function within the "description" field.
A Note on JSONata formatting:
Within any body of code in JSONata, the last expression is returned. All previous expressions should contain semicolons after them. This includes within a function. For example, within a function, if you wanted several expressions, you would need to make it look like the following:
$stringModifier := function($var) {
	(
    $new_var := $var & ' second';
    $updated := $new_var & ' third';
    $returned_var := $updated & ' end.';
  )
}
This function will return the $returned_var variable, even though no "return" is written. Notice the surrounding parentheses within the function, as well as the outer parentheses for the previous JSONata example.
Transform Output (Result Structure)
What we see in the right of the GraphiQL UI will be the output of running the transform (except for the GraphiQL interface has an upper limit of 1000 objects per query, so you may only get a partial response if there are more than 1000 objects that you expect to transform). We must make sure that the output (result structure) is a list, and that every single object within the list is what we expect to write to the new object. So, for example, one of our new ims_Incident objects will contain the data in the first object in the output list:
{
    "uid": "incident-TEST-E2E-1",
    "source": "incident-transform-Mock",
    "resolvedAt": null,
    "title": null,
    "url": "https://foo.com/TEST-E2E-1",
    "description": "unknown: null"
  }
We will have a single ims_Incident object with this data. After we run the transform, when we query ims_Incident, we should expect to find this object (if we search for "uid == incident-TEST-E2E-1").
Saving the Query
Once we have completed our GraphQL query as well as the JSONata and are content with the output, we can click on "Save Query" and name it.
Let's name our query "MyTaskToIncident"
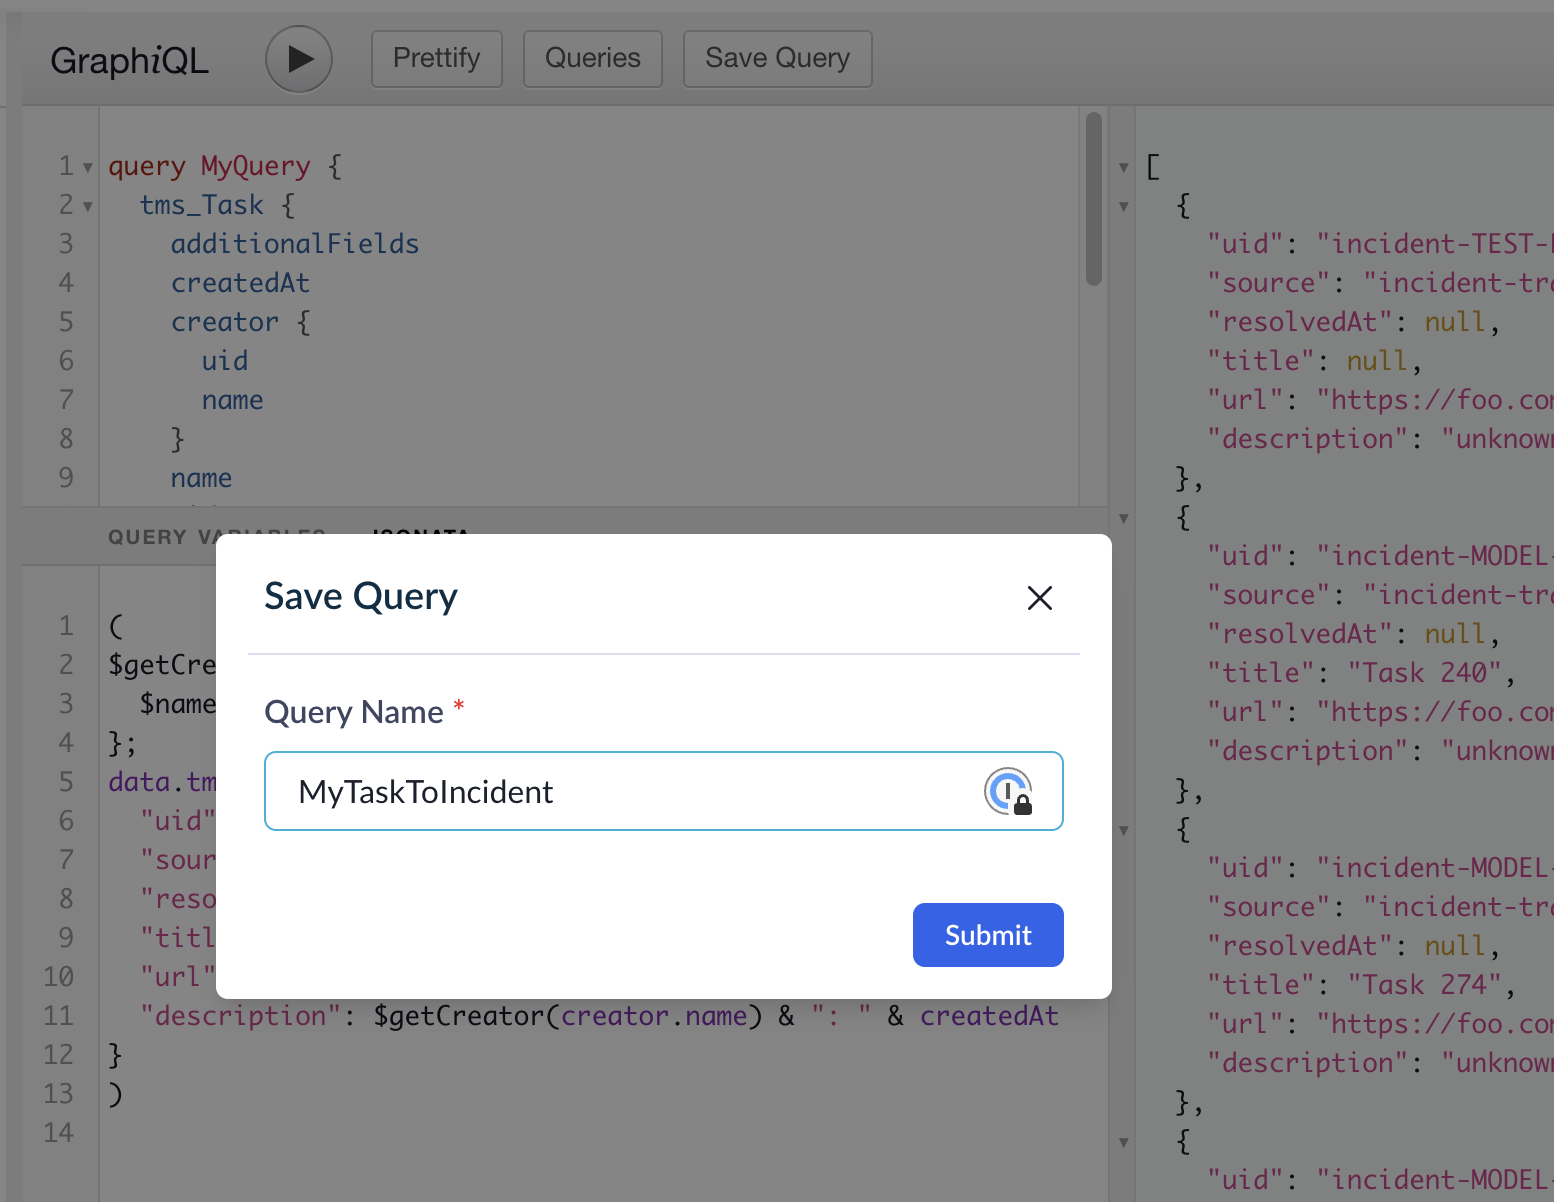
We click submit, and we should be able to see the Query saved under "Queries":
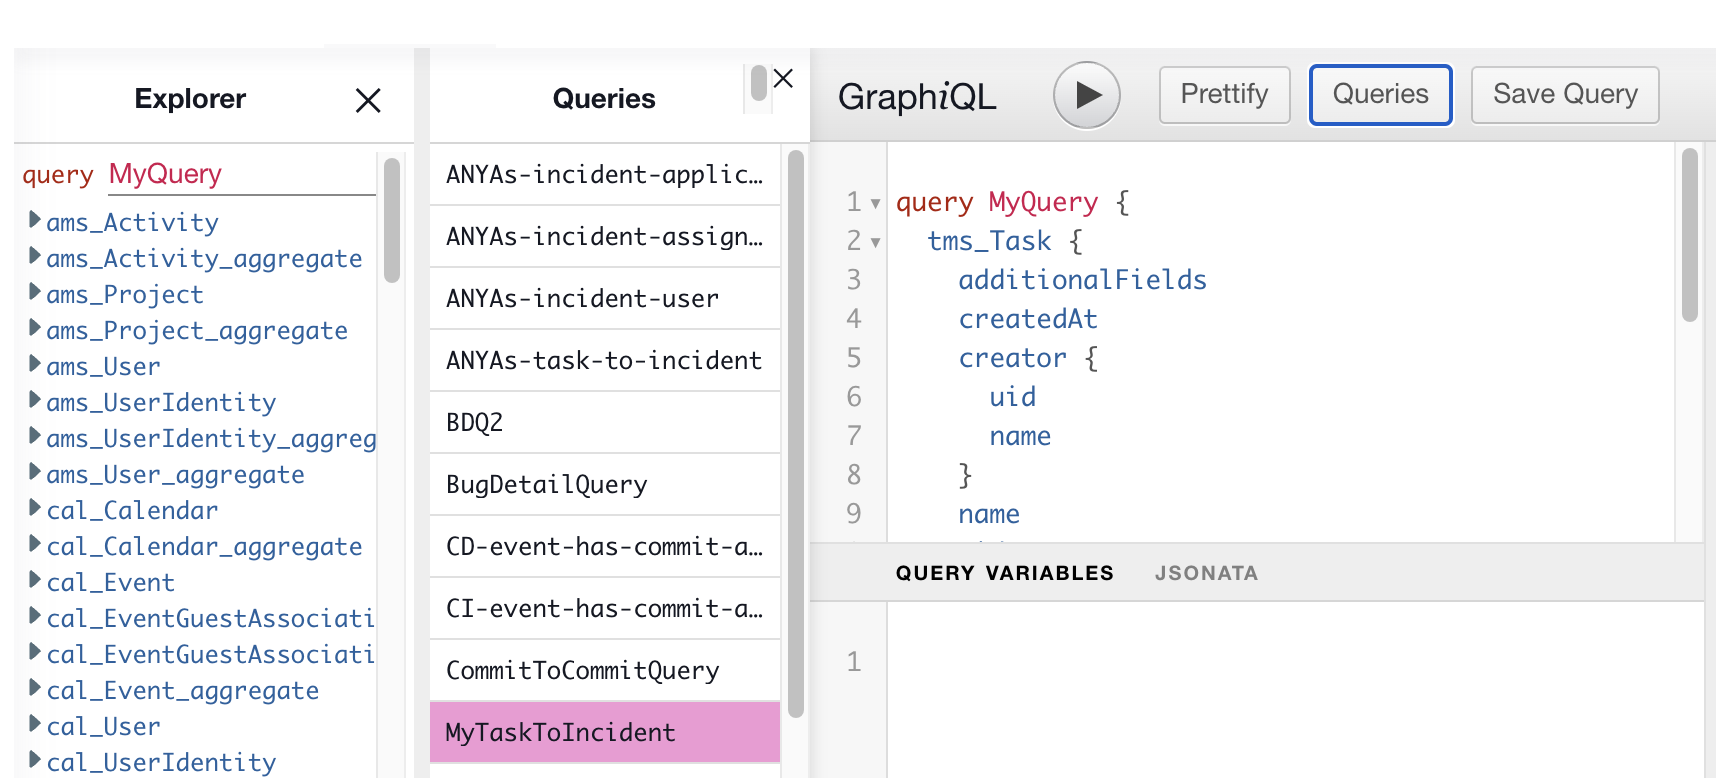
Now we will navigate to our sources, select a "Data Transform" Source, and reference this query by its name:
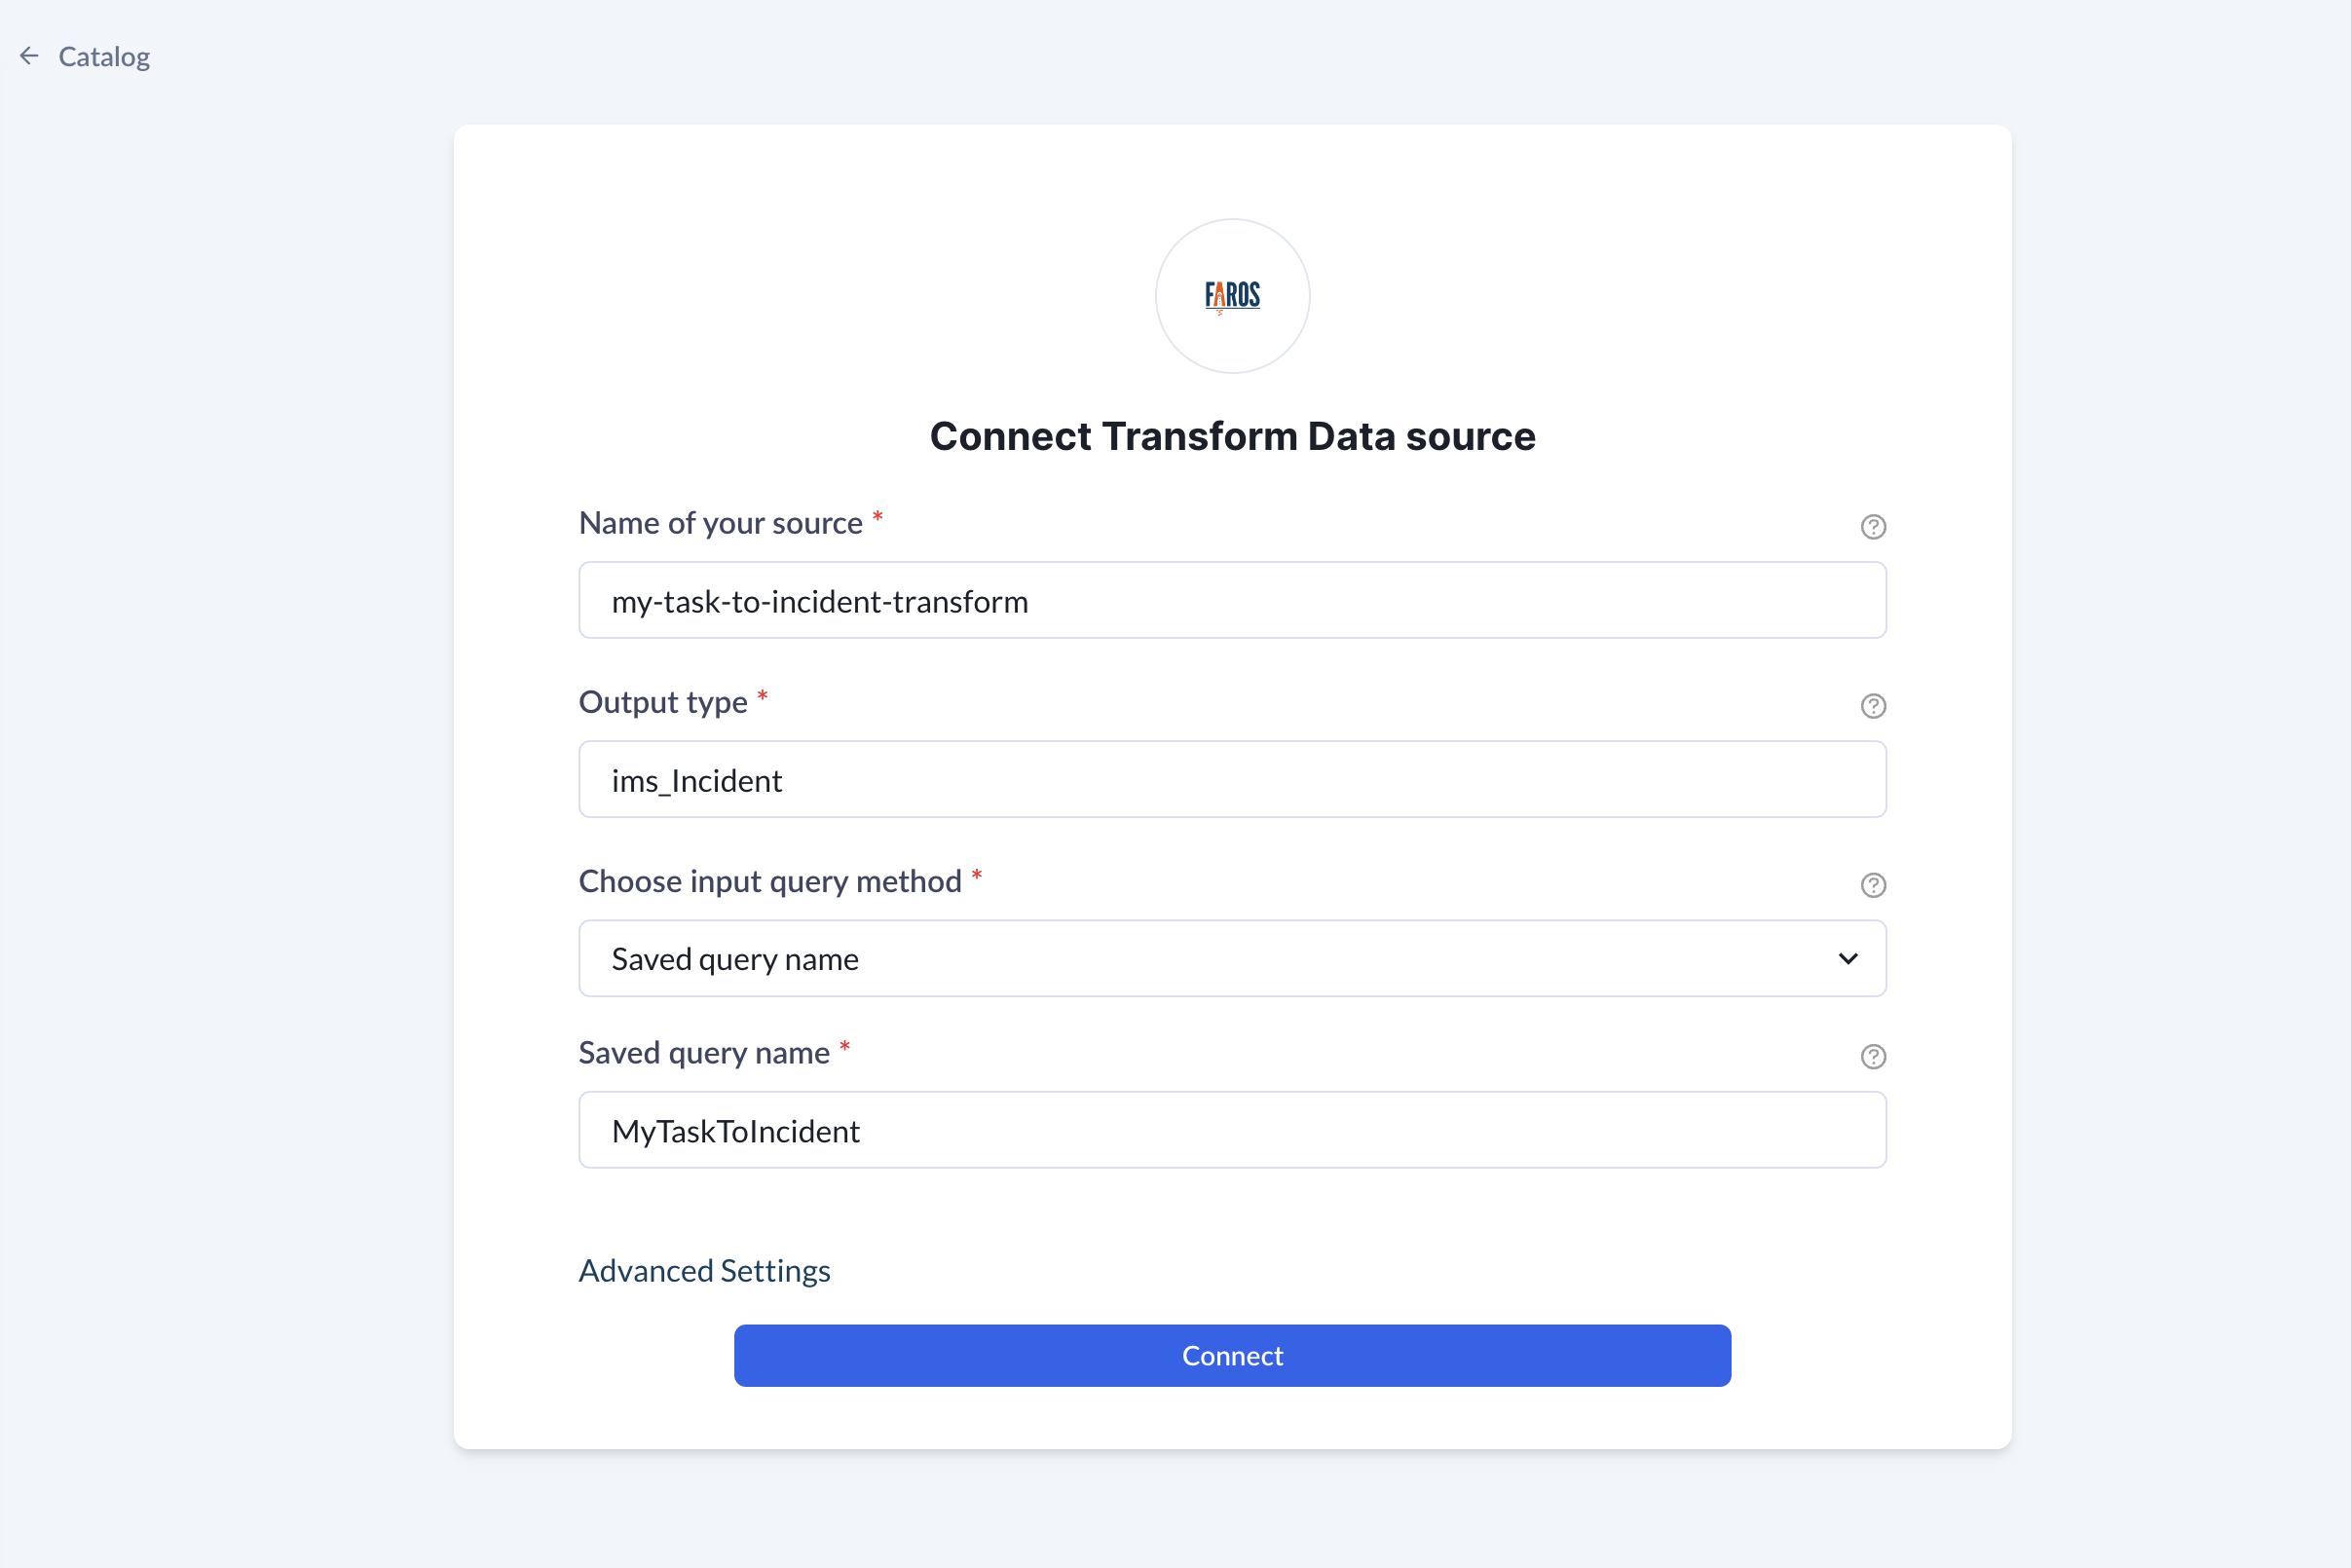
We name it a unique source name. We make sure to write the output is "ims_Incident". Then we choose to use a "Saved query name", and copy and paste our exact Query Name "MyTaskToIncident", and then we click on connect.
Once the source has completed running, we expect to see the new data in our graph.
Transforms for which the input and output are the same object:
The above example works for transforms which take an object as an input and write out a different object as the output (e.g. "tms_Task" -> "ims_Incident"). When you are transforming an object and hoping to write the same object (e.g. "tms_Task" -> "tms_Task"), you need to make sure you are aware of various factors, for more on this, reach out to the Faros team.
Validating your new data was written
After the transform has completed its run, you should expect to see text like this in your airbyte connector logs:
The number of records (in this case 1521) will differ depending on how much data input you have.
Now we'll navigate back to the GraphiQL interface to check if those objects were written. We'll search for ims_Incident objects where the "origin" field is the name of the transform, "my-task-to-incident-transform" (not the Query name, "MyTaskToIncident"). Then within the query we'll add the field names we wrote to.
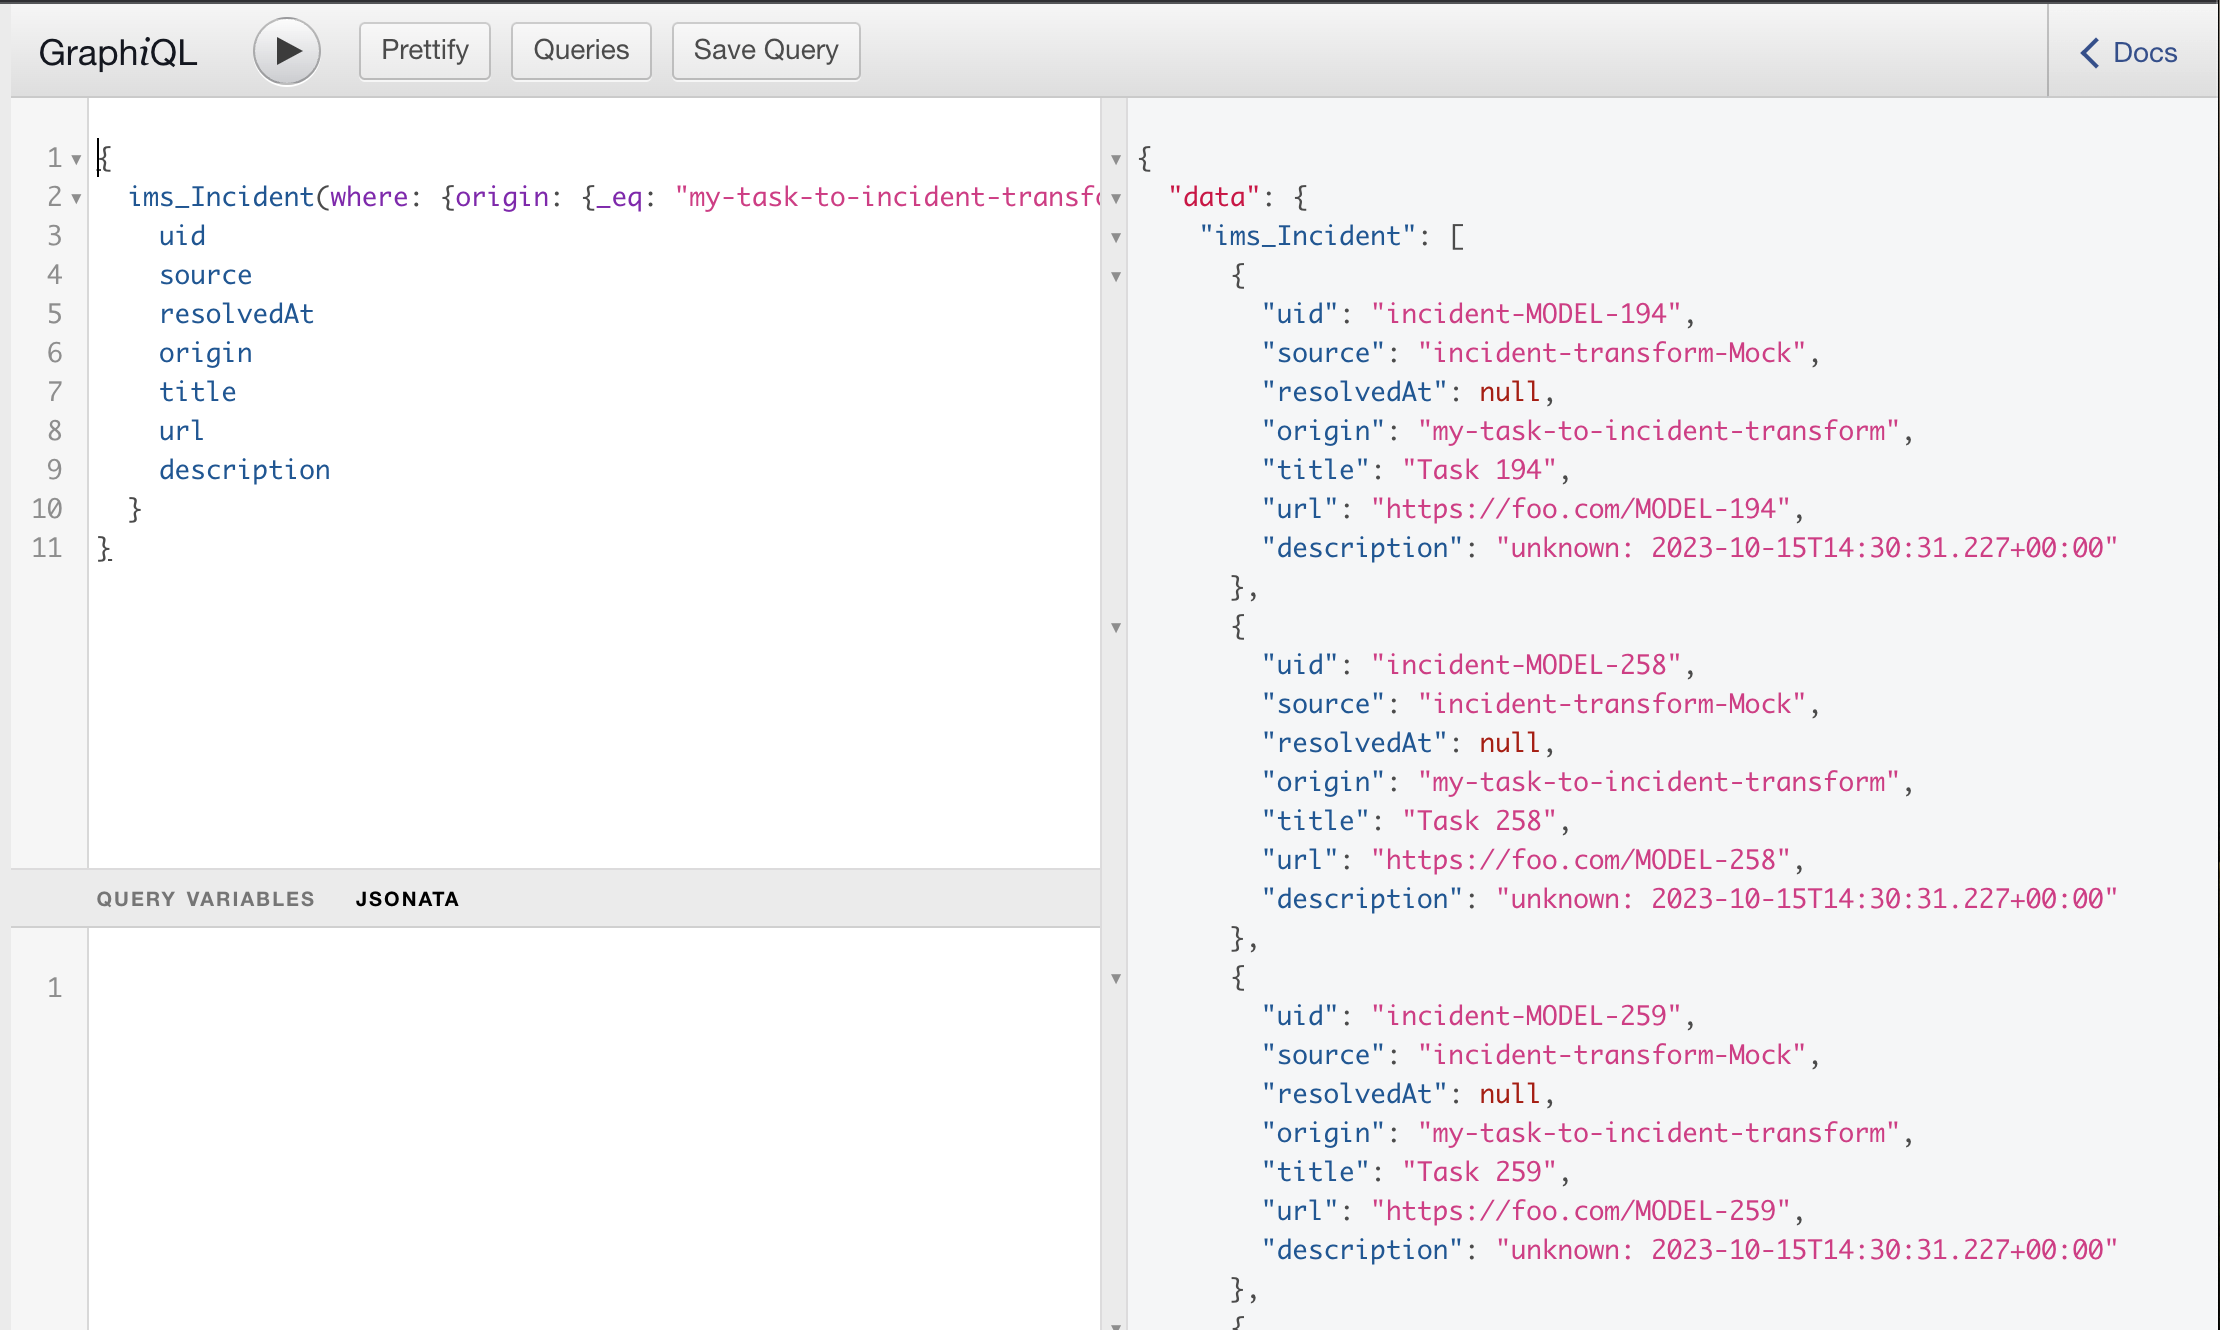
GraphQL Code for copying:
{
  ims_Incident(where: {origin: {_eq: "my-task-to-incident-transform"}}) {
    uid
    source
    resolvedAt
    origin
    title
    url
    description
  }
}
It looks like we have the objects we expected! Now we have the data set up in the underlying Graph DB. There's no more that we need to do. After the next graph sync the data will be available in the Reports Database.
(Optional) Triggering a graph sync
If you want to check the data in the Reports Tables as soon as possible, and you don't have much data in your graph, then you can trigger a graph sync. In order to start a graph sync, navigate to the "Graphs" page (also found under "Workspaces"), and find the graph that you're on, then click on the sync button.
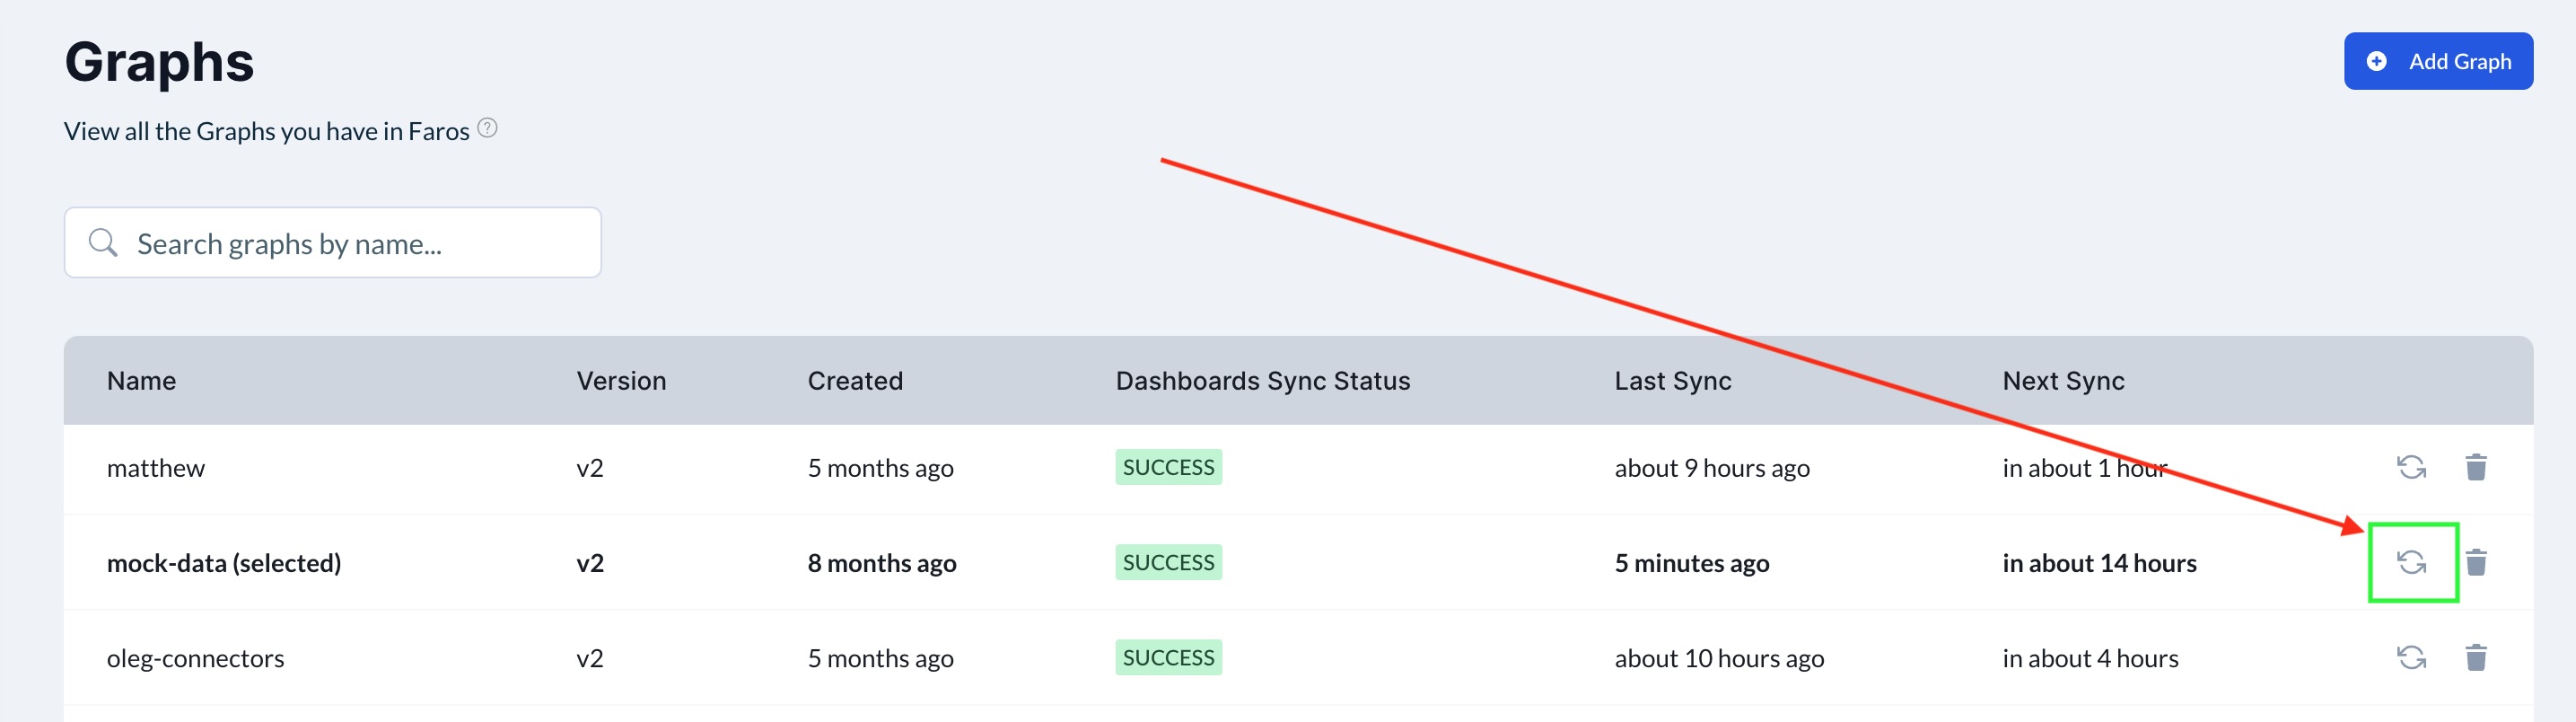
The sync might take a significant amount of time to run, the time depends on the amount of data in the graph (it could take as long as 6 hours). Once the sync finishes you will see the data in your "Reports" tables.
Updated 5 months ago