
Setting up Azure AD SSO
Availability: Enterprise Edition for users with Owner permissions
Azure Active Directory (AD) is one of the SAML integrations supported by the Enterprise Edition of Faros SaaS. This guide describes the steps for configuring Azure AD with Faros SaaS deployment. The configuration can include binding Faros user roles to Azure AD organizational units or groups.
Add a SAML Application
Prerequisites
An Azure AD user account with a
Global Administratorrole, aCloud Application Administratorrole, or anApplication Administratorrole
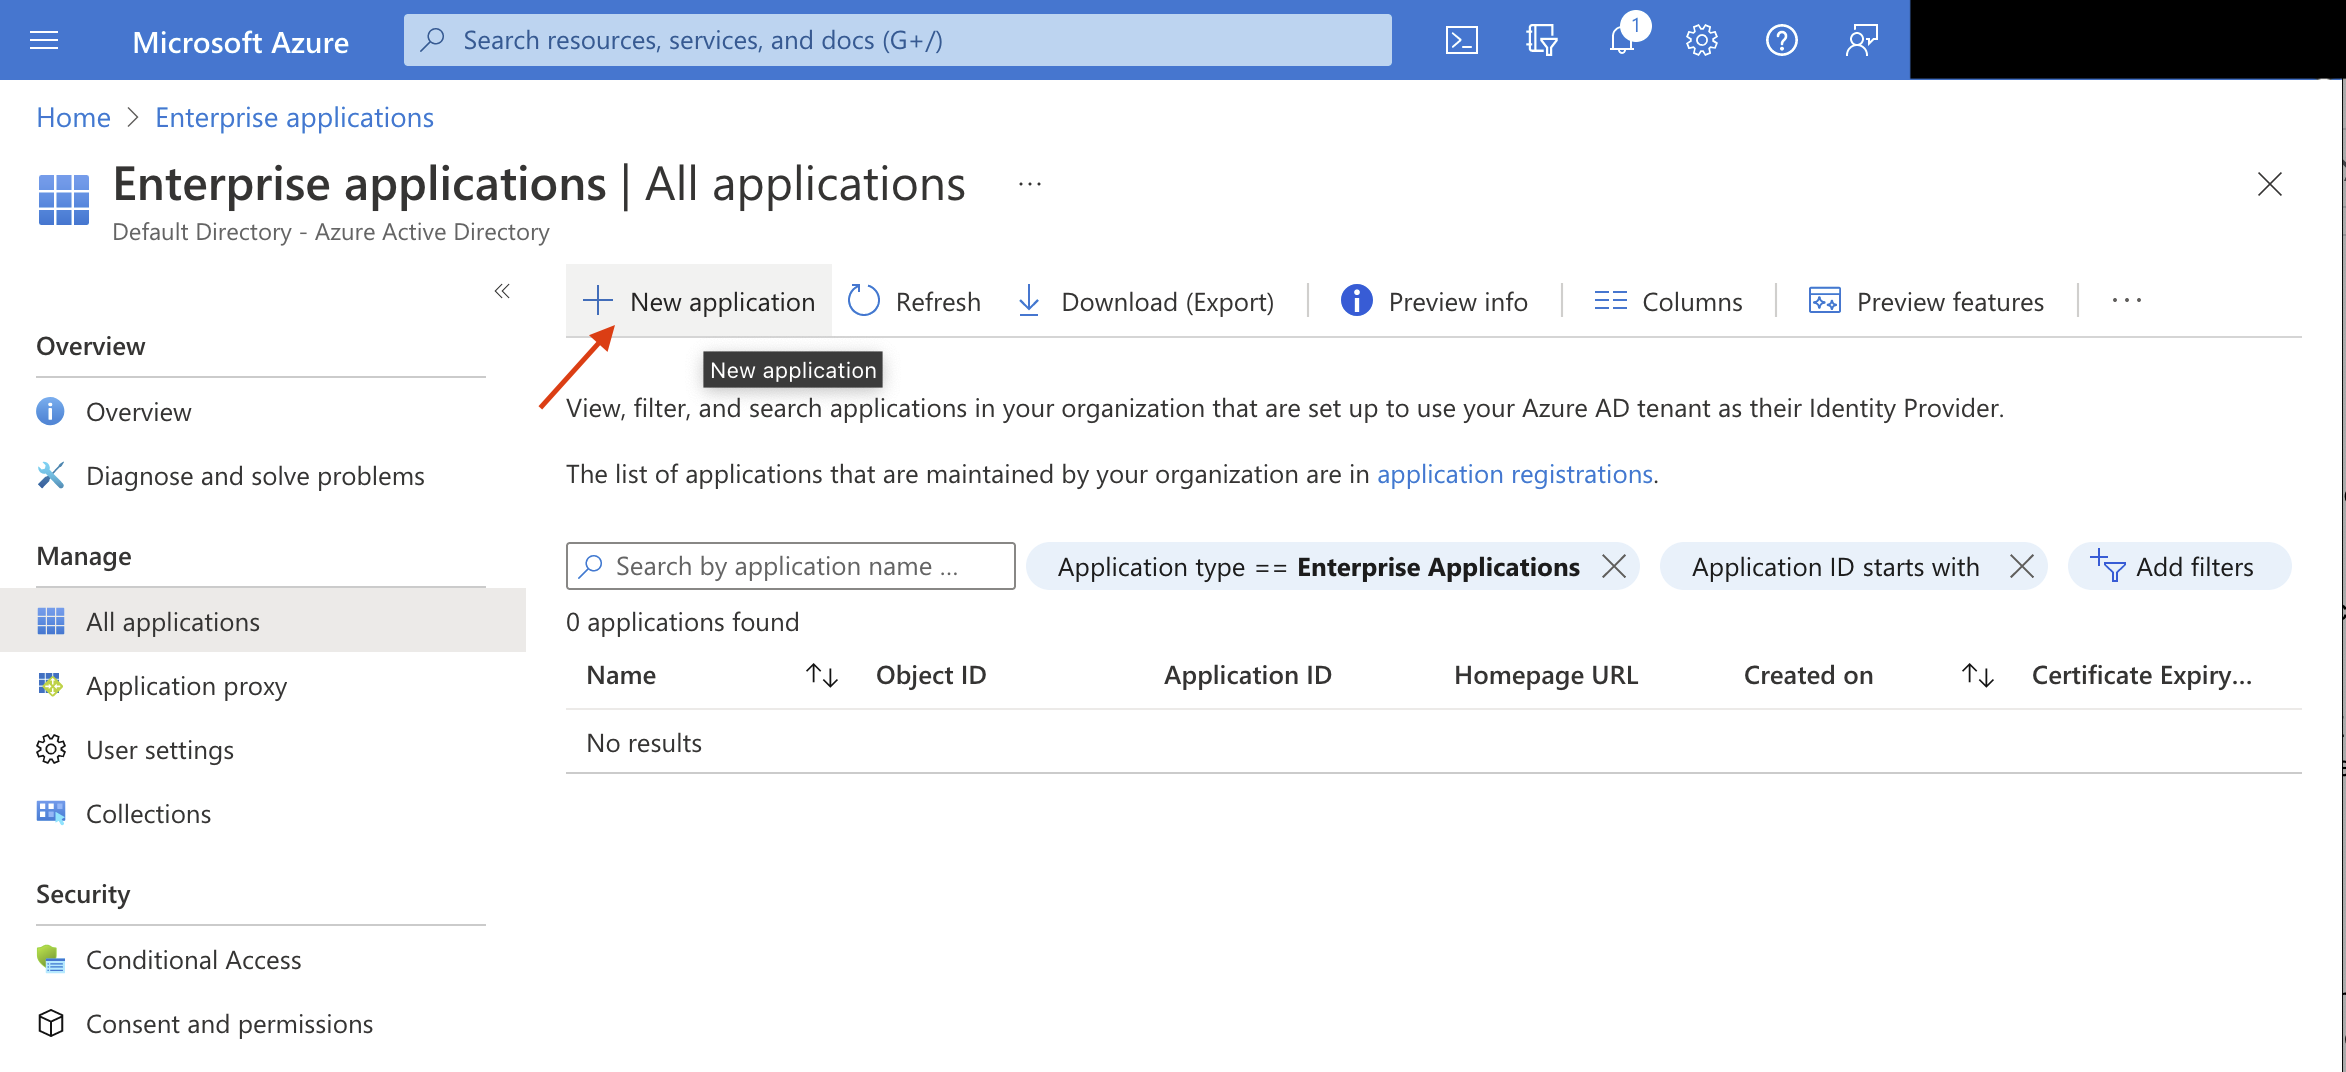
First, add an enterprise application to an Azure AD tenant by following these steps:
- Sign in to
Azure Active Directory Admin Center. Note that your account must be authorized to add an application (see prerequisites above). - In the left menu, choose
Enterprise applicationswhich opens theAll applicationspane, displaying a list of the applications in the Azure AD tenant. - In the
Enterprise applicationspane, choose theNew applicationoption which opensBrowse Azure AD Gallerypane, displaying tiles for on-premises applications, featured applications, and cloud platforms
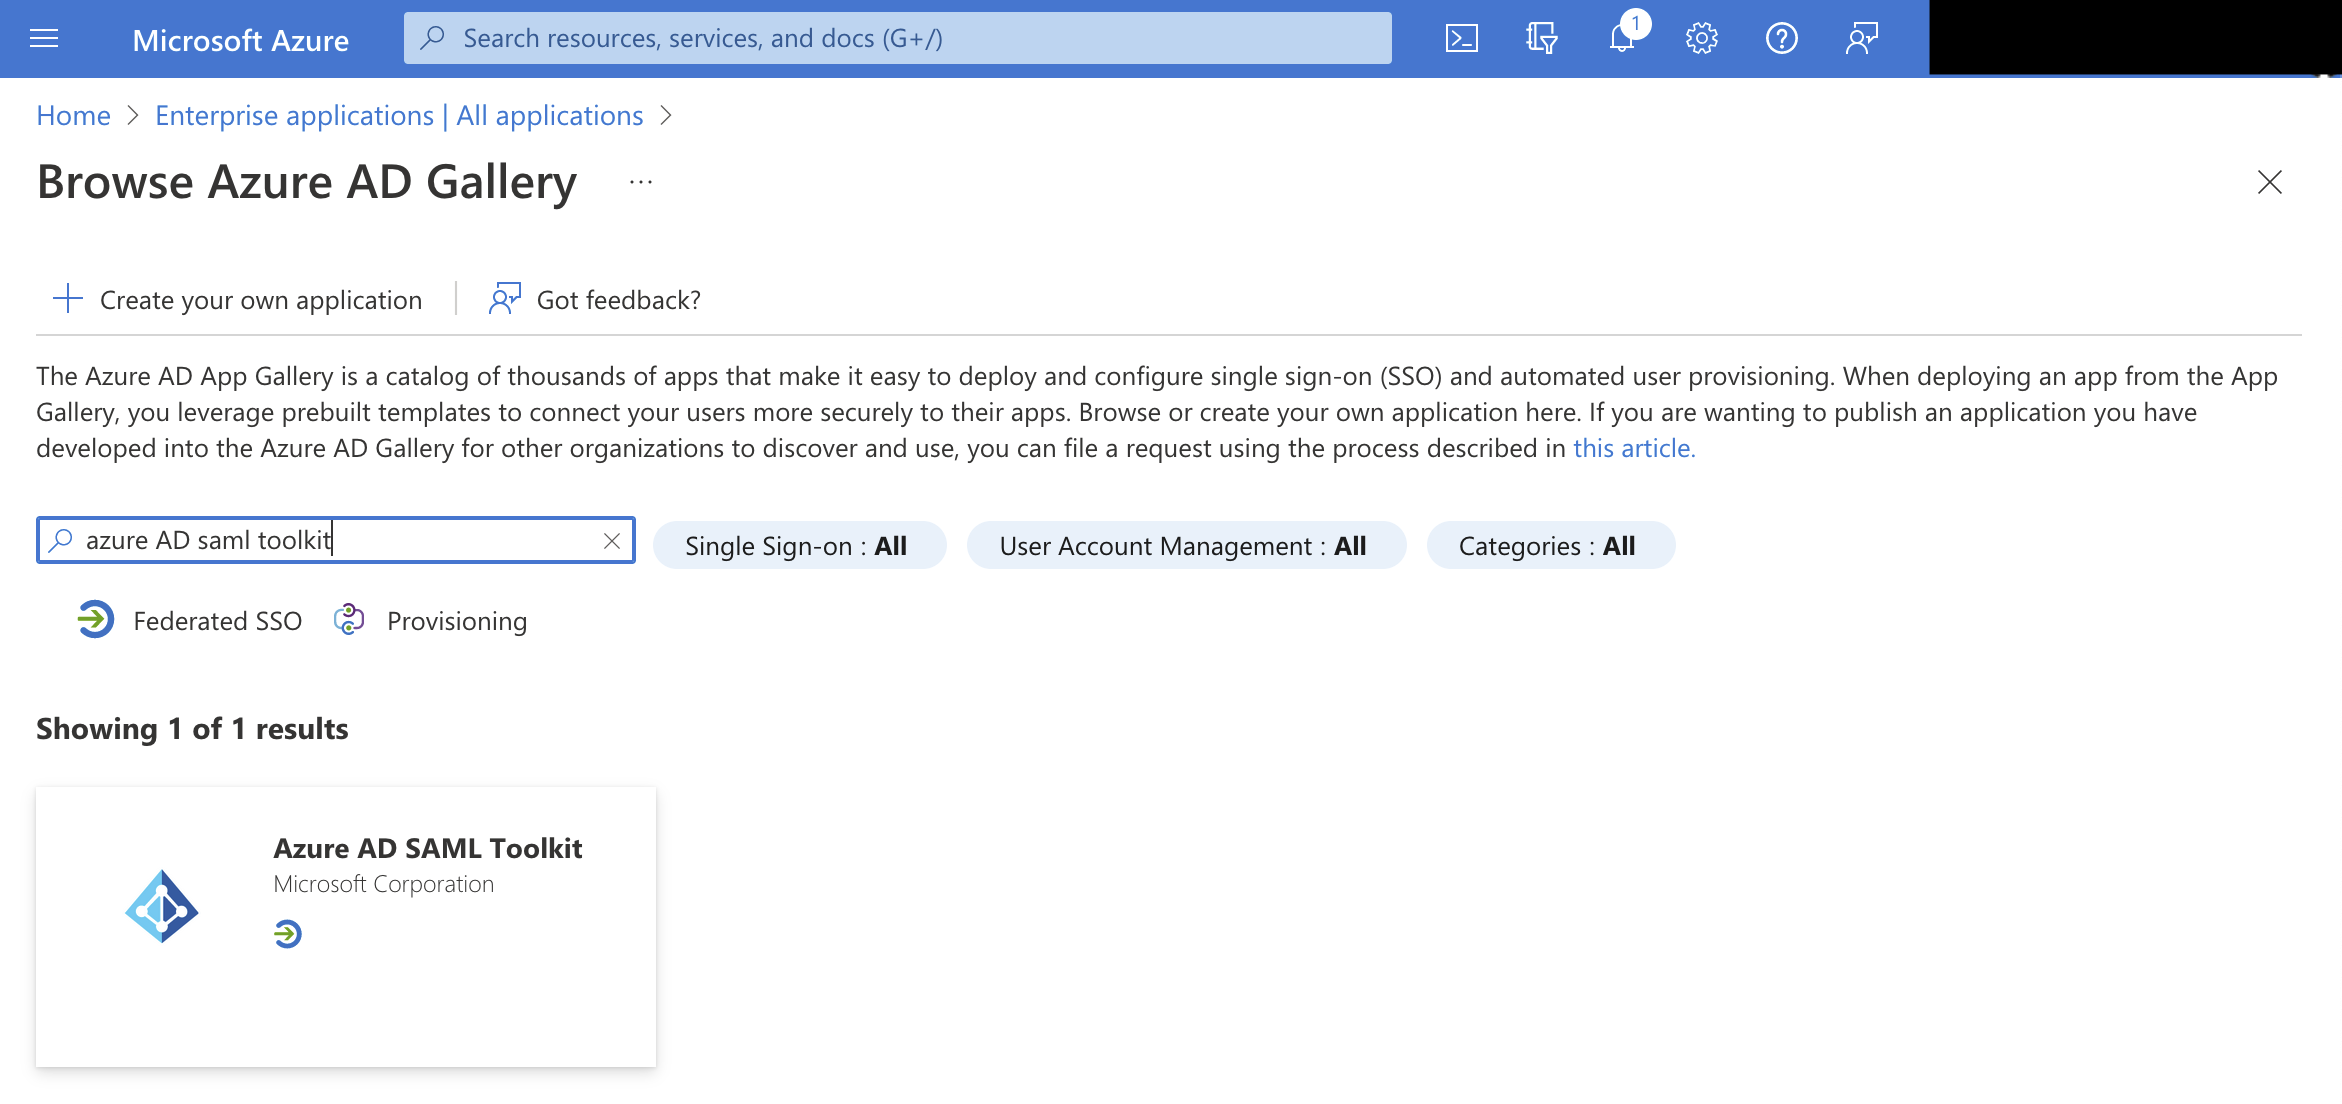
- Search the gallery for
Azure AD SAML Toolkit.
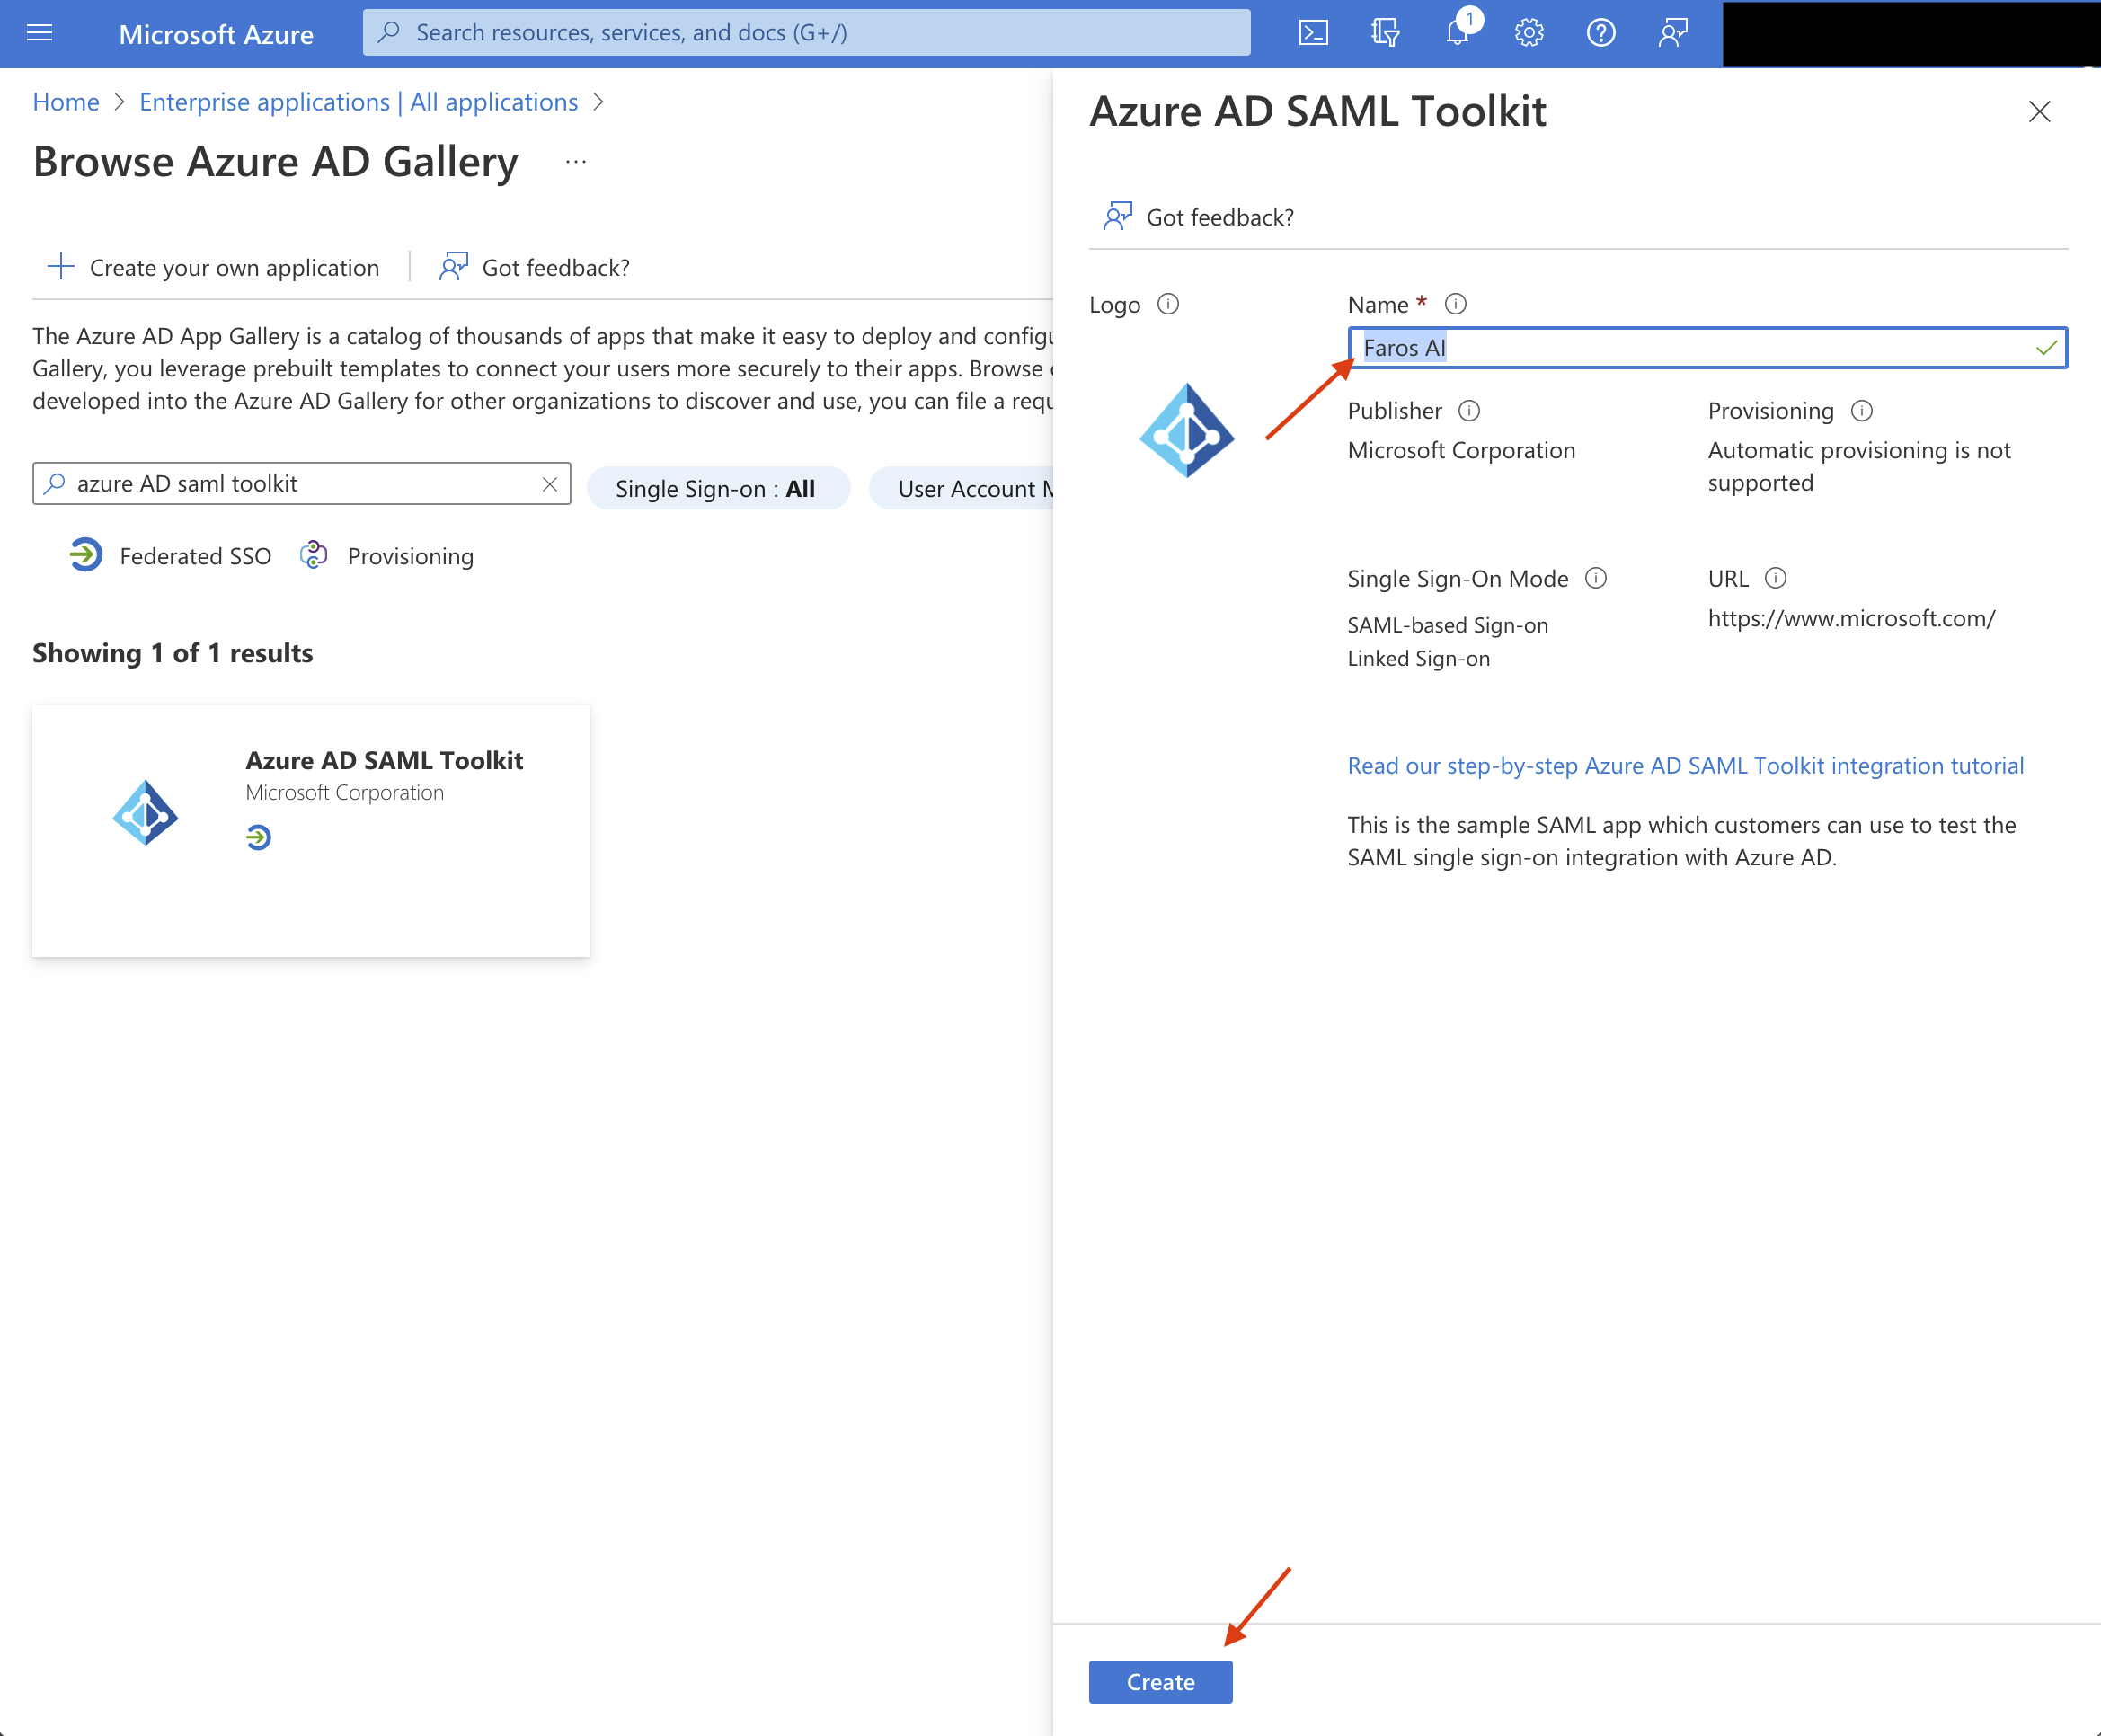
- Click on
Azure AD SAML Toolkitto create new SAML application and name itFaros AI, then clickCreate.
Configure SSO for a SAML Application
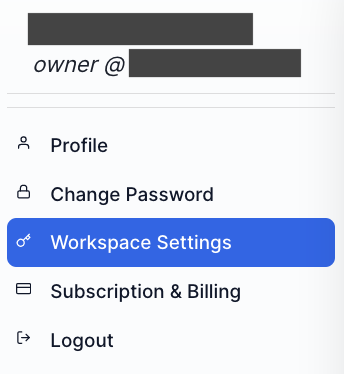
- In a separate browser window log in to Faros and then click on the profile icon in the top right corner of the window. Choose
Workspace Settingsoption from the drop down menu, then click theSSOoption underWorkspace(available to users with FarosOwnerrole only).

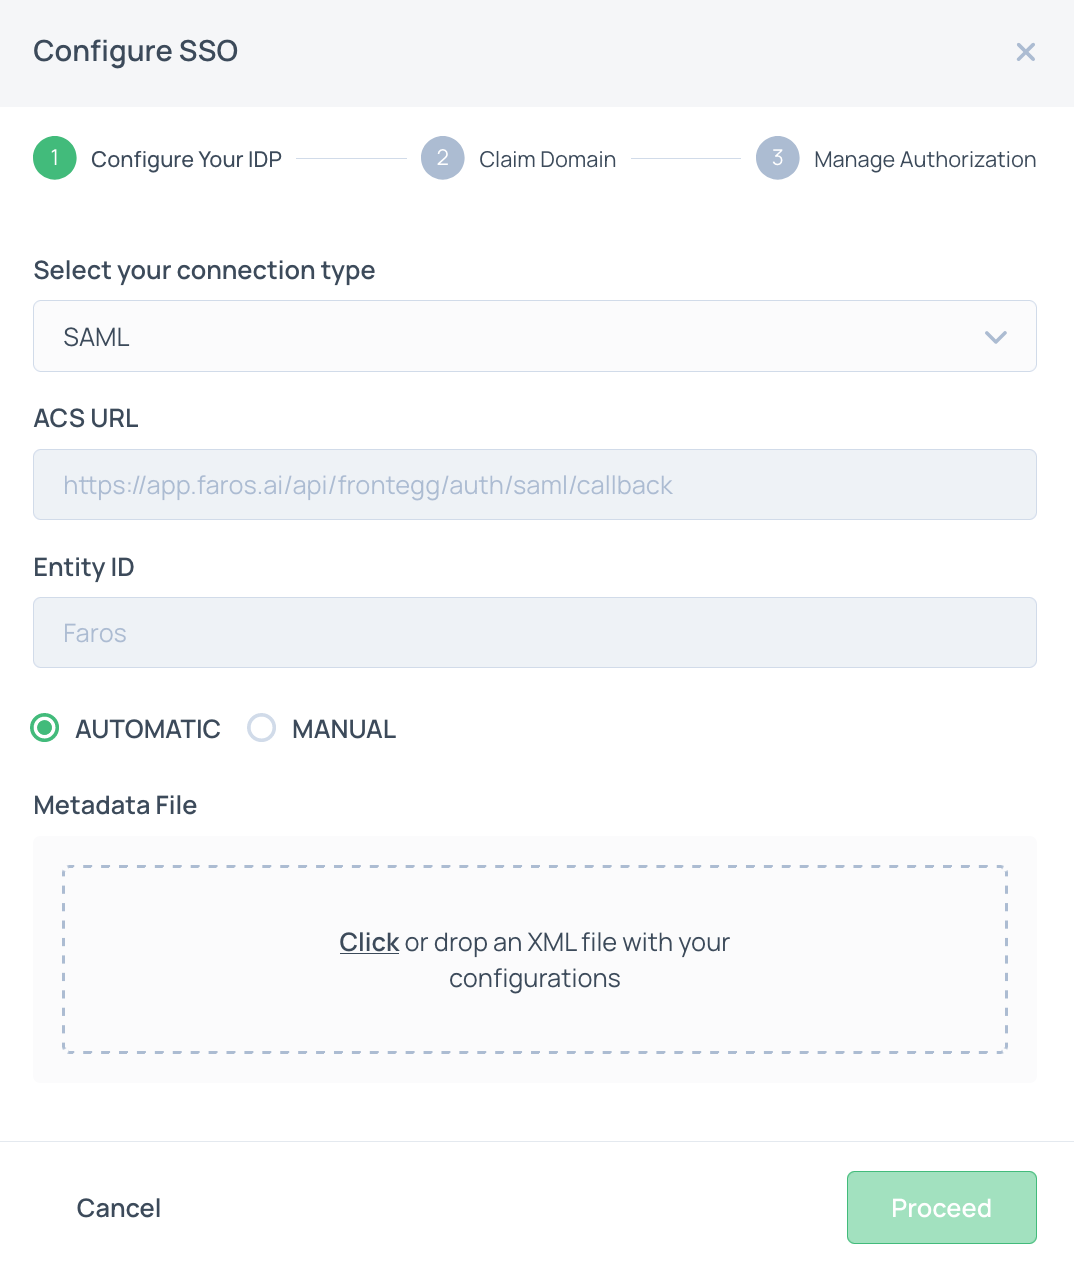
-
Select
Add Newand chooseSAMLfor connection type. NoteACS URLandEntity IDvalues. You will need these when configuring Azure AD SSO next. -
Return to the Azure Active Directory Admin Center. In the left menu, choose
Enterprise applicationswhich opens theAll applicationspane, displaying a list of applications in the Azure AD tenant. Search for and chooseFaros AIapplication you created earlier. -
In the left menu, under the
Managesection chooseSingle sign-onto configure SSO for the Faros AI application -
Choose
SAMLto open the SSO configuration page. -
Click on the
Editicon next toBasic SAML Configurationto edit the settings.
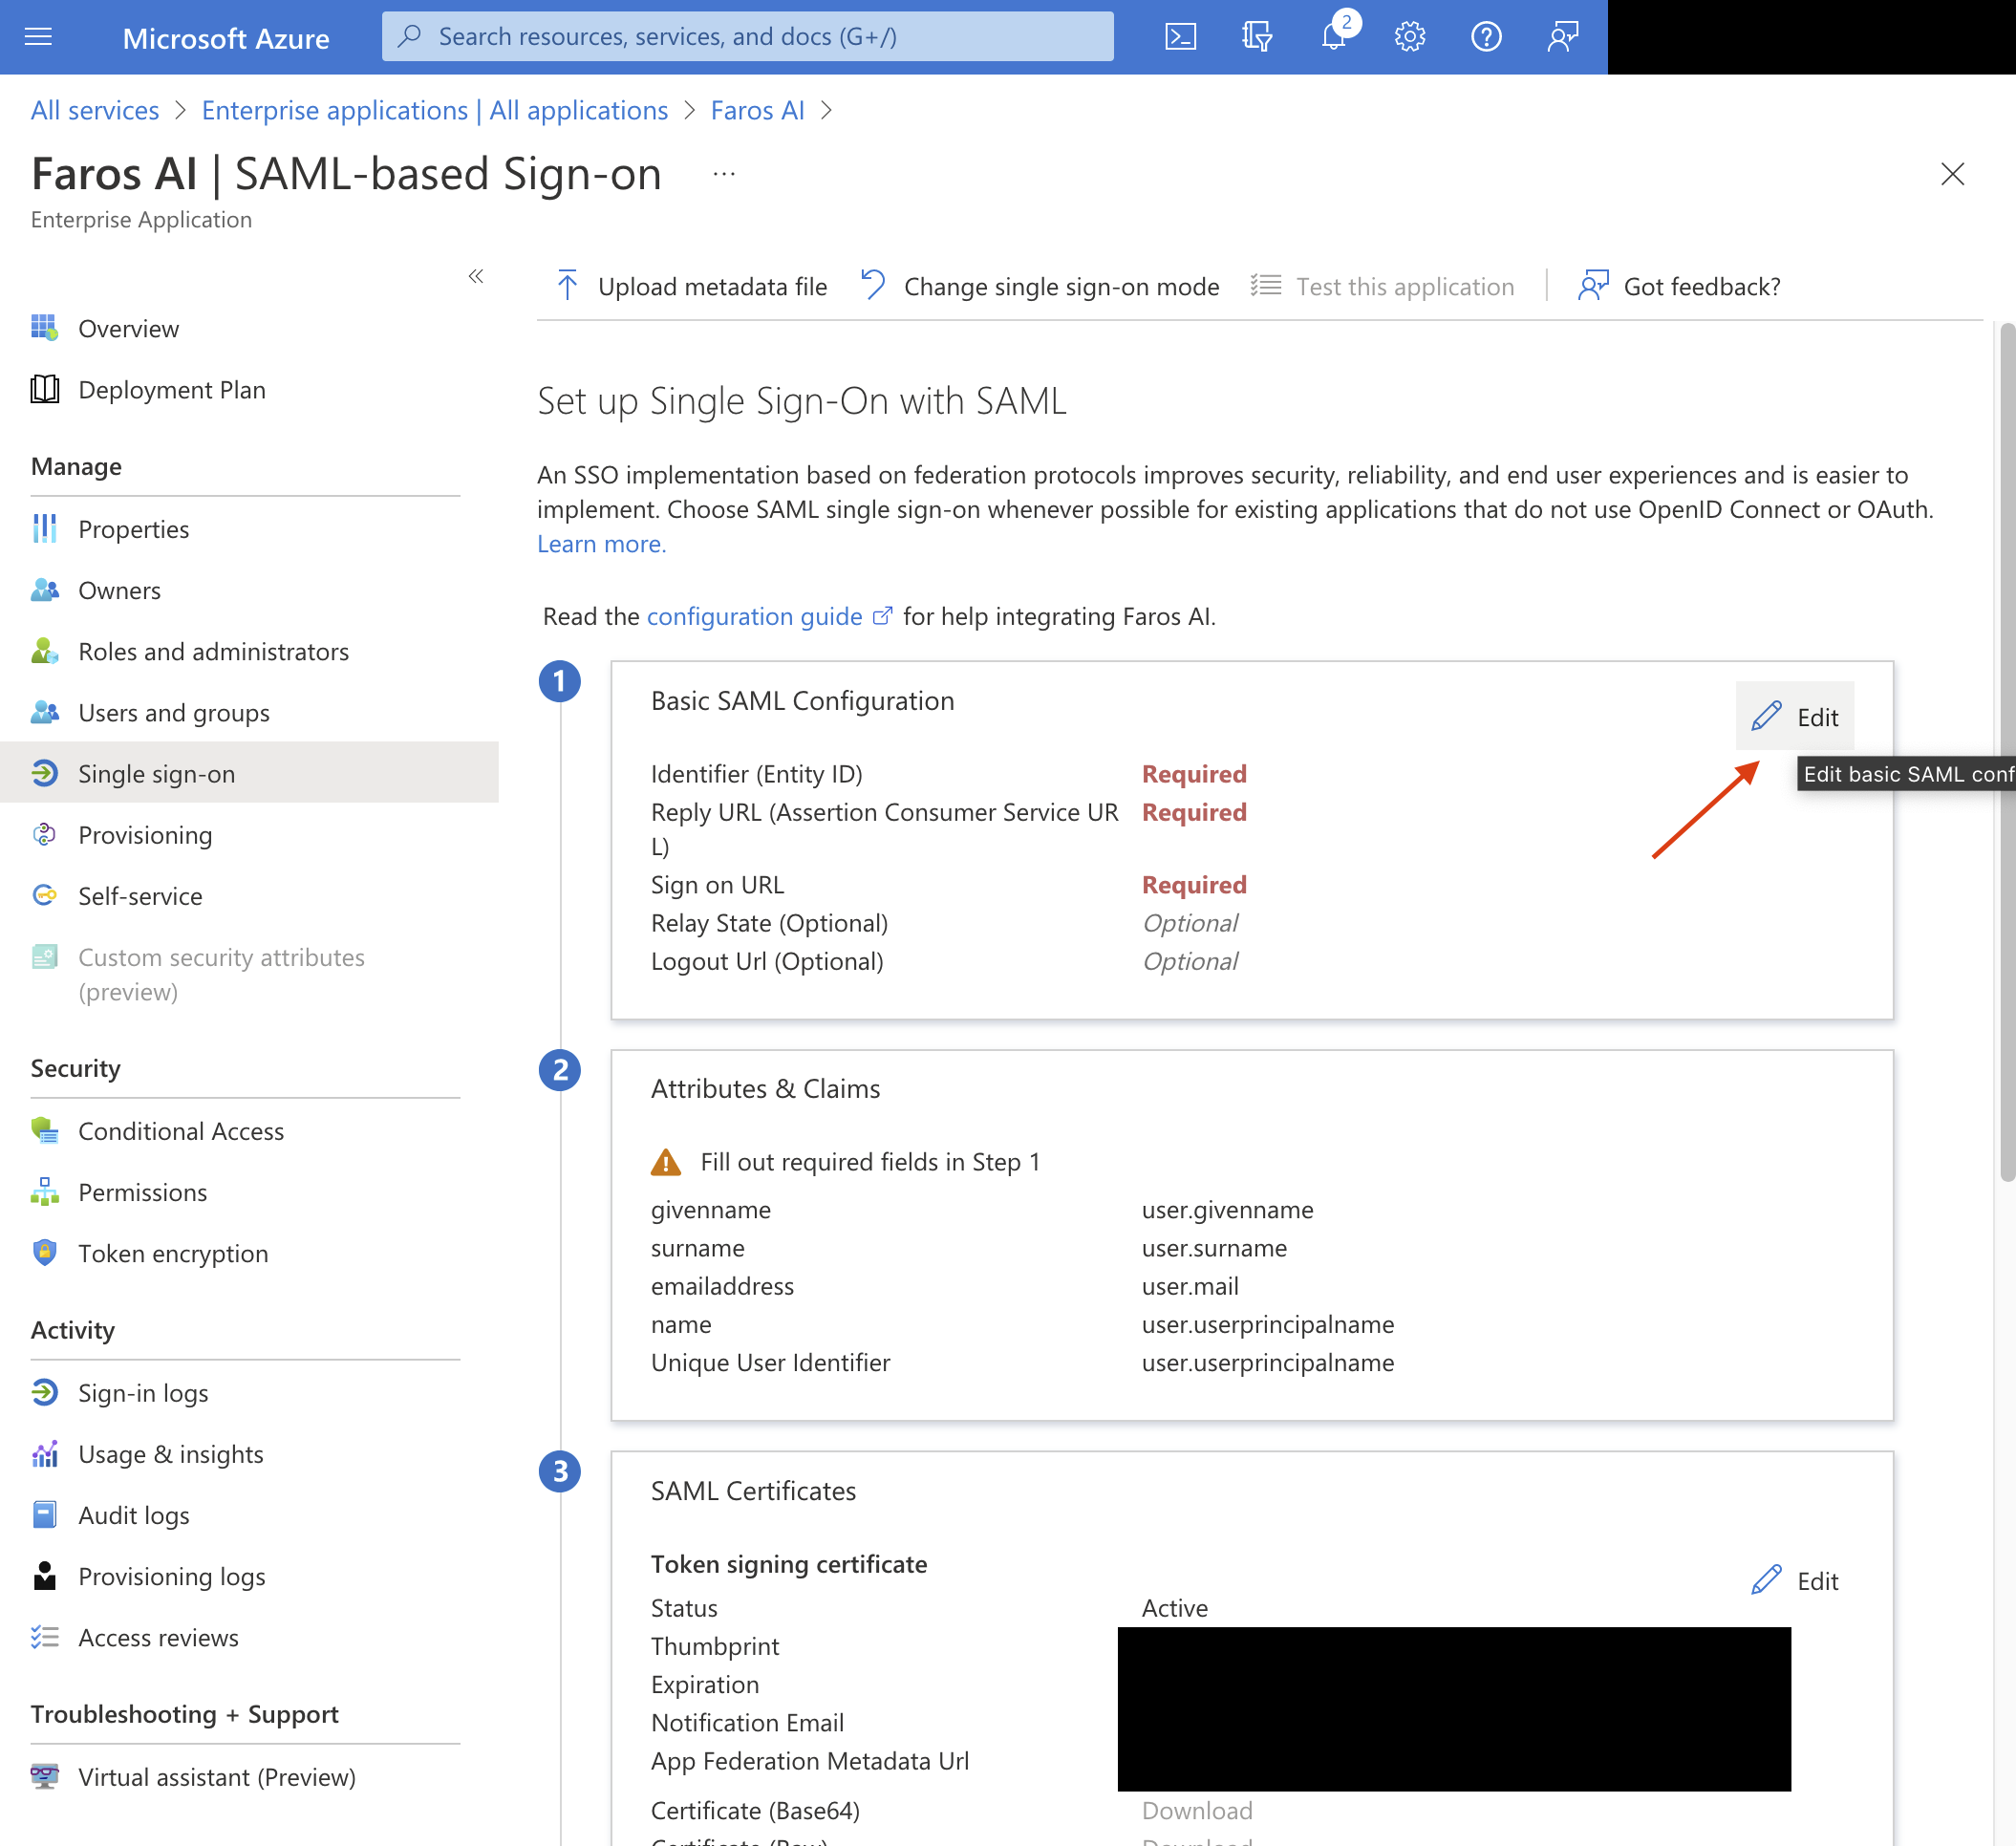
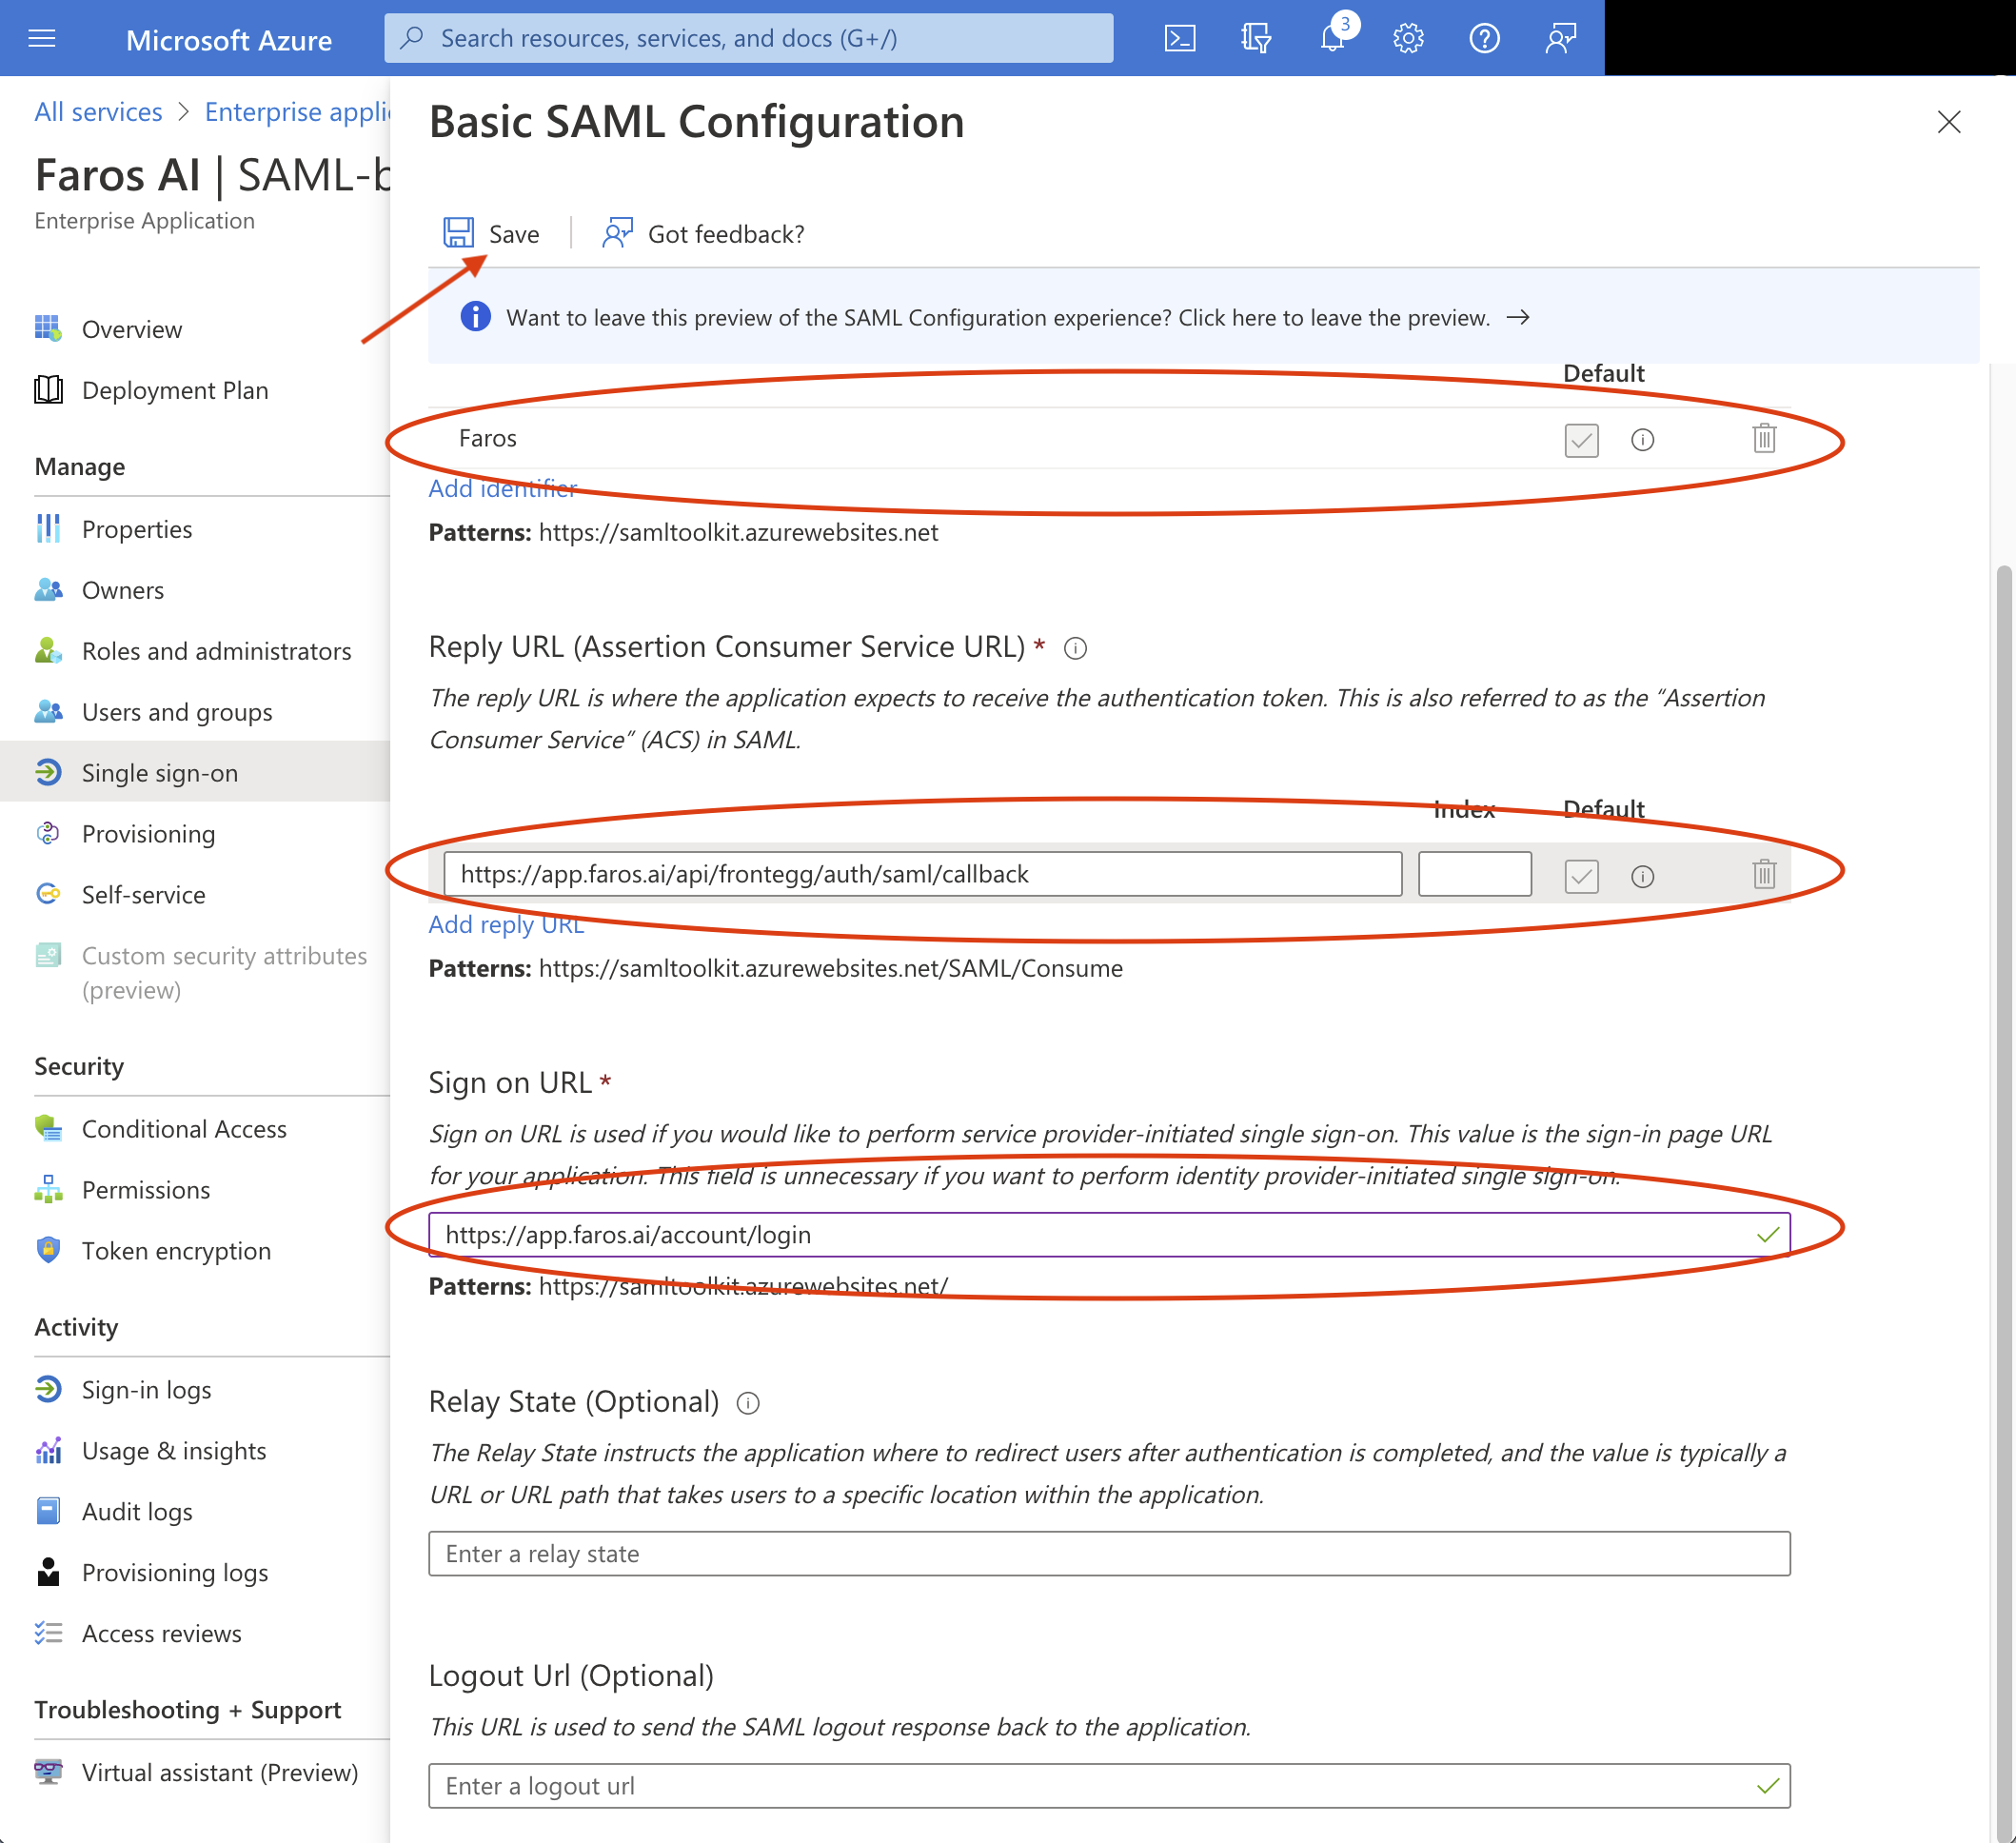
- Fill in
Identifier (Entity ID)field with the value of FarosEntity IDnoted in previous steps. - Fill in
Reply URLfield with the value of FarosACS URLnoted in previous steps. - Fill in
Sign on URLwithhttps://app.faros.ai/account/login - Click
Save
- In the
SAML Certificatesection of theSingle sign-onpane, findFederation Metadata XMLand chooseDownloadto download and save the certificate xml on your computer. - Return to the browser's window with Faros application UI, SSO setup and upload the certificate metadata xml.
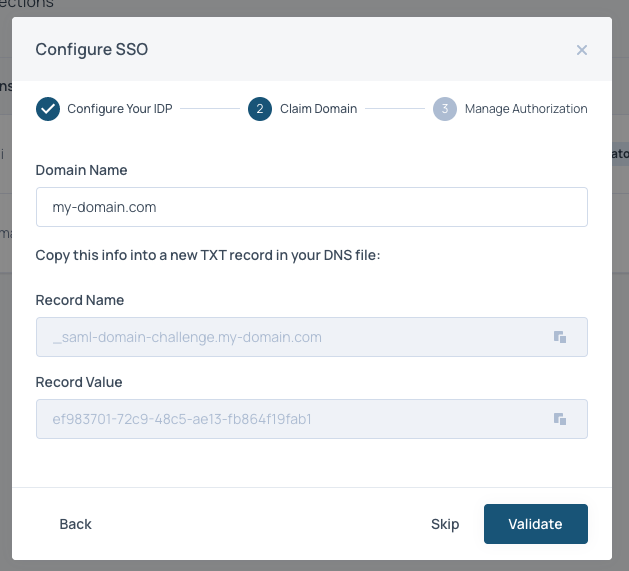
- Click
Proceedand enter the domain of your emails. These will be the emails that can login to Faros via Azure AD SSO. After clickingProceedyou will be provided a TXT record. Add it to your DNS.
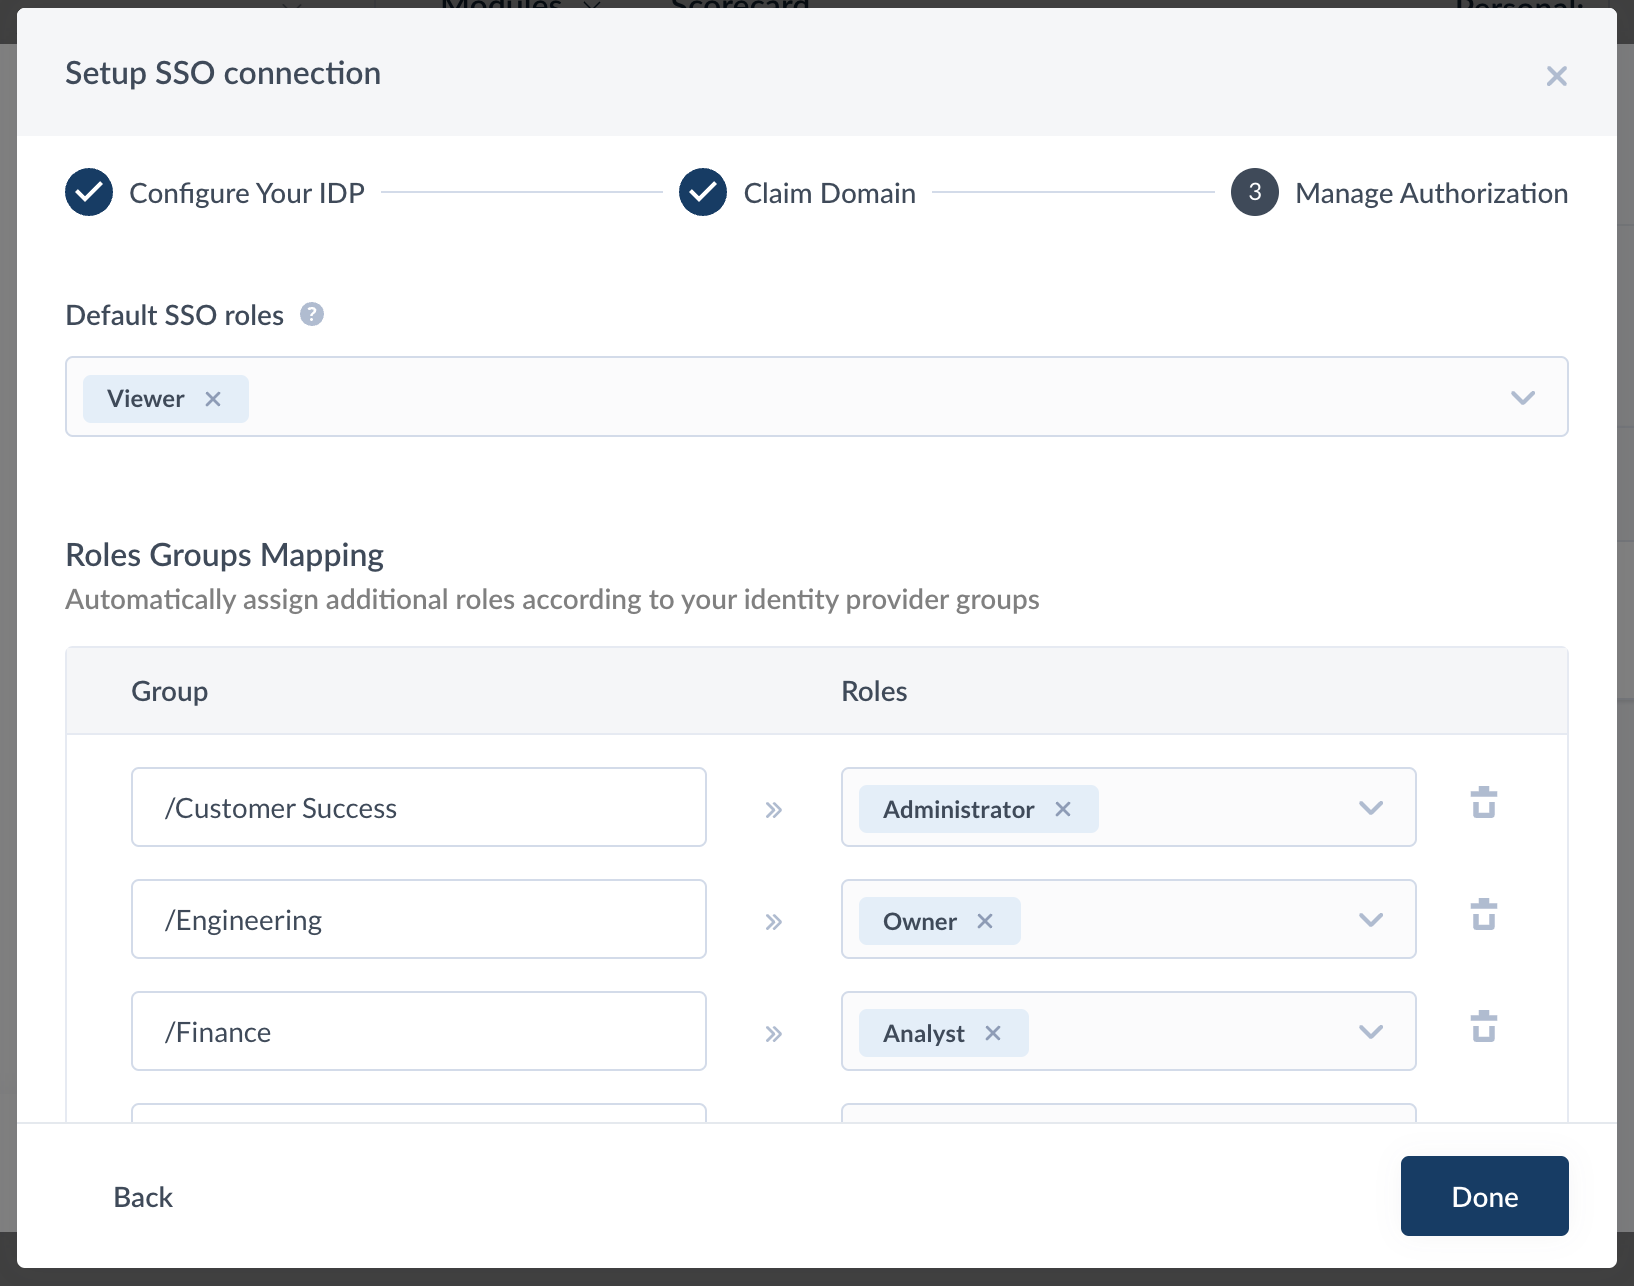
- Choose default SSO Faros roles (e.g,
Viewerrole) to be assigned to all Faros users in the Azure AD. More information on roles here. Note that the default SSO roles can be overwritten by the mappings in theRoles Groups Mappingsection. To enable groups to roles mapping,groupsattribute should be configured in Azure AD -> Faros AI application -> Single Sign-On -> SAMLAttributes & Claimssection populated withusers.groupsvalue.
Updated 3 months ago