Configuring your Source system with webhooks
Once your webhook definition is created in Faros, you can configure your source system. Each webhook definition provides a unique URL to send data to, with the following structure:
POST https://prod.api.faros.ai/webhooks/:webhook_id/events
Modify :webhook_id with the correct id from your webhook definition (API reference)
Tip
Please refer to the documentation of the source system to learn best practices on how to set up webhooks for it.
Configuring a GitHub webhook
Please refer to GitHub documentation for full details.
GitHub webhooks can be set up to send GitHub events to Faros either at the repository or the organization level:
- Repository level: sends events for that repository only. You need to have Admin permission.
- Organization level: sends events for all repositories and members. You need to be an Owner for the organization to configure these.
To configure a webhook for either a repository or an organization, go to the repository or organization main page, select Settings from the top-level menu, then select Webhooks under Code and Automation.

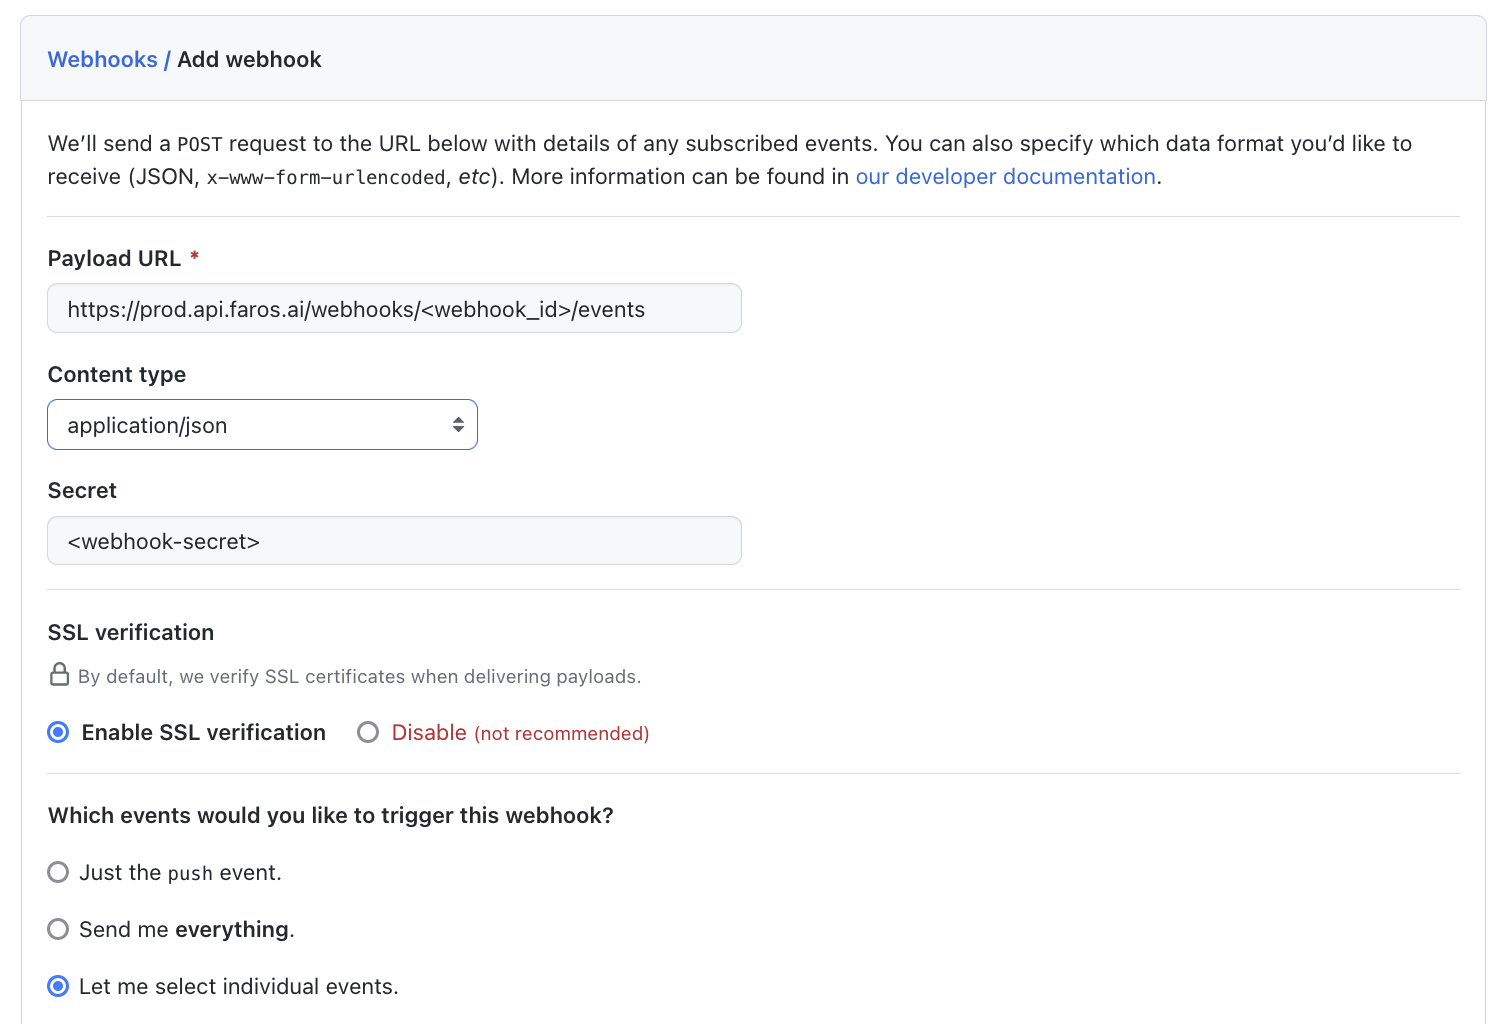
Setup the webhook
- Input the
https://prod.api.faros.ai/webhooks/:webhook_id/eventsas the payload URL. Modify:webhook_idwith the correct id from your webhook definition. - Select Content type to be application/json.
- (Recommended) If you provided a
secretwhen creating a Faros webhook definition, supply the same value here. You can read more how GitHub secures your webhook using the secret here. - Choose what GitHub events to send to Faros. Select Let me select individual events and select:
- Branch or tag creation
- Branch or tag deletion
- Pull request review comments
- Pull request reviews
- Pull requests
- Pushes
- Repositories
- Organizations (event that can only be configured when setting a webhook for an Organization)

Authentication
To send these events the GitHub user must have at least read-level access permissions for:
- Contents - repository
- Members - organization
- Pull requests - repository
- Metadata - repository
After successfully adding the webhook, it will appear in the list of webhooks configured for the repository or organization. Select the webhook to view its details to ensure it is correctly set up. At the bottom of the page, there should be a section Recent Deliveries showing that it successfully sent a "ping" event to your Faros webhook.
Configuring a Jira webhook
Please refer to Jira Documentation for full details.
Setup the webhook
Jira Webhooks can be set either from the administrator console or using Jira REST API. This guide will instruct how to configure a webhook from the console.
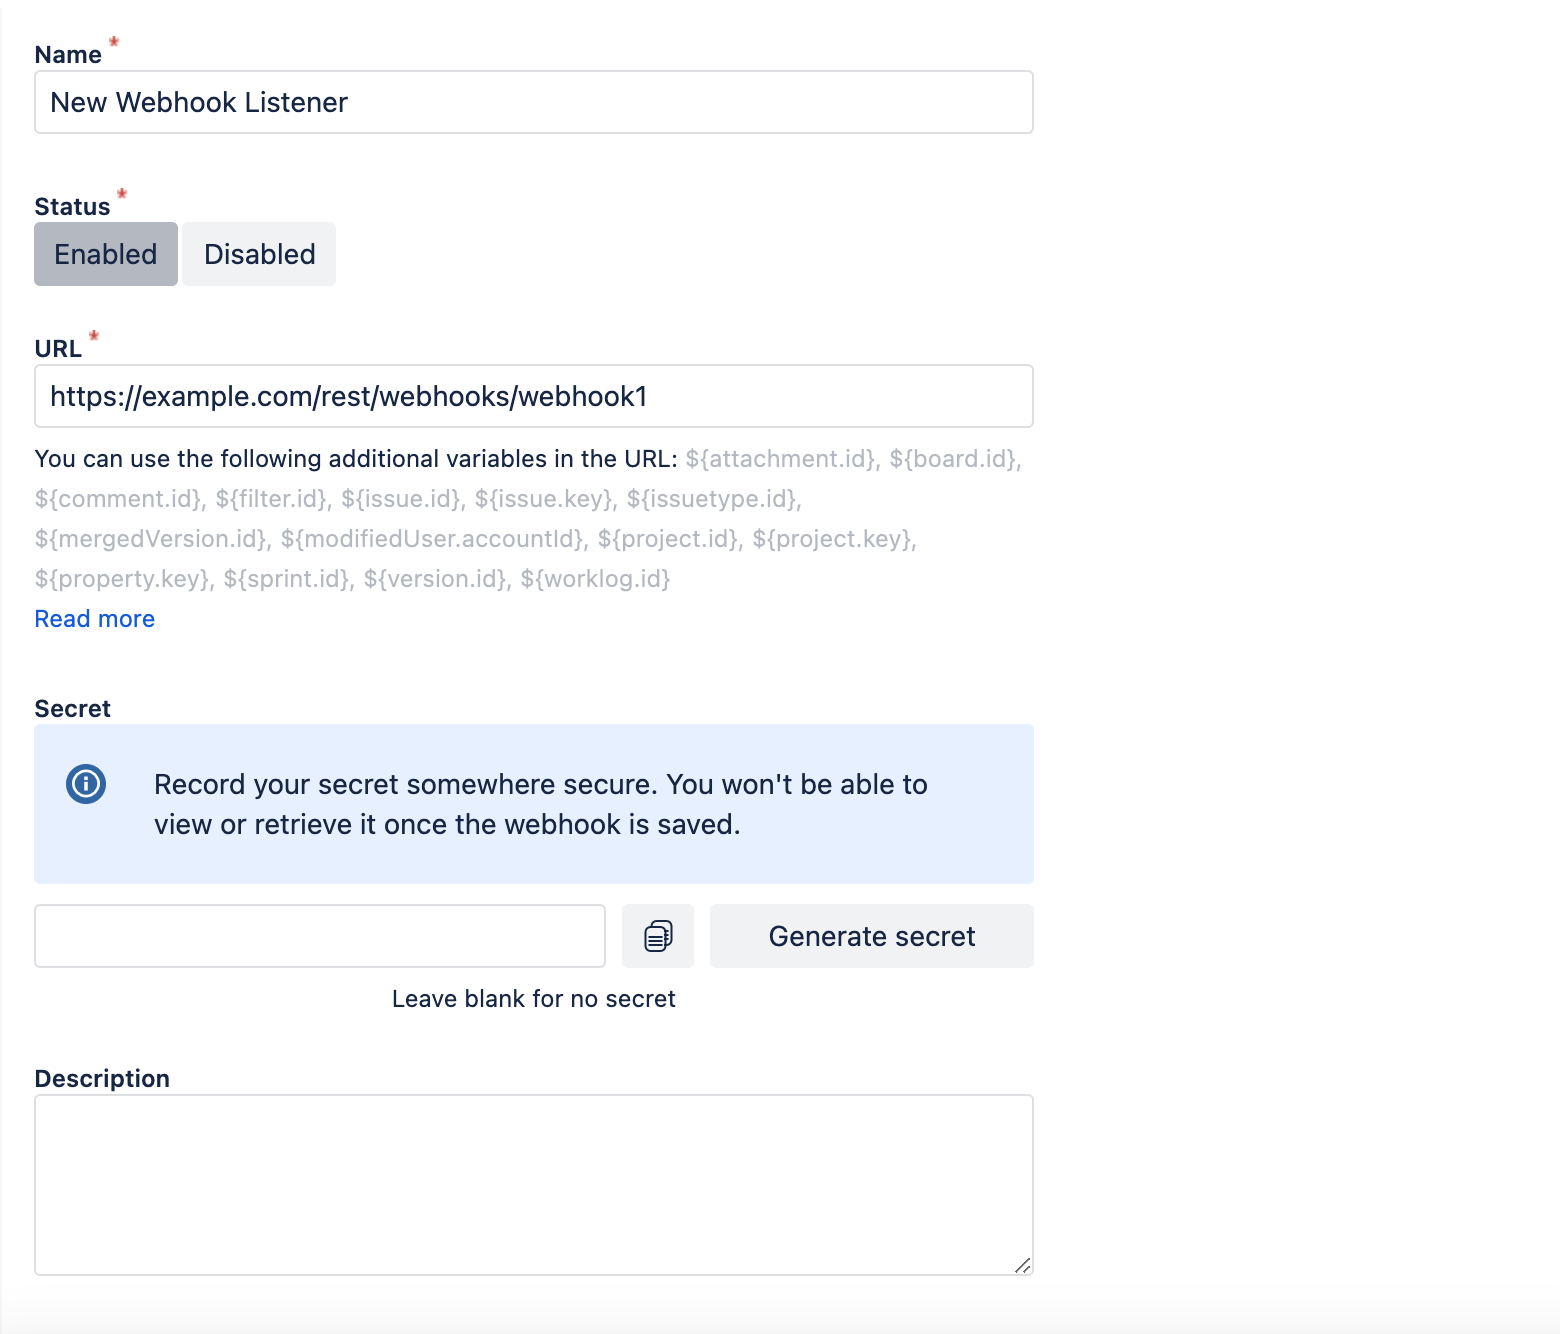
- Go to Jira administration console > System > Webhooks (in the Advanced section) and click Create a webhook.
- Input the
https://prod.api.faros.ai/webhooks/:webhook_id/eventsas the URL. Modify:webhook_idwith the correct id from your webhook definition. - (Recommended) If you provided a
secretwhen creating a Faros webhook definition, supply the same value here. Jira will use your secret to create a hash signature that's sent to Faros with each payload. We then validate that it matches with the provided secret.

- On the events section, choose the events you want Jira to send to Faros. Select them manually using the checkbox on each event and click on the following:
- Issue - created, updated, deleted
- Issue link - created, deleted
- User - created, updated
- Project - created, updated, deleted
- Version - release, unreleased, created, updated, deleted
- Sprint - started, closed, created, updated, deleted,
- Board - created, updated, deleted, configuration changed
- In the last step, ensure the Exclude body is NOT selected so Faros receives the data related to the event.

After successfully adding the webhook, it will appear in the list of webhooks configured with an enabled label. You can view the webhook configuration to check all parameters were set correctly and edit them if needed. At the bottom of the page, there should be a section Recent Deliveries showing that it successfully sent a "ping" event to your Faros webhook.
Updated 3 months ago
