
Setting up Okta SSO
Availability: Enterprise Edition for users with Owner permissions
Okta is one of the SAML integrations supported in the Enterprise Edition of Faros. This guide contains the setup steps for integrating Okta with Faros in a SaaS or On-Prem deployment. This can include assigning Faros user roles through Okta groups.
Note: for on-premise deployments the steps for setting up Okta and roles are different. The on-premise steps are listed below.
SaaS Setup
- Setup a new SAML Integration in Okta. Name it
Farosand use our logo.


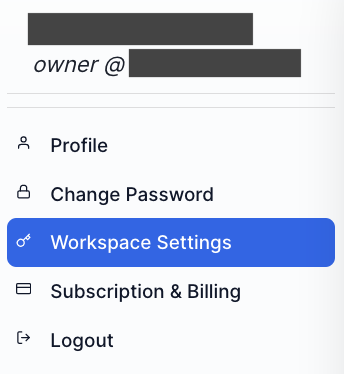
- In a separate browser window log in to Faros and then click on the profile icon in the top right corner of the window. Choose
Workspace Settingsoption from the drop down menu, then click theSSOoption underWorkspace(available to users with FarosOwnerrole only).
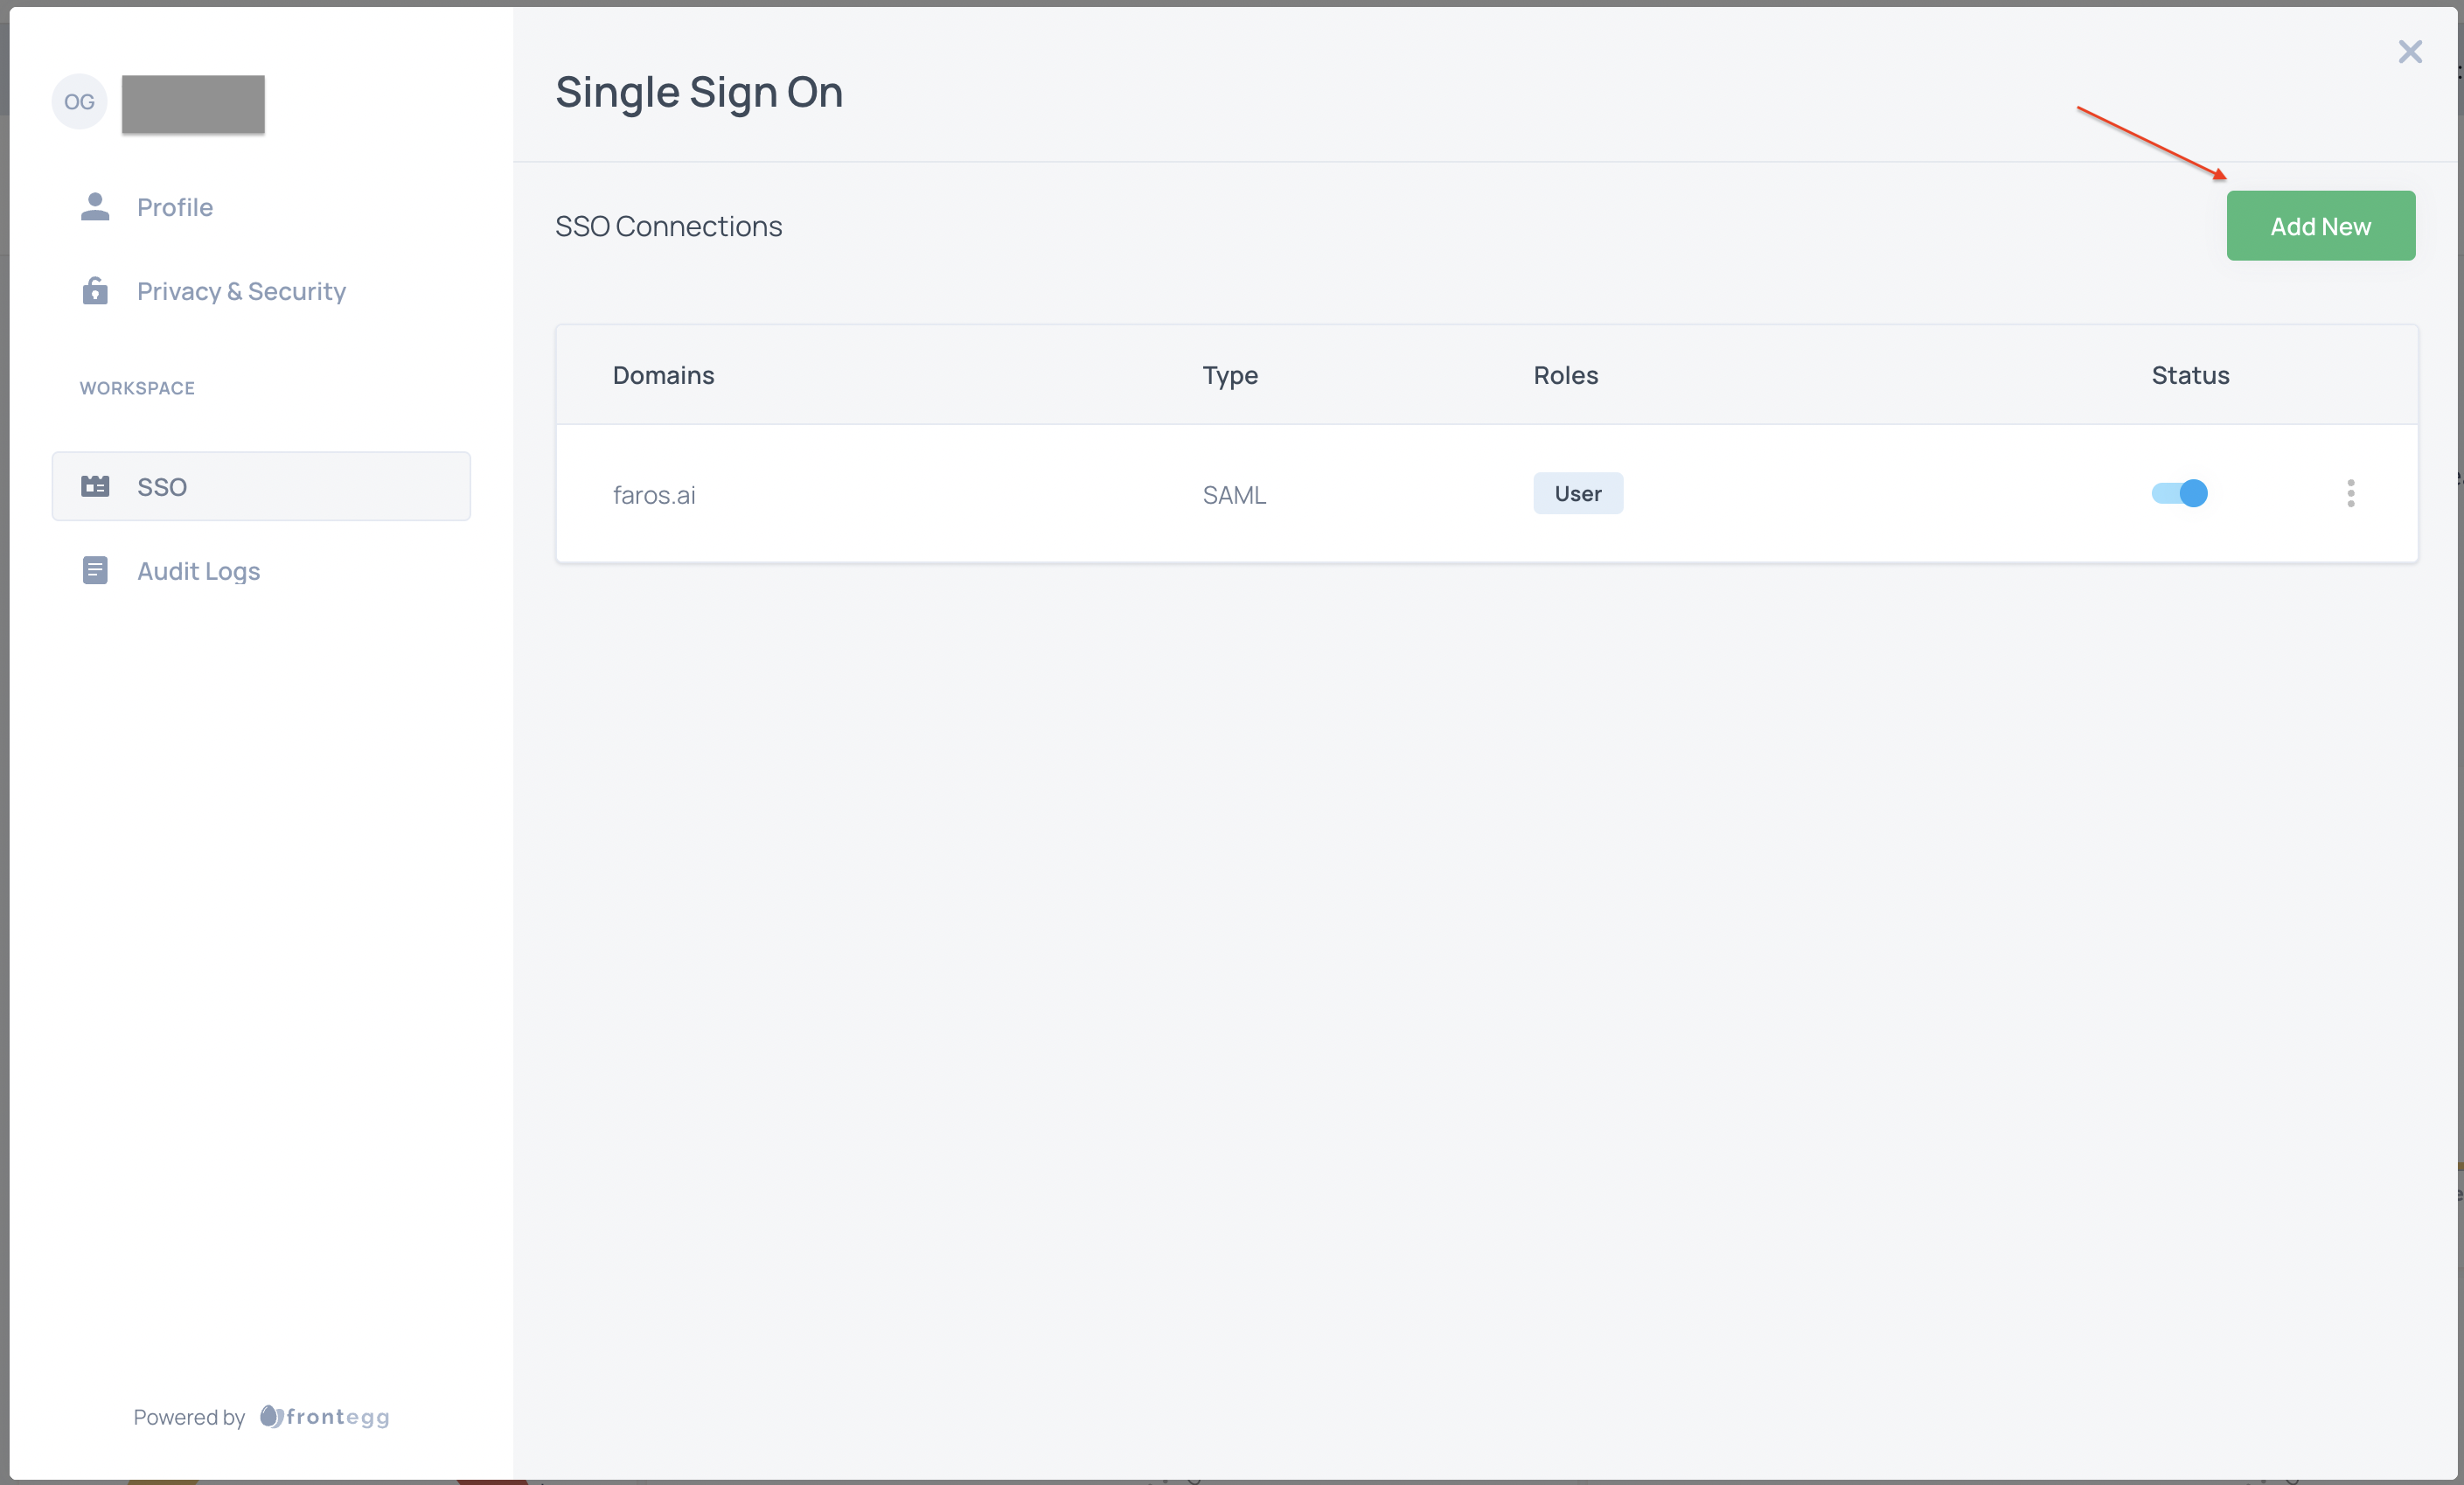
- Select
Add Newand fill out form as follows:- Choose
SAMLfor connection type - Note the ACS URL and Entity ID values. You will enter these in Okta.
- Enter the SSO endpoint from Okta used for authenticating.
- Provide the public certificate found in Okta.
- Choose

- Back in Okta, enter the Entity Id and ACS Url as the Single sign on Url. complete the rest of the Configure SAML form.
If you plan on using Okta groups for Faros roles be sure to enter the Group Attribute Statements and use groups as a name with value matching your Faros groups.

- Back in Faros, click
Proceedand enter the domain of your emails. These will be the emails that can login to Faros via Okta. Once you hit proceed you will be provided a TXT record. Add this to your DNS.

- Enter your default SSO roles. More information on roles here. Default SSO roles are given to all users added to your Faros app in Okta, unless other roles are specified in the
Roles Groups Mappingsection (and you have Group Attributes configured in Okta). Most people use either User or Analyst as their default role.

On-Prem Setup
This section only applies to customers deploying Faros on premise. In those instances the profile section will not be present and roles must be assigned in Okta.
-
As admin in Okta, create an OIDC Web App. Name it
Faros. -
Set the following options in the
Loginsection of the App configuration page:- Sign-in Redirect URI: https://<your.faros.domain>/console/api/auth/callback/okta
- Sign-out Redirect URI: https://<your.faros.domain>/console
- Login initiated by: Either Okta or App
- Application visibility: Display application icon to users
- Login flow: Redirect to app to initiate login
- Initiate login URI: https://<your.faros.domain>/console/auth/login/okta
-
Navigate to
Directory→Profile Editor. From there, select the Faros application. -
Clicking on the application profile will open up the Profile Editor Page and list all attributes available to users of that app.
-
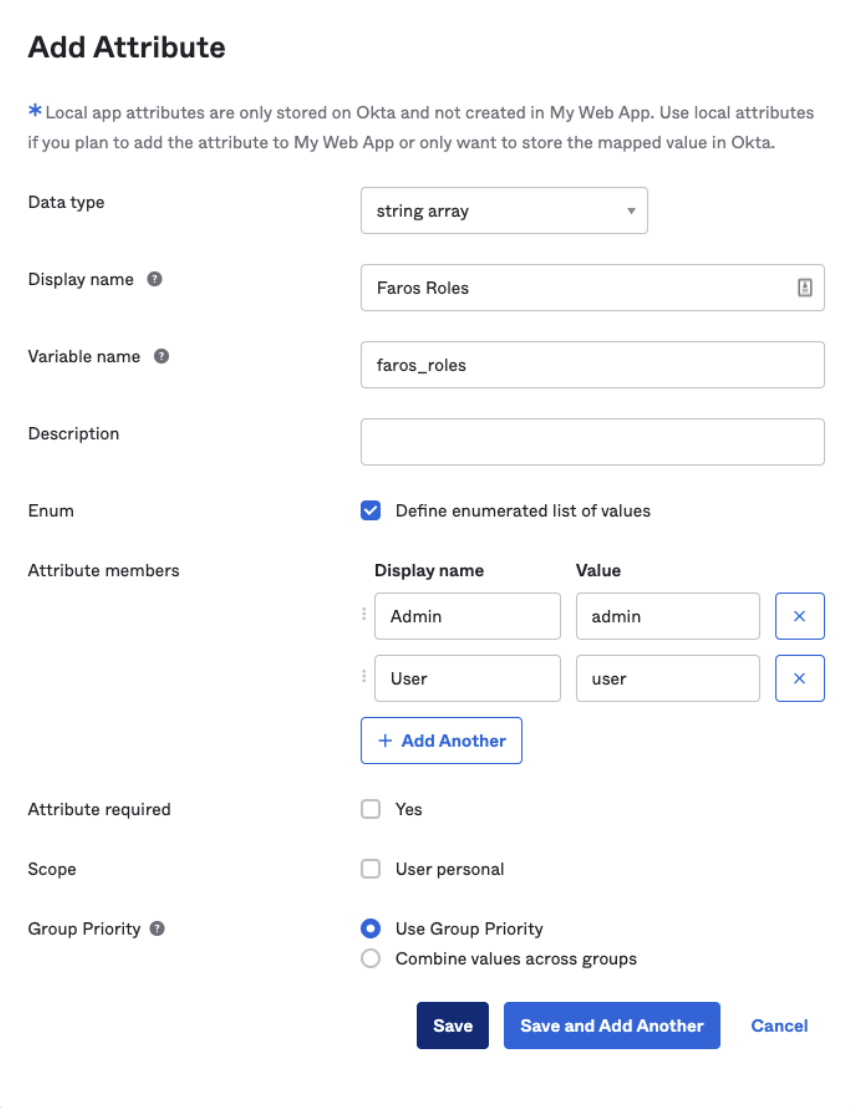
Select
Add Attributeat the top and complete the form. Complete the form being sure to include the following field values:Data Type: string arrayVariable Name: faros_rolesEnum Values: owner, admin, analyst, user
-
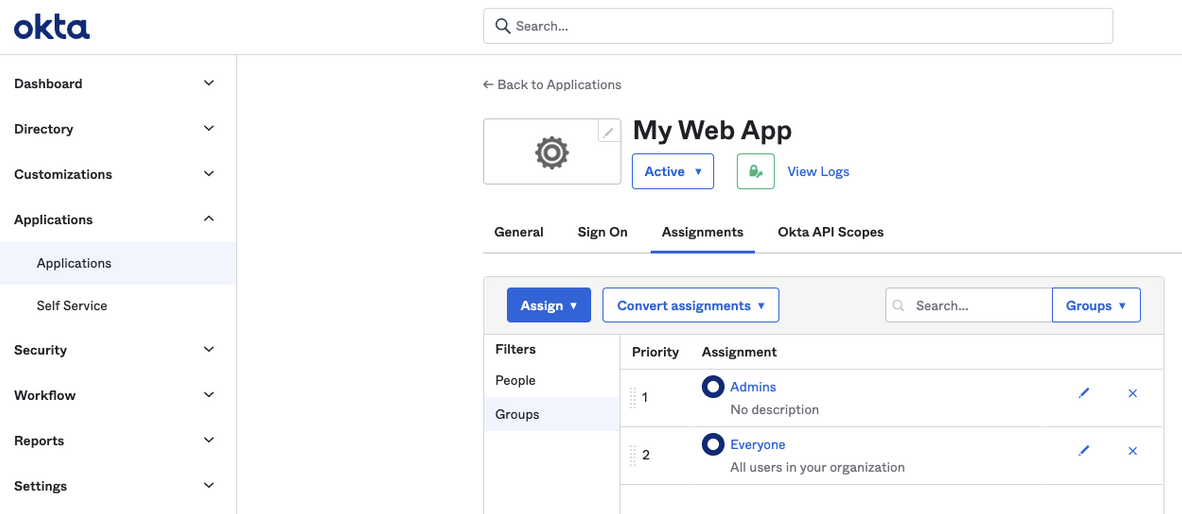
Next, navigate to
Applications→Applicationsand select the application you are using for Faros (the one you added the attribute to in the last step). -
Click on the Assignments tab then the Groups filter.
-
Click the pencil icon next to the group you want to add roles to. Selecting the group will show you which users are in that group
-
Check the roles you want present for that group assignment. For more details on behavior for each role check out this doc .
-
Repeat for other groups.
-
Verify your work. Navigate to the
Peoplefilter and select the pencil next to an individual. Scroll down and verify the expectedfaros_rolesare set for that user.
Updated 4 months ago